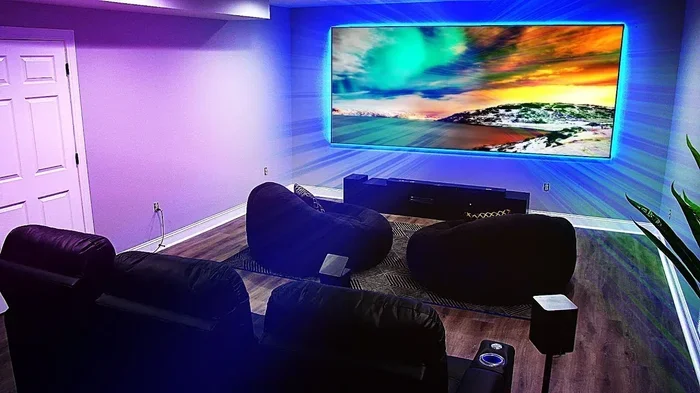
Do You Need A Special Screen For A Projector Setup
You do not always need a special screen for a projector setup. A plain white wall, a bedsheet, or even blackout curtains can work surprisingly well. The right surface depends on your room lighting, projector brightness, and how big you want the image. We will walk you through every option so you can decide what fits your needs and budget best.
Do you need a special screen for a projector setup? The short answer is no. You can get excellent results without spending a fortune on a dedicated projector screen. Many people assume they need to buy a fancy screen to enjoy a big picture. But the truth is, there are plenty of budget-friendly alternatives that work just as well.
Whether you are setting up a home theater, giving a presentation at work, or just want to watch movies on a rainy afternoon, your projector setup does not have to break the bank. In this guide, we will explore every option available to you. We will cover walls, sheets, blackout curtains, and even DIY builds. By the end, you will know exactly what works best for your situation.
The goal here is simple. Help you get the best possible image quality without wasting money on something you might not need. Let us dive in.
Key Takeaways
- White walls work great: A clean, flat white wall is often the easiest and cheapest projection surface.
- DIY screens save money: You can build or repurpose materials like sheets and blackout curtains for solid results.
- Screen gain matters: The material you use affects brightness, contrast, and overall image quality.
- Ambient light is the real enemy: Darkening your room makes any surface perform much better.
- Special screens have perks: They offer uniform texture and optimized gain but are not always necessary.
- Practical tips beat expensive gear: Small adjustments in placement and lighting often matter more than the screen itself.
📑 Table of Contents
- What Does a Projector Screen Actually Do?
- Can You Use a Wall Instead of a Special Screen?
- Household Items That Work as Projector Screens
- DIY Projector Screen Options You Can Build Yourself
- When Should You Actually Buy a Special Projector Screen?
- Expert Tips to Improve Any Projector Setup
- Common Mistakes People Make With Projector Screens
- Final Thoughts
What Does a Projector Screen Actually Do?
A projector screen serves one main purpose. It reflects light back to your eyes in a way that creates a clear, bright image. But not all surfaces do this equally well. The material, color, and texture of your screen all play a role in how your final picture looks.
The Science Behind Projection Surfaces
When a projector shoots light onto a surface, that surface bounces the light back toward you. A good projection surface reflects light evenly across the entire image. This means no hot spots, no dark patches, and no weird color shifts. A regular wall might do some of this, but not as consistently as a purpose-built screen.
The key metric people often overlook is screen gain. Gain measures how much light a surface reflects back compared to a standard white surface. A gain of 1.0 is neutral. Anything higher means the surface pushes more light back toward the viewer. Lower gain means the surface spreads light more widely. This affects both brightness and viewing angle.
Why Gain Rating Matters for Your Setup
If you are sitting directly in front of the projector, a higher gain screen can make the image pop. But if you have a wide seating area, a lower gain surface might actually work better because it spreads the light more evenly. Understanding this helps you choose the right surface without overpaying.
Can You Use a Wall Instead of a Special Screen?
Yes, you absolutely can. A white wall is one of the most common projection surfaces in the world. Most interior walls are painted with flat white or off-white paint, which works surprisingly well for projecting images. The key is making sure the wall is smooth and clean.
Preparing Your Wall for the Best Results
Before you set up your projector on wall, take a few minutes to prep the surface. Fill any cracks or holes with spackle and sand them smooth. Dirt and texture will show up on the projected image and reduce clarity. If your wall has a glossy or semi-glossy paint, consider repainting it with flat matte paint. Glossy surfaces create glare and uneven brightness.
Here are a few quick tips to get the most out of a wall setup:
- Use matte white paint: This gives you the most neutral and even reflection.
- Check for bumps and imperfections: Even small ones will distort the image.
- Clean the wall thoroughly: Dust and smudges will show up on the big screen.
- Test with your projector first: Shine a test image and look for hot spots or uneven areas.
When a Wall Falls Short
A wall works great in a dark room. But if your room has a lot of ambient light, the image will look washed out. This is because walls do not have a special coating to boost contrast. The light from windows or lamps competes with the projected image and reduces visibility. In bright rooms, you may want to consider other options.
Household Items That Work as Projector Screens
You probably already have things around your home that can serve as a projection surface. Let us look at the most popular household alternatives and what you can expect from each one.
Using a Sheet as a Projector Screen
A white bedsheet is one of the easiest and cheapest alternatives to a special projector screen. You can hang it on a wall, drape it over a clothesline, or stretch it across a frame. The results are decent, especially in dim lighting. Sheets are widely available and very affordable.
However, sheets have some drawbacks. They often have a slightly textured weave that can create a grainy look on the projected image. The material may also wrinkle, causing uneven patches of light and dark. If you go this route, look for a white, wrinkle-free sheet and iron it as flat as possible before use.
Can I Use A Sheet As A Projector Screen? Absolutely, and many people do it successfully every day. Just manage your expectations about perfection.
Blackout Curtains as a Projection Surface
Blackout curtains are another interesting option. They are designed to block light, which means they have a dense, dark surface. You might think a dark surface would be bad for projection, but in certain setups, it can work. Some people use blackout curtains behind a white sheet to create a dual-layer setup that improves contrast.
If you want to try this, hang the blackout curtain first, then stretch the white sheet in front of it. The dark backing absorbs stray light and helps boost the perceived contrast of your image. Can I Use Blackout Curtains As A Projector Screen? Yes, especially as part of a layered approach in rooms with some ambient light.
Projecting Directly Onto a Wall Without Any Screen
For many people, simply projecting onto a clean white wall is all they need. This is the simplest projector alternative and requires zero extra cost. If you are watching movies occasionally or giving presentations, a bare wall will get the job done just fine.
The biggest factor here is room lighting control. Blackout curtains over the windows, dimmed lights, and a closed door can make a wall projection look surprisingly good. If you cannot control the light, the image will suffer no matter how good your projector is.
DIY Projector Screen Options You Can Build Yourself
Not everyone wants to spend money on a commercial screen. The good news is that building your own DIY projector screen is easier than you think. With a few materials and a little time, you can create a surface that rivals expensive store-bought options.
Building a Frame-Based Screen
The most common DIY approach is to build a simple wooden frame and stretch a projection material across it. You can use PVC pipes or lumber to create a rectangular frame. Then attach your screen material using staples, clips, or spray adhesive. The goal is a tight, wrinkle-free surface.
For the material itself, you have several options:
- White blackout fabric: Affordable and widely available. Gives good results in dark rooms.
- White shower curtain liner: A surprisingly smooth and reflective surface that works well.
- Projector screen paint: You can paint a wall or board with specialized screen paint for a permanent solution.
- White canvas: Sturdy, smooth, and readily available at craft stores.
Paint Your Wall or Board for a Permanent Setup
If you want a permanent projection surface without buying a screen, consider using projector screen paint. This specialized paint creates a smooth, highly reflective surface that outperforms regular wall paint. You apply it to a piece of plywood or directly to a wall section.
Can I Paint My Projector Screen Black? You can paint borders or frames black around your projection area to reduce light spill and improve contrast. This is a popular trick among home theater enthusiasts. A black border helps your eye focus on the bright image and reduces the distracting glare from the surrounding wall.
Portable and Roll-Up Screen Alternatives
If you need something you can set up and take down easily, consider a portable screen. You do not need to buy a commercial one. A tension rod and a white bedsheet can create a roll-up screen in minutes. This works great for people who project in different rooms or for outdoor movie nights.
The beauty of a DIY approach is that you can customize the size. Want a massive 120-inch image? Build a bigger frame. Need something compact for a bedroom? Go smaller. The flexibility is one of the biggest advantages of building your own screen.
When Should You Actually Buy a Special Projector Screen?
While alternatives work well in many situations, there are times when a dedicated screen makes sense. Understanding when to invest helps you make a smart purchase rather than wasting money on something you do not need.
You Have a Dedicated Home Theater Room
If you have a room specifically set up for watching movies or gaming, a special projector screen can elevate the experience significantly. A high-quality screen provides uniform texture, optimal gain, and better contrast than any DIY option. The difference is especially noticeable on larger screens above 100 inches.
You Need Consistent Image Quality
If you use your projector for professional presentations or educational purposes, consistency matters. A commercial screen ensures every viewer sees the same image quality from every seat. Household alternatives can have inconsistencies in brightness and color that might distract from your message.
You Want the Best Possible Contrast and Color
Modern projector screens come with specialized coatings that enhance color accuracy and contrast ratio. If you are a videophile who demands the best possible picture, a dedicated screen is worth the investment. These screens are designed to work with specific projector types, whether you use an LCD, DLP, or laser projector.
Comparison: DIY vs. Commercial Screens
| Feature | DIY / Household Surface | Commercial Projector Screen |
|---|---|---|
| Cost | $0 – $30 | $50 – $500+ |
| Setup Time | 5-15 minutes | 5-10 minutes |
| Image Uniformity | Moderate | Excellent |
| Portability | High | Low to Moderate |
| Durability | Low to Moderate | High |
| Best For | Casual use, budget setups | Dedicated theaters, professional use |
Expert Tips to Improve Any Projector Setup
No matter what surface you use, a few expert tips can dramatically improve your viewing experience. These are simple adjustments that make a big difference.
Control Ambient Light First
The single biggest factor in image quality is not the screen. It is the light in your room. Even the most expensive projector screen will look mediocre in a bright room. Start by blocking outside light with curtains or blinds. Turn off overhead lights. Use bias lighting behind the screen to reduce eye strain and improve perceived contrast.
Optimize Your Projector Placement
Throw distance is the space between your projector and the screen. Too close and the image will be small and blurry. Too far and it will be dim and distorted. Check your projector manual for the recommended throw distance based on your desired screen size. A projector mount or stable table can help you nail the perfect position every time.
Keystone Correction and Focus
Most modern projectors include keystone correction, which adjusts the image shape when the projector is not perfectly perpendicular to the screen. Use this feature sparingly. It can reduce image sharpness. Instead, try to position your projector as straight as possible. Then use the focus ring to get a crisp, clear image.
Use the Right Resolution and Source
Your projector setup is only as good as the content you feed it. Make sure you are using a high-quality source. Streaming Netflix from a laptop works well when you know how to connect them properly. A 1080p or 4K source will look dramatically better than standard definition content, especially on larger screens.
Common Mistakes People Make With Projector Screens
Avoiding common mistakes can save you money and frustration. Here are the top errors people make when setting up their projection surface.
- Choosing a glossy surface: Glossy materials create hot spots and glare. Always use matte or semi-matte surfaces for the best results.
- Ignoring room color: Dark-colored walls absorb light and make the image look dim. Stick with white or light gray surfaces.
- Using a wrinkled sheet: Wrinkles create shadows and distortions. Iron or steam your fabric before projecting.
- Placing the projector too high or too low: This forces you to use heavy keystone correction, which degrades image quality.
- Forgetting about ventilation: Projectors generate heat. Make sure there is enough airflow around the device to prevent overheating and image dimming.
By steering clear of these mistakes, you will get a much better experience no matter what surface you use. The goal is to work with what you have and make smart adjustments along the way.
Final Thoughts
So, do you need a special screen for a projector setup? The answer is still no, not necessarily. A clean white wall, a stretched bedsheet, or even a DIY frame with blackout fabric can deliver a fantastic viewing experience. The key is understanding your room conditions and choosing the right surface for those conditions.
Special projector screens offer advantages in uniformity, gain, and durability. But for most casual users, the alternatives discussed in this guide will more than suffice. Start simple. Try a wall or a sheet first. Then upgrade only if you feel the need for a better surface.
The best projector setup is the one you actually use. Do not let the pursuit of perfection stop you from enjoying a big screen tonight. Set up whatever surface you have, dim the lights, and enjoy the show.
Experiment with different options. You might be surprised at how good a homemade screen can look. And if you ever decide to invest in a commercial screen, you will know exactly what features matter and why. Happy projecting.
Frequently Asked Questions
Can I use a plain white wall as a projector screen?
Yes, a plain white wall is one of the easiest and most affordable projector surfaces. Make sure the wall is smooth, clean, and painted with flat matte white paint for the best results. Avoid glossy or textured paints, as they can distort the image and create uneven brightness across the screen.
What is the cheapest DIY projector screen option?
The cheapest option is simply projecting onto a clean white wall. If your wall is not ideal, a white bedsheet hung on a wall or stretched over a frame costs almost nothing. You can also use a white shower curtain liner or white blackout fabric from a craft store for just a few dollars.
Does screen material really affect projector image quality?
Yes, the material makes a noticeable difference. A smooth, matte white surface reflects light evenly and produces the best image. Textured or colored surfaces scatter light unevenly, reducing sharpness and contrast. However, for casual viewing, most household surfaces work well enough in a dimly lit room.
Can I project onto a window at night?
Yes, projecting onto a window at night can work because the glass acts as a semi-transparent surface. The image will appear reversed from the outside. However, the image quality is usually lower than on a dedicated screen due to reflections and the glass texture. For best results, use a matte white surface instead.
How big should my projector screen be?
The ideal screen size depends on your throw distance and room size. A general rule is to sit about 1.5 to 2 times the diagonal screen size away from the projector. For a 100-inch screen, that means sitting 12 to 16 feet back. Check your projector manual for specific recommendations based on your model.
Do I need a special screen for outdoor movie nights?
No, you do not need a special screen for outdoor use. A white bedsheet stretched between two poles or a white tarp hung on a fence works well. The key is choosing a surface that is as smooth and white as possible, and projecting after sunset when ambient light is minimal.
=== CONCLUSION ===
A special projector screen is a nice-to-have, not a must-have. You have plenty of affordable and creative alternatives that deliver great results. From a simple white wall to a DIY frame with blackout fabric, the options are endless. Focus on controlling room light, choosing the right surface color, and positioning your projector correctly. These steps matter far more than whether you spend money on a commercial screen. Start with what you have, experiment, and upgrade only when you feel the need. Your perfect projector setup is closer than you think.