Can You Fix The Hdmi Port On A Playstation Right Now
You can often fix the HDMI port on a PlayStation without buying a whole new console. This guide covers simple fixes like cleaning dust and tightening connections, plus deeper repairs like soldering or replacing the port. Whether your PlayStation 5 or PlayStation 4 has a loose HDMI port, we will show you how to restore your digital output signal and get back to gaming right now!
Have you ever turned on your PlayStation just to see a black screen? It is a very frustrating moment. You are ready to play your favorite game. You grab your controller. You press the power button. Then nothing happens on the TV. Many gamers face this exact problem every single day. It ruins the mood instantly. Often, the culprit is a loose HDMI connection. Sometimes, the HDMI port itself is broken. So, can you fix the HDMI port on a PlayStation right now? The short answer is yes. You do not always need to buy a brand new console. With the right tools and a little patience, you can bring your gaming setup back to life. This guide will walk you through every step. We will cover simple cleaning tips. We will also cover DIY soldering. You will learn when to call a pro. We will also talk about preventing future problems. Let us get your PlayStation screen working again!
Key Takeaways
- Cleaning the port often fixes loose HDMI connections and black screens.
- You can repair a damaged HDMI port using basic tools like a soldering iron.
- Replacing the entire port is a viable console repair option for severe damage.
- Always test your HDMI cable before assuming the PlayStation port is broken.
- Professional repair is best if you lack soldering skills or confidence.
📑 Table of Contents
- Why Does The HDMI Port On A Playstation Fail?
- How To Tell If Your HDMI Port On A Playstation Is Broken
- Easy Fixes You Can Do For The HDMI Port On A Playstation
- Advanced Repair: Soldering The HDMI Port On A Playstation
- Comparing Fix Options For The HDMI Port On A Playstation
- Preventing Future HDMI Port Issues On A Playstation
- Conclusion
Why Does The HDMI Port On A Playstation Fail?
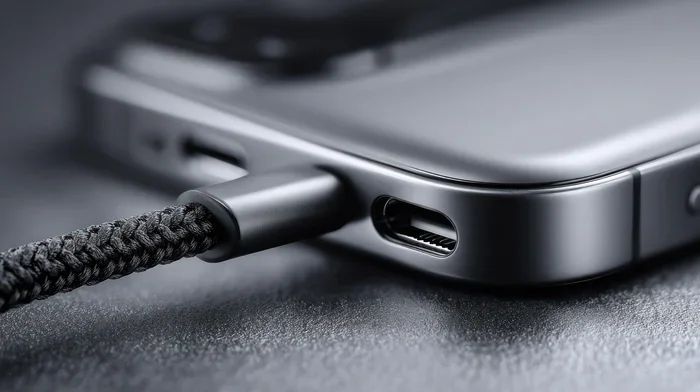
Your PlayStation HDMI port takes a beating over time. Plugging and unplugging the cable wears it down. Dust and dirt build up inside the port too. This can cause a loose HDMI connection. Sometimes, the port simply breaks from pulling the cable at a bad angle. Other times, a power surge fries the internal pins. Understanding the root cause helps you choose the best fix. Here are the most common reasons your console might have issues:
- Frequent cable plugging and unplugging. This wears out the plastic and metal inside the port. The port gets loose over time.
- Dust and lint clogging the port. Dirt blocks the digital output signal. It stops the TV from reading the console. Even a tiny bit of dust can cause big problems.
- Bending or forcing the HDMI cable. A tight fit can bend the pins inside the port. Bent pins mean no connection.
- Power surges or electrical spikes. These can fry the delicate circuits on the motherboard. A lightning strike nearby can do this too.
- Physical impact dropping the console. A drop can crack the port right off the board. It can also crack the solder joints inside.
Many people also ask about the HDMI e-arc feature. If your port has issues, you might lose this advanced audio feature too. The good news is that most of these problems have solutions. You do not need to be a tech wizard to fix them. Just take it one step at a time. Whether you have a PlayStation 5 HDMI port or an older model, the port can fail. The repair process is very similar for both models.
Common Causes of HDMI Port Damage
Let us look closer at the damage. The most common type is physical wear. The HDMI port is designed to be plugged in and out. But over months and years, the plastic gets loose. The metal contacts get weak. They no longer grip the cable tightly. Another big cause is dust. Dust is tiny and invisible to the eye. It gets inside the port and blocks the pins. This leads to an HDMI handshake failure. Your PlayStation and TV cannot talk to each other. They cannot agree on the picture settings. So no picture appears on the screen. This is a very common issue.
Power surges are also a silent killer. A sudden spike in electricity goes right through the HDMI port. It burns out the tiny chips inside. This is a very serious type of damage. It usually means you need a full port replacement. Finally, physical drops are brutal. If your console hits the floor, the port takes the shock. The solder joints can crack. The port can bend or snap off completely. Knowing the exact cause helps you decide the best fix. It saves you time and money.
Quick Tips for Port Care
Here are some quick habits to save your port and keep your 4K gaming setup safe:
- Always pull the cable straight out. Never yank it at an angle. Yanking is the fastest way to break the port.
- Do not move the console while cables are plugged in. This puts stress on the solder joints.
- Use a dust cover when the console is not in use. A simple cloth cover works great.
How To Tell If Your HDMI Port On A Playstation Is Broken
Before you start repairing, you must confirm the problem. Is it the port, or is it the cable? A gaming display problem often looks like a broken port. You might see no picture on your TV. Or you might see a fuzzy, glitchy screen. Audio might cut out too. These PlayStation HDMI issues can scare you. But do not panic yet. You can test your setup easily. You need to rule out the cable first. A bad cable acts just like a bad port. It shows the exact same symptoms.
Here is how to check if your port is truly broken:
- Try a different HDMI cable first. Start with an HDMI cable test. Borrow one from a friend if you can. A bad cable acts just like a bad port.
- Plug the cable into a different TV. This checks if the TV is the problem. If the TV works fine, the console is the issue.
- Look closely at the port pins inside the PlayStation. Use a flashlight. Look for bent or missing pins.
- Check if the port feels loose when you wiggle the cable gently. A little movement is normal. A lot of movement is bad.
If the problem stays with the PlayStation, your port is likely the issue. You are dealing with an AV port replacement situation. You might also notice a burning smell. That is a clear sign of internal damage. Stop using the console right away if you smell burning. Console troubleshooting starts with simple checks. Always test the easiest things first. Save the hard stuff for last. A quick check can save you a lot of money.
Signs of a Faulty Connection
A loose HDMI connection is the first sign. The picture might flicker on and off. You might see color stripes on the screen. The TV might say “No Signal” even when the console is on. Another sign is a black screen after the PlayStation logo. The console turns on, but the TV stays dark. This is a classic TV screen black issue. It often points to a broken port. Sometimes the port just needs cleaning. Other times, the pins are completely bent. You must look inside to know for sure. Do not guess. Check the port carefully.
Another sign is the console making a weird buzzing sound. This happens when the port is struggling to send the digital output signal. The console works hard but cannot connect. If you hear buzzing, stop using the console. Keep troubleshooting. You want to avoid making the damage worse.
Expert Insights
“Many gamers think their console is dead when it is just a dirty port. A quick clean solves 50 percent of these issues.” – Console Repair Specialist
Easy Fixes You Can Do For The HDMI Port On A Playstation
Not all port problems need soldering. Many PlayStation HDMI issues come from simple dirt or poor contact. You can fix these at home in minutes. Start with the simplest solutions first. Do not jump to the hard stuff yet. Most people do not need a soldering iron. They just need a can of air and a little time.
Method 1: Cleaning the Dust Out
Let us talk about the HDMI port dust problem. Dust is everywhere in your home. It floats in the air. It settles on your furniture. It gets inside your console too. Over time, it builds up inside the HDMI port. This dust blocks the tiny pins inside. The pins need to touch the cable to work. If dust is in the way, the connection fails. This is why cleaning is so important. It is the first step in any port damage fix. Always clean before you try anything else. Use a can of compressed air to blow dust out of the port. Hold the can upright. Spray short bursts. Do not hold the button down too long. The air can get very cold and damage the port. You can also use a soft, dry toothbrush. Gently brush the inside of the port. Be very careful not to bend the pins. The pins are tiny and fragile. If you bend them, the repair gets much harder.
Method 2: The Tightening Trick
Sometimes the port is loose but not broken. You can try to tighten the internal contacts. This requires opening the console. Once inside, you can use a tiny screwdriver. Gently bend the metal contacts inward. This makes the HDMI cable fit snugly. This method works well for loose HDMI connections. Just go slow. You do not want to snap any plastic pieces. Use a flashlight to see what you are doing. Work in a clean, bright area.
Method 3: The Rubber Band Trick
This is a quick hack for a loose fit. Wrap a small rubber band around the HDMI plug. This makes the plug thicker. It will fit tighter into the PlayStation port. It is not a permanent fix. But it works in a pinch. It is a great temporary solution. You can use it while you plan a bigger repair. It is a very easy trick to try. Keep a rubber band with your gaming gear.
Common Mistakes to Avoid
Do not use metal pins to clean the port. You might short the circuits. Do not use water or liquids inside the port. Moisture destroys electronics. Do not force the cable in if it does not fit. Forcing it breaks the pins. Always be gentle with your console. Patience is your best tool.
Advanced Repair: Soldering The HDMI Port On A Playstation
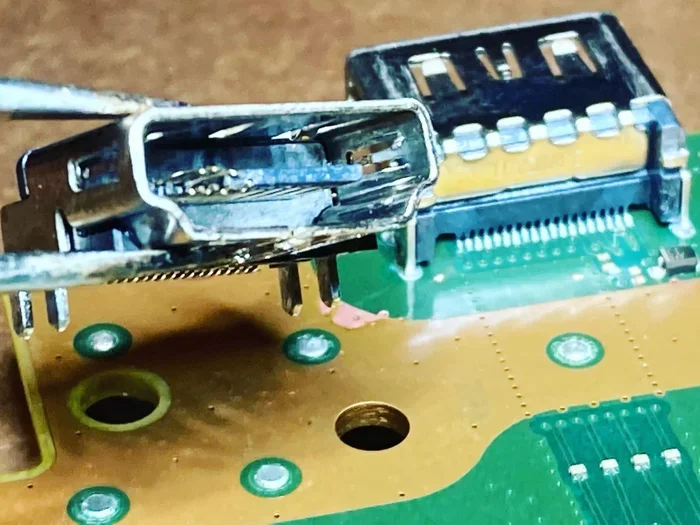
If cleaning does not work, the port might be physically broken. The pins inside are snapped or bent too far. In this case, you need a proper console repair. You can replace the whole port. This requires soldering skills. Soldering HDMI connections is an advanced fix. Do not try this if you have never soldered before. You could make things worse. You might destroy the motherboard completely. It is okay to ask for help. There is no shame in that.
Tools You Will Need
Here is what you need for this job:
- A replacement HDMI port (specific to your PlayStation model).
- A soldering iron and solder wire. Lead-free solder is best.
- A multimeter to test connections. This checks if the electricity flows.
- A hot air gun for removing the old port safely.
- Patience and a steady hand. This is the most important tool.
Step-by-Step Replacement Process
Follow these steps carefully to replace your port and fix your HDMI port PlayStation issue:
- Open your PlayStation carefully. Keep all screws in a safe place. Use a magnetic mat if you have one.
- Locate the broken HDMI port on the motherboard. The motherboard is the big green board inside.
- Heat the old solder points with your iron or hot air gun. Use a low temperature setting.
- Remove the broken port gently. Do not pull too hard. Let the heat melt the old solder first.
- Clean the pads on the board with a solder remover. This clears the old solder away.
- Place the new port in position. Make sure it is perfectly straight.
- Solder the new port carefully. Use a tiny amount of solder. Less is more.
- Let it cool completely. Do not touch it while hot. Wait at least five minutes.
- Reassemble the console and test the connection. Plug in the cable and turn it on.
Common Mistakes During Soldering
Using too much solder is a big error. It creates bridges between pins. This causes short circuits. A short circuit stops the console from working at all. Always use a tiny amount of solder. Another mistake is applying too much heat. Too much heat can lift the pads off the board. This makes the repair impossible. You would have to buy a whole new motherboard. Practice on old electronics first if you are new to soldering. Watch a few video tutorials before you start your real repair.
Quick Tips for Soldering Success
Use a magnifying glass to see the pins clearly. You need to see what you are doing. Take your time. Do not rush the process. Rushing leads to mistakes. Clean your iron tip often. A clean tip makes better solder joints. If you feel unsure, stop and ask for help. There are many online video tutorials for HDMI port repair. Watch a few before you start. Practice makes perfect.
Comparing Fix Options For The HDMI Port On A Playstation
Deciding how to fix your HDMI port PlayStation depends on your budget and skills. Should you buy a new console? Do it yourself? Or pay a repair shop? Let us compare your options. This will help you make the best choice for your situation and your wallet.
| Fix Option | Cost | Difficulty | Time Needed |
|---|---|---|---|
| DIY Cleaning | Free – $5 | Easy | 10 minutes |
| DIY Soldering | $10 – $20 | Hard | 1 – 2 hours |
| Professional Repair | $50 – $150 | Easy for you | 1 – 3 days |
| Buy New Console | $400 – $500 | None | Instant |
As you can see, professional repair saves your wallet compared to a new console. A new console is a big expense. Repairing the old one is much cheaper. If your PlayStation is still under warranty, contact Sony first. They might fix it for free. Check your warranty status before you do anything else. This can save you a lot of money and time. Do not void your warranty by opening the console if it is still covered.
Expert Insights on Repair Decisions
“Always weigh the cost of repair against the cost of a new console. If the repair costs more than half the price of a new one, buying new makes sense.” – Electronics Repair Expert
Quick Tip: Always back up your game saves before opening your console. You never know when a repair might go wrong. A saved game is a saved life. Use a USB drive to copy your data first. This is a very smart habit for all console owners. You can also use PlayStation Plus cloud storage to keep your saves safe online.
The table above shows the cost and time for each option. DIY cleaning is the fastest and cheapest method. It costs almost nothing. You probably already have the tools at home. DIY soldering is a bit harder. It takes more time. But it saves you a lot of money compared to professional repair. Professional repair is the easiest for you. You just drop off the console and wait. The experts do all the hard work. Buying a new console is the most expensive choice. It is also the fastest way to get a working console. But it is a waste of money if your old one can be fixed.
Preventing Future HDMI Port Issues On A Playstation
Once you fix the problem, you want to stop it from happening again. Prevention is the best medicine. Taking care of your cables and console extends their life. You will save money and headaches in the long run. Here are simple habits to protect your 4K gaming setup and keep your console running strong:
- Keep your console in a dust-free area. Use a closed cabinet if possible. Dust is the number one enemy of ports.
- Do not move the console while cables are plugged in. This stresses the port and the solder joints inside.
- Use an HDMI cable with a sturdy connector. Cheap cables break easily and damage the port.
- Avoid pulling the cable to remove it. Pull the plug out instead. Pulling the cable breaks the port.
- Use a surge protector to prevent electrical damage. Power spikes are dangerous and can kill your port.
These small steps make a huge difference. Your audio visual cable will last much longer. Your PlayStation will run cooler too. A little care goes a long way. You will not have to deal with a broken port again. Enjoy your gaming time without worry. Prevention is always better than cure. This is true for electronics and for health. You want to keep your console clean. You want to keep it safe. A little effort goes a long way. You will not have to fix a broken port again. You will just enjoy your games. Make these habits part of your routine. Your future self will thank you.
Key Takeaways for Port Health
Remember these simple rules to keep your digital output signal strong and your HDMI handshake stable. Keep the port clean. Pull cables straight out. Use a surge protector. These habits keep your console working perfectly. Your PlayStation will last for many more years. A little prevention goes a very long way.
Conclusion
So, can you fix the HDMI port on a PlayStation? Absolutely. Whether you choose a quick clean, a DIY soldering job, or a professional console repair, you have options. Do not throw away your console just yet. Start with the easy fixes first. Work your way up to the advanced methods if needed. We hope this guide helped you solve your PlayStation HDMI issue. Now get back to your gaming display problem solution and enjoy your favorite games. Your PlayStation is ready to roll again! Remember, taking care of your cables and ports saves you money. You can do this!
Frequently Asked Questions
Can I fix the HDMI port myself?
Yes, you can fix a loose HDMI connection yourself with simple tools. Cleaning the port and tightening the contacts are easy DIY tasks. However, soldering requires more advanced skills and patience.
Why does my PlayStation show a black screen?
A TV screen black issue often happens when the HDMI port is loose or dirty. The console turns on, but the digital output signal does not reach the TV. Try a different cable or clean the port first.
How much does it cost to repair an HDMI port?
DIY cleaning costs almost nothing, while professional repair ranges from $50 to $150. Soldering the port yourself only costs the price of the replacement part, around $10 to $20. Buying a new console is the most expensive option.
What causes an HDMI handshake failure?
An HDMI handshake failure occurs when the PlayStation and TV cannot agree on the video settings. This is often caused by dust in the port or a damaged cable. Cleaning the port usually fixes this issue quickly.
Is it worth replacing the HDMI port on a PlayStation?
Yes, it is worth it if your console is otherwise in good condition. A port damage fix can save you hundreds of dollars compared to buying a new system. Weigh the repair cost against the price of a new console.
How can I prevent my HDMI port from breaking again?
Always pull the cable straight out instead of yanking it at an angle. Use a surge protector to prevent electrical spikes that can fry the internal pins. Keep the console in a dust-free area to avoid clogging.