Can You Do Screen Printing At Home With These Tips
Yes, you can do screen printing at home with the right tools and a little patience. This guide covers everything from DIY screen printing supplies to step-by-step techniques for printing custom t-shirts and fabric. You will learn how to set up your home printing setup, avoid common mistakes, and create professional-quality prints. Whether you are a hobbyist or a small business owner, these tips will help you get started today.
Have you ever wondered if screen printing at home is actually possible? The short answer is yes. You absolutely can create stunning prints right from your own space. Whether you want to make custom t-shirts for your family or start a small side business, the process is more accessible than you might think.
DIY screen printing has grown in popularity over the last few years. More people are discovering that you do not need a fancy studio or expensive equipment to get great results. With a basic home printing setup, some screen printing supplies, and a bit of practice, you can produce beautiful designs on fabric, paper, and other substrates. This guide will walk you through every step of the journey.
We will cover everything from the equipment you need to the actual printing process. You will also learn about common mistakes to avoid and expert tips that make a real difference. By the end of this article, you will feel confident enough to start your very first project. Let us dive in.
Key Takeaways
- Screen printing at home is totally doable with basic equipment and a small budget.
- DIY screen printing requires a screen frame, squeegee, ink, and a design to print.
- Home printing setup can be built in a garage, basement, or spare room with minimal space.
- Common beginner mistakes include poor screen coating, incorrect exposure, and rushing the curing process.
- Custom t-shirts and fabric printing at home can save money and spark a new creative hobby.
- Quality results are possible at home when you follow proper technique and use the right materials.
- Screen printing at home is worth it for personal projects, gifts, and small business ventures alike.
📑 Table of Contents
What Is Screen Printing at Home?
Screen printing at home is the process of pushing ink through a fine mesh screen onto a surface. The screen has a stencil on it that blocks ink from passing through everywhere. Only the design area lets ink pass through, creating a sharp and vibrant print. This method works on fabric, paper, wood, and many other materials.
The technique has been around for centuries, but modern DIY screen printing makes it easy for anyone to try. You do not need to be an artist or a professional. The process is repeatable, which means you can print the same design over and over again. This is one of the biggest reasons people fall in love with hobby screen printing.
Why People Choose to Print at Home
There are many reasons people start screen printing at home. Here are the most common ones:
- Cost savings — You can save a lot of money compared to ordering prints from a shop.
- Creative freedom — You control every part of the design and print process.
- Custom gifts — Making personalized items for friends and family is always a hit.
- Small business potential — Many people start selling custom t-shirts and prints from home.
- Learning a new skill — Screen printing is a fun and rewarding craft to pick up.
The Equipment You Need to Get Started
Setting up a home printing setup does not require a huge investment. You can get started with basic screen printing supplies that are easy to find. Here is what you will need to begin your DIY screen printing journey.
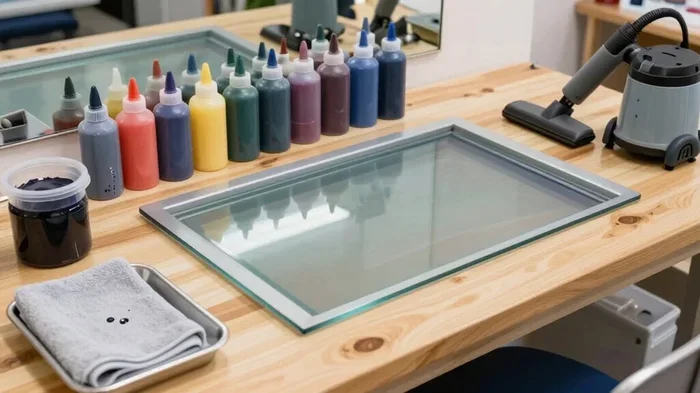
Essential Screen Printing Supplies
Every home printing setup needs a few core pieces of equipment. Let us break them down:
- Screen frame — This is the wooden or aluminum frame that holds the mesh. You can buy pre-made frames or build your own.
- Screen mesh — The mesh is the fine fabric stretched over the frame. For fabric printing, a 110 or 156 mesh count works well.
- Squeegee — This is the rubber blade you use to push ink through the screen. A 10- to 12-inch squeegee is ideal for most projects.
- Screen printing ink — Choose ink that is right for your substrate. Fabric ink works on clothing, while plastisol ink is popular for custom t-shirts.
- Emulsion and scoop coater — These are used for the photo emulsion method of creating stencils.
- Flash dryer or heat gun — You need a way to cure your prints after they are made.
- Washout booth — A simple setup for rinsing your screens after exposure.
Optional but Helpful Tools
Once you have the basics, these extra tools can improve your experience:
- Exposure unit — Helps you cure the emulsion on your screen quickly and evenly.
- Registration pins — Keep your screens aligned for multi-color prints.
- Ink mixer — Ensures your ink is well blended before you start printing.
- Heat press — A great tool for curing prints on fabric with consistent pressure.
Step-by-Step Guide to Screen Printing at Home
Now that you have your screen printing supplies, it is time to start printing. Follow these steps carefully for the best results. Each step is simple, but doing them right makes a big difference in your final print quality.
Step 1: Prepare Your Design
Before you touch any equipment, you need a design. Your design will become the stencil on your screen. Keep these tips in mind:
- Use high-contrast designs for the best results.
- Create your design as a black-and-white image.
- Print your design onto a transparency sheet using a laser printer.
- Make sure the design is the right size for your screen frame.
The print design quality matters a lot. A blurry or low-resolution image will give you a poor print. Take your time to get this step right.
Step 2: Coat Your Screen with Emulsion
This is where the photo emulsion method comes in. The emulsion is a light-sensitive liquid that hardens when exposed to UV light. Here is how you do it:
- Work in a dark room with no sunlight or bright lights.
- Scoop a thin, even layer of emulsion onto the screen.
- Use the scoop coater to spread it across both sides of the screen.
- Let the screen dry completely in a dark area.
Expert Insight: Apply the emulsion in a thin, smooth coat. Thick coats cause problems during exposure and washout. A thin, even layer gives you the sharpest screen mesh stencil.
Step 3: Expose Your Screen
Once your coated screen is dry, it is time for exposure. Place your transparency with the design onto the screen. Then expose it to UV light. This can be done with a dedicated exposure unit or even bright sunlight on a clear day.
- Exposure time usually ranges from 1 to 5 minutes depending on your light source.
- After exposure, rinse the screen with water in your washout booth.
- The emulsion covered by your design will wash away, leaving a clear stencil.
Let the screen dry fully before you start printing. Any moisture left in the mesh can affect ink flow and print quality.
Step 4: Set Up Your Print Area
Your home printing setup should have a flat, stable surface. Many people use a table covered with a protective sheet. Place your substrate (the item you are printing on) underneath the screen. Use registration marks to align the screen properly for each print.
Step 5: Pull Your Print
This is the most exciting part. Here is the process:
- Place the screen on top of your substrate.
- Pour a line of ink along the top edge of the screen.
- Hold the screen firmly in place with one hand.
- Use the squeegee to pull the ink across the design with firm, even pressure.
- Lift the screen carefully to reveal your print.
Repeat this process for each print. Keep your squeegee angle consistent — about 45 degrees works well for most projects. Consistent pressure is the key to clean, professional-looking fabric printing.
Step 6: Cure Your Print
After printing, your ink needs to cure. This means using heat to set the ink permanently. You can use a flash dryer, a heat press, or even a household iron for small projects. Curing ensures your print survives washing and everyday wear.
Common Mistakes Beginners Make
Even with the best screen printing supplies, beginners can run into trouble. Knowing these mistakes ahead of time helps you avoid them and get better results faster.
Mistake 1: Using the Wrong Mesh Count
Not all screens are the same. The mesh count determines how much ink passes through. A low mesh count lets more ink through, which is great for thick inks on dark fabric. A high mesh count gives finer detail but less ink flow. Choosing the wrong mesh for your project leads to blurry or uneven prints.
Mistake 2: Skipping the Emulsion Coat
Some people try to use tape or vinyl instead of proper emulsion. While these shortcuts work for very simple projects, they do not give you the durability and precision that emulsion provides. For any serious DIY screen printing, learning the emulsion method is essential.
Mistake 3: Rushing the Exposure Process
Underexposure or overexposure ruins screens. If you do not expose the screen long enough, the stencil washes out completely. If you expose it too long, the stencil becomes too hard and blocks ink from passing through. Follow exposure times carefully for your specific light source.
Mistake 4: Printing with Too Much Ink
More ink does not mean a better print. Too much ink causes bleeding, smearing, and messy edges. Use a thin, controlled amount of ink and pull the squeegee with steady pressure. Clean, precise prints come from controlled ink usage.
Mistake 5: Ignoring Ink Curing
Skipping the curing step is one of the biggest errors. Un-cured ink feels sticky and will not last. Always cure your prints properly before wearing or washing them. This is especially important for custom t-shirts that will be washed regularly.
Tips for Better Screen Prints at Home
Want to take your screen printing at home results to the next level? These practical tips from experienced printers will help you improve quickly.
Use the Right Ink for Your Substrate
Not all inks work on all materials. Fabric ink is designed for clothing and textiles. Paper ink works best for prints on cardstock and paper. Using the wrong ink leads to poor adhesion and faded prints. Always match your ink type to your substrate for the best results.
Keep Your Screens Clean
Residual ink and emulsion buildup can clog your screen mesh and ruin print quality. Clean your screens thoroughly after every printing session. Use a screen cleaner or a gentle degreaser to remove all traces of old ink and emulsion.
Practice Registration
If you are printing multi-color designs, registration is critical. Misaligned colors make prints look messy and unprofessional. Use registration pins or tape to keep your screens perfectly aligned. Practice your alignment before committing to a full print run.
Store Your Supplies Properly
Your screen printing supplies last longer when stored correctly. Keep ink in a cool, dark place. Store screens in a dry area to prevent moisture damage. Proper storage saves money and keeps your equipment ready for your next project.
Start Simple and Build Up
Do not try to print complex multi-color designs on your first attempt. Start with a single-color design on a plain t-shirt. Once you master the basics, you can experiment with more colors, more fabric printing techniques, and more complex print designs.
Is Screen Printing at Home Worth It?
The short answer is yes — screen printing at home is absolutely worth it. Let us look at the pros and cons to help you decide if this is the right hobby or business for you.
The Pros of Home Screen Printing
- Low startup cost — You can begin with under $100 for basic supplies.
- Unlimited creativity — You can print any design you want, anytime.
- Quick turnaround — No waiting for orders from an outside shop.
- Profit potential — Many people sell their prints and build a profitable small business.
- Skill building — You develop a valuable craft that can grow with your interests.
The Cons to Consider
- Learning curve — It takes practice to get consistent, high-quality prints.
- Space requirements — You need a dedicated area for your home printing setup.
- Initial investment — While low, you still need to buy some equipment upfront.
- Cleanup time — Washing screens and maintaining equipment takes effort after each session.
Overall, the benefits of DIY screen printing far outweigh the downsides for most people. The joy of creating something with your own hands and seeing your designs come to life on fabric is incredibly rewarding.
Comparison: Home Screen Printing vs. Professional Printing
| Factor | Home Screen Printing | Professional Printing |
|---|---|---|
| Startup Cost | Low ($50-$200) | High ($1,000+) |
| Print Quality | Good with practice | Excellent and consistent |
| Speed | Slower for large runs | Fast for bulk orders |
| Creative Control | Full control | Limited by shop capabilities |
| Learning Curve | Moderate | Minimal (you let experts handle it) |
| Best For | Small batches, custom projects | Large production runs |
As you can see, screen printing at home is perfect for small batches and custom projects. If you need hundreds of identical prints fast, a professional shop might be better. But for personal use, gifts, and small businesses, your home printing setup works wonderfully.
Getting the Most Out of Your Home Screen Printing Setup
Once you have the basics down, you can start exploring advanced techniques. These ideas will help you get the most from your DIY screen printing experience at home.
Experiment with Different Inks
Try water-based inks, plastisol inks, and specialty inks like glow-in-the-dark or puff ink. Each type creates a different feel and finish on your prints. Experimenting helps you discover what works best for your projects and substrate choices.
Build a Dedicated Print Space
Even a small corner of a room can become an effective print area. Use a foldable table for your press surface. Hang a drying rack nearby. Keep your supplies organized on shelves or in bins. A dedicated space makes it easy to jump in and print whenever inspiration strikes.
Join Online Communities
The screen printing at home community is active and supportive. Join forums and social media groups where you can share your work, ask questions, and learn from others. Seeing what fellow hobbyists create can spark new ideas and keep you motivated.
Consider Selling Your Prints
If you enjoy the process, you can turn your hobby screen printing into a side income. Sell custom t-shirts at local markets, create designs for friends, or set up an online shop. Many successful small businesses started exactly this way — right from a home printing setup.
The journey of screen printing at home is one of continuous learning. Every print teaches you something new. Embrace the process, celebrate your progress, and enjoy the creative freedom that comes with this timeless craft.
Conclusion
Can you do screen printing at home? Absolutely. With the right screen printing supplies, a basic home printing setup, and a willingness to learn, anyone can create beautiful prints from their own space. DIY screen printing opens up a world of creative possibilities for personal projects, custom gifts, and even small business ventures.
Start simple, practice regularly, and do not be afraid to make mistakes. Every print you make builds your skills and confidence. The tips and techniques in this guide give you a strong foundation to work from. Now it is your turn to pull out that screen, squeeze some ink, and bring your designs to life. Happy printing!
Frequently Asked Questions
Do I need a dark room for screen printing at home?
Yes, you need a dark space when working with photo emulsion. Light exposure before the curing step will ruin your stencil. A bathroom, closet, or covered garage works perfectly for coating and drying your screens in the dark.
What is the best ink for printing on fabric at home?
Water-based fabric ink is a great choice for beginners. It is easy to clean up, feels soft on fabric, and works well on cotton t-shirts. Plastisol ink is another popular option that gives more vibrant colors and lasts longer through many washes.
Can I use a regular household iron to cure my prints?
Yes, a household iron can work for small projects. Set it to the cotton setting with no steam. Press firmly over the print for about 3 to 5 minutes, moving the iron slowly across the design. However, a dedicated flash dryer gives more consistent and reliable curing results.
How much does it cost to start screen printing at home?
A basic starter setup costs between $50 and $200. This includes a screen frame, squeegee, ink, emulsion, and a transparency for your design. You can always add more equipment as you grow your skills and take on bigger projects.
What materials can I print on besides t-shirts?
Screen printing works on many surfaces. You can print on tote bags, tote pouches, canvas, paper, wood, and even ceramic items. Just make sure you use the right type of ink for each material to get the best adhesion and durability.
How long does it take to learn screen printing at home?
Most people get comfortable with the basics within a few practice sessions. Your first few prints may not be perfect, and that is completely normal. Within a week of regular practice, you will notice a big improvement in print quality and speed.