Can You Replace A Laptop Screen Yourself Without Help
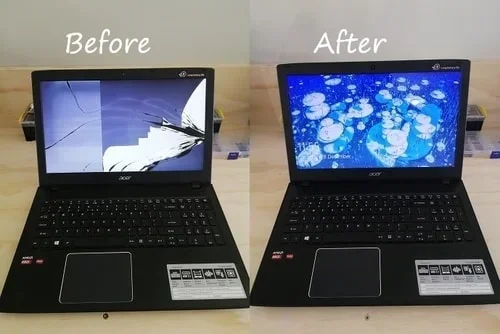
Yes, you absolutely can replace a laptop screen yourself without calling a technician. With the right tools, a compatible replacement panel, and a bit of patience, DIY laptop screen replacement is very doable. In this guide, we’ll walk you through every step so you can fix your broken laptop screen and save big on repair costs.
This is a comprehensive guide about Can You Replace A Laptop Screen Yourself.
Key Takeaways
- DIY replacement is possible: Most laptop screen replacements can be done at home with basic tools and a compatible part.
- Save money: Replacing a laptop screen yourself costs a fraction of what a repair shop charges.
- Right part matters: Always match your laptop model and screen specs before buying a replacement.
- Patience is key: Take your time, work on a soft surface, and avoid rushing the process.
- Know when to quit: If you hit major obstacles, it is okay to seek professional help instead of risking damage.
[FEATURED_IMAGE_PLACEHOLDER]
Why You Might Need to Replace Your Laptop Screen
Life happens. Your laptop takes a fall. A kid leans on the keyboard. A coffee cup tips over. Suddenly, your screen looks like a modern art painting with cracks running everywhere. These are more common than you think.
A broken laptop screen is one of the top reasons people search for repair options. And honestly, it makes sense. Screens are fragile. They take the brunt of everyday wear and tear. Sometimes the damage is obvious. Other times, you might notice subtle issues like flickering, dim spots, or strange lines across the display.
Common Causes of Laptop Screen Damage
Let us break down the most frequent reasons laptops need a screen replacement:
- Physical impact: Drops, bumps, and pressure on the closed lid.
- Liquid damage: Spills that seep into the display layers.
- Age and wear: Older screens naturally degrade over time.
- Manufacturing defects: Sometimes the issue is not your fault at all.
- Backlight failure: The LED or CCFL light behind the panel dies out.
Whatever the cause, the result is the same. You need a working screen. And you want it fixed fast. So let us talk about whether you can handle this on your own.
How to Know If Your Laptop Screen Needs Replacing
Before you rush out and buy a replacement panel, make sure the screen really is the problem. Sometimes the issue is not the display itself. It could be the graphics card, the cable connection, or even the motherboard.
Signs Your Screen Is the Problem
- Visible cracks or shards: This is the clearest sign. If glass is broken, the panel needs to go.
- Flickering display: Random flickering can mean a dying backlight or loose cable.
- Dead pixels: Black or white dots that do not go away may signal panel damage.
- Vertical or horizontal lines: Lines across the screen often point to internal display failure.
- Dim or dark screen: If you can barely see anything, the backlight might be shot.
- Color distortion: Washed-out or strange color shifts are red flags.
Quick Test to Confirm the Issue
Here is a simple test. Shine a flashlight directly at your screen. If you can faintly see your desktop or icons through the brightness, your LCD screen replacement needs a backlight fix or a full panel swap. The image is still there, just not visible without extra light. This confirms the problem is the display, not your computer’s internals.
Another good test is to connect an external monitor. If the external display works perfectly, your laptop’s graphics and motherboard are fine. That strongly points to a faulty screen. This is great news for DIY laptop repair because it confirms you just need a display swap.
Tools and Preparations You Will Need
You do not need a fancy workshop. But having the right tools makes the job smoother and safer. Let us go over what you need before you start your laptop screen DIY project.
Essential Tools
- Phillips-head screwdriver: Small size, usually size 0 or 1. This is your best friend for this job.
- Plastic spudger or pry tool: Helps you separate panels without scratching anything.
- Anti-static wrist strap: Keeps static electricity from zapping your laptop’s components.
- Soft towel or microfiber cloth: Protects the screen and keeps dust away.
- Magnetic mat: Keeps tiny screws organized and in place.
- Replacement screen: More on this below. This is the most important item on the list.
Choosing the Right Replacement Screen
This step is critical. Not all laptop screens are the same. You need to match your laptop model exactly. Here is what to check:
- Screen size: 13-inch, 15-inch, 17-inch. Make sure it matches your current panel.
- Resolution: HD, Full HD, or 4K. Match this for best results.
- Panel type: IPS, TN, or OLED. Stick with the same type for consistent quality.
- Connector type: 30-pin or 40-pin. This must match your laptop’s motherboard.
- Brand compatibility: Some brands like HP, Dell, and Lenovo have specific panel requirements.
Where to Buy Replacement Screens
You can find replacement panels on Amazon, eBay, or specialized electronics parts sites. Prices range from $30 to $150 depending on your laptop model. Always read seller reviews and confirm return policies before purchasing. Look for sellers who offer compatibility guarantees.
Step-by-Step Guide to Replace a Laptop Screen Yourself
This is where the real work happens. Follow these steps carefully for a smooth laptop screen replacement. Take your time and work in a clean, well-lit area.
Step 1: Back Up Your Data
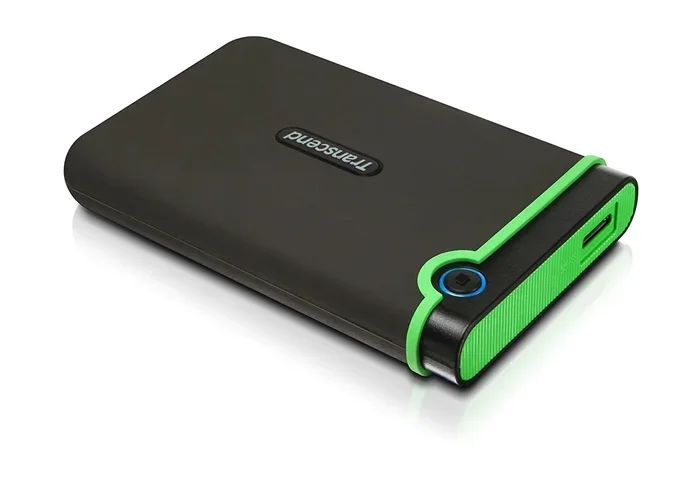
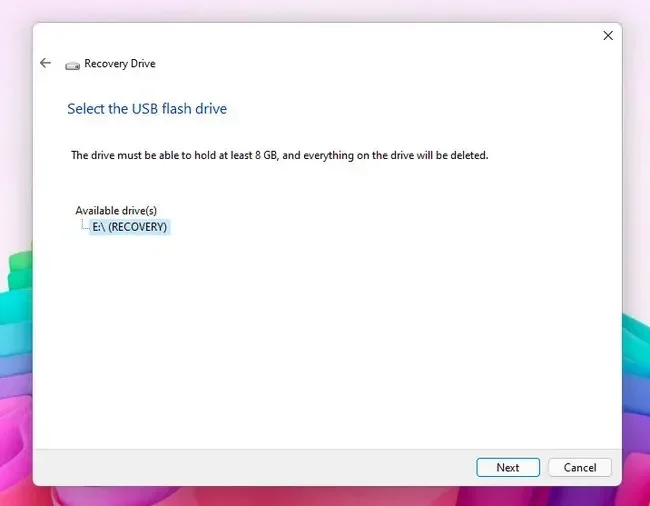
Before touching anything, back up your files. This is not the screen replacement itself that worries you. It is the unexpected. If something goes wrong, you want your data safe. Use an external drive or cloud storage. This step takes minutes but saves headaches.
Step 2: Remove the Battery (If Possible)
Some laptops have removable batteries. Others do not. If yours has one, take it out. This eliminates the risk of electrical damage. For sealed batteries, unplug the charger and hold the power button for 15 seconds to discharge any remaining charge.
Step 3: Remove the Bezel Around the Screen
The bezel is the plastic frame around your display. Use your plastic spudger to gently pry it loose. Start at a corner and work slowly around the edges. Every laptop model is different. Some bezels clip in. Others use small screws hidden under rubber pads.
Go slow. The bezel holds the screen in place and connects to the frame. Forcing it risks breakage. Watch this part carefully and keep track of any screws you remove.
Step 4: Disconnect the Old Screen
Once the bezel is off, you will see the screen panel held by screws, usually two or three. Remove those screws carefully. Keep them on your magnetic mat. Then gently disconnect the video cable that runs from the laptop base to the back of the display.
This cable is usually a flat ribbon cable. It slides out of a connector. Do not pull it. Lift it straight up. Some connectors have tiny latches. Check before you pull anything.
Step 5: Remove the Old Screen
With screws out and cable disconnected, you can now remove the old panel. Some screens also have metal brackets on the sides. Unscrew those too. Gently lift the old screen away. Set it aside. You might want to keep it in case you need parts later or for proper disposal.
Step 6: Install the New Screen
Now the fun part. Place your new panel into the frame. Reattach any side brackets. Carefully connect the video cable to the new screen. Make sure it sits properly in the connector. Slide it down to lock it in place.
Replace the mounting screws. Do not overtighten them. Snug is perfect. Then move on to the bezel.
Step 7: Reattach the Bezel
Clip or screw the bezel back into place. Work evenly around the screen. Make sure it sits flush with no gaps. This frame protects your new panel and keeps it secure.
Step 8: Power On and Test
Reinstall the battery if you removed it. Plug in the charger. Power on your laptop. Does the new screen light up? Is the image clear? Check for dead pixels by displaying a solid white and black image. If everything looks good, you did it. You just replaced your laptop screen yourself.
Quick Tips for Success
- Watch a video tutorial first: Search for your specific laptop model on YouTube. Seeing the process helps a lot.
- Label every screw: Take a photo before removing anything. Screenshots save lives.
- Work on a soft surface: A towel or blanket prevents scratches and keeps parts from sliding.
- Stay organized: Use the magnetic mat. Know where every screw goes back.
Comparison: DIY vs Professional Laptop Screen Repair
Not sure if you should do it yourself or take it to a shop? Here is a quick comparison to help you decide.
| Factor | DIY Replacement | Professional Repair |
|---|---|---|
| Cost | $30 to $150 for parts | $100 to $300 including labor |
| Time | 30 minutes to 2 hours | 1 to 3 hours waiting plus travel |
| Skill Level | Beginner-friendly with guidance | No skill needed from you |
| Risk | Low if done carefully | Very low with trained techs |
| Convenience | Do it at your own pace at home | Requires a trip to the shop |
| Warranty | Depends on parts seller | Usually includes a service guarantee |
As you can see, DIY laptop screen replacement saves you a lot of money. The risk is manageable if you follow instructions. Professional repair is still the safer bet if you are nervous or your laptop is under warranty.
Common Mistakes to Avoid When Replacing a Laptop Screen
Even with a great guide, mistakes happen. Here are the most common ones people make during a do it yourself laptop fix.
Mistake 1: Buying the Wrong Screen
This is the biggest pitfall. Screens look similar but have different connectors, sizes, and specs. Always double-check your laptop model number. Look it up on the manufacturer’s website. Confirm the exact part number of your current screen before ordering a replacement.
Mistake 2: Using Metal Tools on the Bezel
Metal screwdrivers can easily scratch or crack the plastic bezel. Always use plastic pry tools. They glide without damage. A few dollars in tools saves a $50 bezel replacement.
Mistake 3: Forcing the Video Cable
Ribbon cables are delicate. If it does not slide out, stop. Look for a hidden latch or connector cover. Forcing it tears the cable or damages the port. A torn cable means another part purchase and a lot of frustration.
Mistake 4: Skipping the Data Backup
It rarely happens but it can. A slip, a fall, an electrical issue. Back up first. It takes ten minutes and gives you total peace of mind during the repair.
Mistake 5: Not Testing Before Closing Up
Always test the new screen before reassembling everything. Reconnect the cable, power on, and check the display. If something looks wrong, you still have access. Fix it now, not after everything is sealed back up.
When Should You Take Your Laptop to a Professional?
Replacing a laptop screen yourself works for most people. But there are times when professional help is the smarter choice. Know when to call in the experts.
Your Laptop Is Under Warranty
Check your warranty status first. Many manufacturers cover screen defects for a specific period. A DIY repair might void your warranty. Contact the brand or retailer before opening anything. Sometimes you get a free replacement or discounted repair through official channels.
Your Laptop Is a High-End Model
Ultra-thin laptops, 2-in-1 convertibles, and touchscreen models have complex assemblies. They often have screens fused into the chassis. These require specialized tools and knowledge. If you are not comfortable, take it to a certified technician.
You Damage Something Else During the Repair
Accidents happen. If you crack the bezel, tear a cable, or disturb the motherboard, stop. Take it to a repair shop. A small mistake should not become a big problem. Technicians can fix collateral damage faster than you can learn on the fly.
You Feel Unsure at Any Point
There is zero shame in this. Not everyone enjoys hands-on electronics work. If you feel stuck, frustrated, or overwhelmed, step away. A professional will do a great job. You will still save compared to some overpriced repair services by getting quotes beforehand.
Expert Insight
Professional repair technicians we spoke with shared this advice: “If you have never opened a laptop before, start with an older cheap model. Practice on that first. Then when your main laptop needs a display assembly swap, you will already know what to expect.” This is solid advice. Practice builds confidence.
Frequently Asked Questions
How much does it cost to replace a laptop screen yourself?
You will typically spend between $30 and $150 on a replacement panel. Add a few dollars for tools if you do not already own them. This is far cheaper than professional repair which often costs $100 to $300. Your total DIY cost usually stays under $160 even for premium screens.
How long does it take to replace a laptop screen?
Most people finish the job in 30 minutes to 2 hours. Your first time might take longer. That is completely normal. As you get familiar with the process, you can knock it out in under an hour. The key is not rushing. Take breaks if needed.
Is it hard to replace a laptop screen?
It is not extremely hard but it does require patience and care. If you can follow step-by-step instructions and handle small screws, you can do it. The trickiest part is usually removing the bezel without breaking it. Watch a few videos for your specific model and you will be ready.
Will replacing the laptop screen fix a flickering display?
Not always. A flickering screen could be caused by a faulty cable, graphics driver issue, or backlight problem. Before buying a replacement panel, run the flashlight test and try an external monitor. If the issue is not the panel itself, a new screen will not solve the flickering. Troubleshoot first, then replace.
Can I replace my laptop screen with a different brand or type?
You can, but it is risky. The replacement screen must match your laptop model’s specifications. Size, resolution, connector type, and panel technology should all be compatible. Mixing brands or types can cause display issues, poor image quality, or complete incompatibility. Always stick with the recommended specs.
What should I do with my old laptop screen?
Do not throw it in the regular trash. Laptop screens contain materials that should be recycled properly. Check with your local electronics recycling center or retailer that offers e-waste pickup. Some manufacturers also have take-back programs. Responsible disposal helps the environment and keeps hazardous materials out of landfills.
Conclusion
So, can you replace a laptop screen yourself? Absolutely. You now have everything you need to tackle this project with confidence. From understanding the damage to choosing the right parts, from step-by-step instructions to avoiding common mistakes, you are well prepared.
DIY laptop screen replacement saves you significant money and gives you a satisfying sense of accomplishment. The process is manageable for most people with basic tools and a willingness to learn. Just remember to back up your data, take your time, and know when professional help is the better choice.
Your laptop is an expensive investment. Fixing it yourself protects that investment and keeps it running for years to come. Grab your tools, order your replacement panel, and get ready to bring your screen back to life. You have got this.
Frequently Asked Questions
What is Can You Replace A Laptop Screen Yourself?
Can You Replace A Laptop Screen Yourself is an important topic with many practical applications.