Can You Just Plug In An Ssd And Have Instant Access
Yes, you can just plug in an SSD and get instant access to your files in most cases. Whether you are using a USB enclosure, a SATA connection, or an M.2 adapter, the process is simpler than most people think. This guide walks you through every step so you can start using your external storage right away.
Have you ever wondered can you just plug in an SSD and start using it right away? The short answer is yes. Most modern solid state drives work on a plug and play basis. You connect them to a USB port or a SATA port on your computer, and they show up almost instantly.
This simplicity is exactly why millions of people switch to SSD storage every year. No need for complicated setups. No need to be a tech expert. Whether you want to expand your laptop storage, back up important files, or carry your entire media library with you, an SSD makes it easy. In this guide, we will walk you through everything you need to know about SSD installation and getting instant access to your data.
Key Takeaways
- Plug and Play Simplicity: Most SSDs work instantly when connected to a USB port with the right enclosure.
- Multiple Connection Options: You can use SATA, NVMe, M.2, or USB-C depending on your needs.
- No Software Required: A plug and play SSD does not need extra drivers in most modern operating systems.
- Speed Matters: SSDs offer data transfer speeds far faster than traditional hard drives.
- Common Mistakes Exist: Wrong enclosures, missing drivers, or incorrect formatting can cause problems.
- Cloning Makes It Easy: You can copy your entire operating system onto a new SSD for a seamless upgrade.
- Portability Is a Big Win: External SSDs let you carry terabytes of data in your pocket.
📑 Table of Contents
- What Is an SSD and Why Does It Matter?
- Types of SSDs You Can Plug In
- How to Plug In an SSD and Get Instant Access
- External SSD Enclosures: Your Instant Access Solution
- Common Mistakes to Avoid When Setting Up an SSD
- When Plugging In an SSD Does Not Work
- Expert Tips for Getting the Most From Your SSD
- SSD vs HDD: Why Plugging in an SSD Changes Everything
- Conclusion
What Is an SSD and Why Does It Matter?
A solid state drive is a type of storage device that uses flash memory instead of spinning disks. Traditional hard drives have moving parts. An SSD has none. That means faster speeds, quieter operation, and better durability.
When you plug in an SSD, you are getting access to storage that is lightning fast compared to old-school hard drives. A standard HDD might read files at 100 to 150 megabytes per second. A basic SSD can push 500 megabytes per second or more. And a top-tier NVMe SSD can hit speeds over 3,000 megabytes per second.
This speed difference matters a lot. You notice it when opening large files, loading games, or transferring a folder full of photos. SSD storage has become the go-to choice for anyone who wants a responsive computer experience.
Why People Switch to SSDs
There are several reasons people make the switch from traditional drives to solid state storage:
- Speed: Boot times drop from minutes to seconds.
- Durability: No moving parts means less risk of physical damage.
- Portability: External SSDs are small enough to fit on a keychain.
- Silence: SSDs make zero noise during operation.
- Energy Efficiency: They use less power, which helps laptop battery life.
All of these benefits start the moment you connect your SSD to a computer. The question is really about how you do it and what setup works best for your situation.
Types of SSDs You Can Plug In
Not all SSDs are the same. Before you plug in an SSD, you need to know which type you have. Different SSDs use different connections, and each one has its own setup process.
SATA SSDs
SATA SSDs are the most common type. They use the same SATA connection that traditional hard drives use. These drives are 2.5 inches in size and connect through a flat cable. Many desktop computers have built-in SATA ports. Laptops sometimes do too.
If you buy a 2.5-inch SATA SSD, you can install it inside your computer using a SATA cable and a power connector. This is the simplest form of internal SSD installation. Once connected, your operating system recognizes the drive right away.
NVMe and M.2 SSDs
NVMe drives are the fastest option available. They use the M.2 form factor, which looks like a small stick of gum. These drives plug directly into an M.2 slot on your motherboard. No cables needed.
M.2 SSDs are incredibly popular in modern laptops and desktops. They offer blazing file transfer speeds and take up almost no space. However, you cannot plug an M.2 drive into a USB port directly. You need either an internal M.2 slot or an M.2 to USB adapter for external use.
External SSDs
External SSDs come pre-built in a protective enclosure. You just plug them into a USB port. That is it. This is the easiest way to get portable storage with no fuss. Brands like Samsung, SanDisk, and WD make excellent external SSDs that work instantly on Windows, Mac, and even some smart TVs and gaming consoles.
How to Plug In an SSD and Get Instant Access
Now let us get into the practical steps. Here is how you set up an SSD and start using it right away.
Step 1: Choose the Right Connection Method
Decide how you want to connect your SSD. You have three main options:
- Internal SATA: Install the SSD inside your desktop or laptop using a SATA cable.
- External USB Enclosure: Place a bare SSD inside a USB enclosure and connect it to any available USB port.
- M.2 Adapter: Use an M.2 to USB adapter to connect an NVMe drive externally.
Each method has its perks. Internal setups offer the best performance. External setups offer the most convenience. Choose based on what matters most to you.
Step 2: Connect the SSD
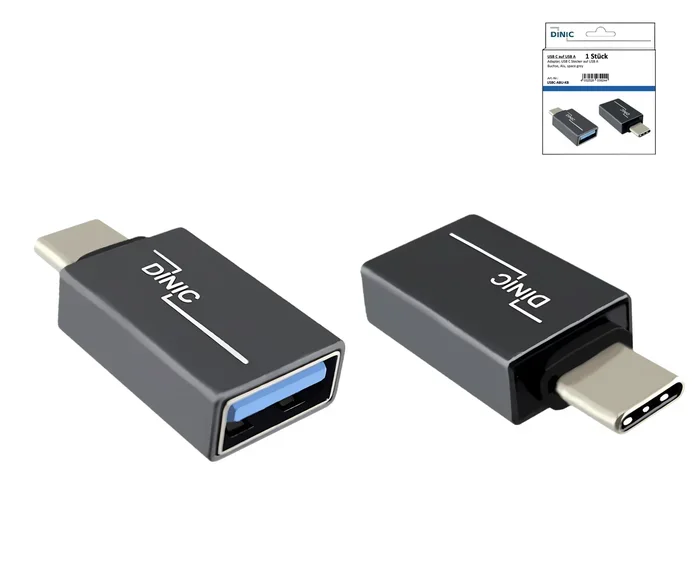
For an external SSD, the process is straightforward. Plug the drive into a USB port on your computer. Most modern SSDs use USB-C connectors. If your computer only has USB-A ports, grab a simple USB adapter. The connection should feel secure and snug.
For an internal SSD, you will need to open your computer case. Connect the SATA cable to the SSD and to an available SATA port on your motherboard. Then connect the power cable from your power supply. Close the case and boot up your computer.
Step 3: Initialize and Format the Drive
When you first connect a new SSD, your operating system may ask you to initialize it. On Windows, this shows up as a pop-up in the Disk Management tool. On Mac, you will use Disk Utility.
Here is what to do:
- Open Disk Management (Windows) or Disk Utility (Mac).
- Find your new SSD in the list of drives.
- Initialize it using GPT (GUID Partition Table) for modern systems.
- Format the drive with NTFS (Windows) or APFS (Mac).
- Assign a drive letter or mount point.
Once formatting is complete, your SSD is ready to use. You can now drag and drop files, install programs, or use it as a backup drive.
Step 4: Clone Your Existing Drive (Optional)
If you are replacing your old hard drive with an SSD, you might want to clone your existing drive. Cloning copies everything — your operating system, applications, and files — onto the new SSD.
You will need a disk cloning tool for this. Popular options include Macrium Reflect, Clonezilla, and Samsung Data Migration (for Samsung SSDs). The process takes a bit of time depending on how much data you have, but the result is seamless. You boot up your computer from the new SSD boot drive and everything works exactly as before.
External SSD Enclosures: Your Instant Access Solution
If you own a bare SSD and want to use it externally, you need an SSD enclosure. This is a small protective case that connects to your computer through USB. The enclosure houses the SSD and handles the data transfer between the drive and your system.
SSD enclosures are inexpensive and widely available. You can find them online for as little as $15 to $30. They come in different sizes to fit 2.5-inch SATA drives and M.2 NVMe drives.
How to Choose the Right Enclosure
Not all enclosures are created equal. Here are some things to consider:
- Drive Compatibility: Make sure the enclosure matches your SSD type. A SATA enclosure will not work with an M.2 NVMe drive.
- Connection Speed: Look for USB 3.0 or USB-C enclosures. USB 2.0 enclosures will bottleneck your SSD speed.
- Build Quality: Metal enclosures dissipate heat better than plastic ones.
- Portability: If you travel often, choose a compact enclosure that fits in your bag.
Once you have the right enclosure, the setup is instant. Slide your SSD in, close the case, plug it into your computer, and you are good to go. This is the fastest way to get portable storage without buying a pre-built external drive.
Quick Tips for Using an SSD Enclosure
- Always eject the drive properly before unplugging it.
- Use a powered USB hub if your drive does not get enough power from a single port.
- Keep the enclosure in a well-ventilated area during heavy use.
- Avoid cheap enclosures with poor chipsets — they can cause disconnections.
Common Mistakes to Avoid When Setting Up an SSD
Even though plugging in an SSD is simple, people still make mistakes. Here are the most common ones and how to avoid them.
Using the Wrong Enclosure or Cable
This is the number one mistake. A SATA SSD needs a SATA enclosure. An NVMe SSD needs an M.2-compatible enclosure. Mixing them up will not work. Always double-check compatibility before you buy.
Similarly, using a USB 2.0 cable with a fast SSD will severely limit your speeds. Always use the cable and port that match your drive’s capabilities.
Skipping the Format Step
Some people skip formatting and wonder why their new drive does not show up. A new SSD needs to be formatted before your computer can use it. This takes about 30 seconds and prevents a lot of frustration later.
Not Backing Up Data Before Cloning
If you are cloning your drive, always back up your important files first. Cloning tools are reliable, but something can go wrong. A simple backup to a cloud service or a second drive saves you from disaster.
Ignoring Heat Management
SSDs can get warm during heavy use. Cheap enclosures with no heat dissipation can cause your drive to throttle its speed or even disconnect. Choose an enclosure with good ventilation or add a small heatsink if you plan to transfer large files regularly.
When Plugging In an SSD Does Not Work
Sometimes, even when you do everything right, your SSD does not show up. This is frustrating but usually fixable. Here are the most common reasons and solutions.
The Drive Is Not Recognized
If your computer does not detect the SSD, try these steps:
- Unplug the drive and plug it into a different USB port.
- Try a different cable. Cables fail more often than people think.
- Check Disk Management (Windows) or Disk Utility (Mac) to see if the drive appears there.
- Restart your computer and try again.
Driver Issues
Most modern operating systems have built-in drivers for SSDs. But occasionally, you need to update your USB or storage drivers. Visit your computer manufacturer’s website or your SSD brand’s support page to download the latest drivers.
Formatting Conflicts
If your SSD was previously formatted for a different operating system, it may not show up correctly. For example, a drive formatted for macOS will not work natively on Windows without third-party software. Reformatting the drive solves this issue, but remember that reformatting erases all data.
BIOS or UEFI Settings
For internal SSDs, your computer’s BIOS or UEFI settings may need adjustment. Make sure the SATA port is enabled in your BIOS. If you are trying to boot from a new SSD, check the boot order and set the SSD as the primary drive.
Expert Tips for Getting the Most From Your SSD
Once your SSD is up and running, a few simple habits will keep it performing at its best.
- Keep Free Space: SSDs perform best when they have at least 10 to 15 percent free space.
- Enable TRIM: TRIM helps your SSD maintain its speed over time. Most modern operating systems enable this by default.
- Avoid Defragmentation: Unlike HDDs, SSDs do not need defragmentation. In fact, it can reduce their lifespan.
- Use the Drive Regularly: Flash memory performs best when it is used regularly. An SSD sitting unused for years may develop issues.
- Update Firmware: Check your SSD manufacturer’s website for firmware updates. These often improve performance and fix bugs.
These small steps go a long way. Your solid state drive will stay fast and reliable for years if you take care of it properly.
SSD vs HDD: Why Plugging in an SSD Changes Everything
If you have been using a traditional hard drive, switching to an SSD is one of the biggest upgrades you can make. The difference is night and day.
| Feature | SSD | HDD |
|---|---|---|
| Read Speed | 500–7,000 MB/s | 80–160 MB/s |
| Boot Time | 5–15 seconds | 30–60 seconds |
| Durability | No moving parts | Spinning disks inside |
| Noise | Silent | Clicking and humming |
| Power Use | Low | Higher |
| Price per TB | Higher | Lower |
| Portability | Excellent | Bulky |
The table makes it clear. SSD performance blows traditional drives out of the water. Yes, SSDs cost more per terabyte. But the speed, durability, and convenience are worth every penny for most users.
Conclusion
The answer to can you just plug in an SSD is a resounding yes. With the right enclosure, cable, or internal connection, your SSD works almost immediately. The entire process from unboxing to accessing your files takes just minutes.
SSD installation has never been easier. Whether you are a student backing up research files, a gamer wanting faster load times, or a professional managing large video projects, a solid state drive delivers real results. You do not need special skills or expensive tools.
Start with a USB enclosure if you want the simplest setup. Choose an internal SATA or M.2 SSD if you want maximum performance. Either way, you will enjoy instant access to your data the moment you connect it. The days of waiting for slow hard drives are over. Plug in your SSD, and get back to doing what matters.
Frequently Asked Questions
Do I need any special software to plug in an SSD?
No. Most modern operating systems like Windows 10, Windows 11, and macOS recognize SSDs automatically. You just plug the drive in, and it appears on your desktop or in File Explorer. You only need cloning software if you want to copy your entire existing drive onto the new SSD.
Can I plug an NVMe SSD into a USB port directly?
Not directly. NVMe drives use the M.2 form factor and need a special M.2 to USB adapter or an SSD enclosure that supports NVMe. Once you have the right adapter, the drive works just like any external storage device.
How fast is a plug and play external SSD?
Speed depends on the SSD type and the USB connection. A USB 3.0 external SSD typically delivers 400 to 500 megabytes per second. A USB-C or USB 3.1 drive can reach 1,000 megabytes per second or more. This is still much faster than any traditional hard drive.
Is it safe to leave an external SSD plugged in all the time?
Yes, it is generally safe. SSDs are designed for continuous use. However, it is a good idea to safely eject the drive before unplugging it, and to keep it in a cool, dry place. Avoid exposing it to extreme heat or moisture.
Can I use an SSD with both Windows and Mac computers?
Yes, but you may need to format the drive correctly. ExFAT is the best file system for cross-platform compatibility. It works on both Windows and Mac without any extra software. Just be aware that formatting erases all data on the drive.
What is the difference between a SATA SSD and an NVMe SSD?
A SATA SSD uses the older SATA interface and typically delivers speeds up to 550 megabytes per second. An NVMe SSD uses the faster PCIe interface and can reach speeds over 3,000 megabytes per second. NVMe drives are more expensive but offer significantly better performance.
=== META DESCRIPTION ===
Can you just plug in an SSD and have instant access? Our complete guide covers SSD installation, enclosures, setup tips, and everything you need.