Can I Split My Laptop Into Two Screens With These Tips
Yes, you can split your laptop into two screens, and it is easier than you think. Whether you use Windows or Mac, a few simple steps let you extend or mirror your display. This guide walks you through every method, from built-in split screen shortcuts to external monitor setups. You will learn the best tools, cables, and settings to double your workspace instantly. Splitting your laptop screen boosts productivity and makes multitasking a breeze.
Have you ever wished your laptop could do more? Maybe you are working on a spreadsheet while watching a tutorial. Or perhaps you want to chat with friends while reading an article. The good news is that you can split your laptop into two screens. It sounds complicated, but it really is not. This guide shows you exactly how to do it, step by step.
Many people think they need expensive equipment to get a second screen. That is not true. Your laptop already has built-in tools for splitting your display. You can also connect an external monitor for a bigger workspace. Either way, you will boost your productivity in no time. Let us dive into everything you need to know about splitting your laptop screen into two screens.
Key Takeaways
- Built-in split screen features work on both Windows and Mac laptops with just a few clicks.
- An external monitor is the best way to get a true two-screen setup for work or gaming.
- Keyboard shortcuts like Windows key plus arrow make splitting windows instant and effortless.
- USB-C and HDMI cables are the most common ways to connect a second display to your laptop.
- Avoid common mistakes like mismatched resolutions or wrong display modes to get the best experience.
- A docking station simplifies the process and gives you multiple port options in one hub.
📑 Table of Contents
- What Does It Mean to Split Your Laptop Screen?
- How to Split Your Laptop Screen on Windows
- How to Split Your Laptop Screen on Mac
- Using an External Monitor to Create Two Screens
- Best Tools and Accessories for a Dual Screen Setup
- Common Mistakes and How to Avoid Them
- How Splitting Your Screen Boosts Productivity
- Final Thoughts
What Does It Mean to Split Your Laptop Screen?
When people talk about splitting a laptop screen, they usually mean one of two things. The first is dividing your single laptop display into two side-by-side windows. The second is connecting an external monitor so you have two separate screens. Both options are useful, but they work differently. Let us look at each one so you know what to expect.
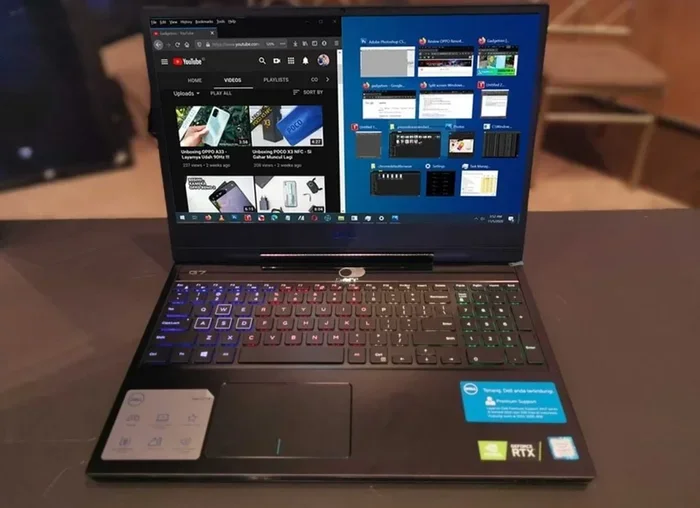
Splitting windows on your laptop screen means placing two apps next to each other. Your display stays the same size, but each app gets half the space. This is great for comparing documents or copying information between files. On the other hand, using an external monitor adds a whole new screen. Your laptop screen stays active, and the new monitor extends your workspace. This gives you much more room to work.
Why Split Your Screen?
There are many reasons to split your screen or add a second display. Here are some of the biggest benefits:
- Better multitasking: You can work on two things at once without constantly switching tabs.
- More screen space: Larger or dual screens reduce clutter and make everything easier to see.
- Faster workflow: Dragging files between windows takes seconds instead of minutes.
- Improved focus: You keep related tasks together instead of bouncing between windows.
- Better for learning: You can watch a lecture on one screen and take notes on the other.
How to Split Your Laptop Screen on Windows
Windows makes it really easy to split your screen. The operating system has built-in tools that work on most laptops. You do not need to download anything special. Let us walk through the different methods you can use.
Method 1: Use Snap Assist
Snap Assist is a Windows feature that lets you split your screen quickly. Here is how it works:
- Open the first app or window you want to use.
- Click the maximize button (the square icon at the top right of the window).
- Drag the window to the left or right edge of your screen.
- Release the mouse button. The screen will split into two halves.
- Click on the other half to choose a second app to fill it.
That is it! Your screen is now split into two windows. You can resize each half by dragging the divider in the middle. This is the fastest way to split your screen on Windows.
Method 2: Use Keyboard Shortcuts
Keyboard shortcuts make splitting your screen even faster. Here are the most useful ones:
- Windows key + Left arrow: Snaps the active window to the left half of the screen.
- Windows key + Right arrow: Snaps the active window to the right half of the screen.
- Windows key + Up arrow: Maximizes the current window.
- Windows key + Down arrow: Minimizes or restores the window.
Try pressing Windows key and the Left arrow at the same time. Watch what happens. The window jumps to the left side, and the right side shows your other open apps. Click the app you want on the right side, and you are done. These shortcuts work on Windows 10 and Windows 11.
Method 3: Use the Taskbar
You can also split your screen using the taskbar. Right-click on an empty space on your taskbar. Look for a setting called “Snap windows.” Make sure it is turned on. Once it is enabled, you can drag any window to the edge of your screen and it will snap into place automatically.
Expert Tip: If you want three or four windows open at once, you can still use Snap Assist. Drag a window to a corner of your screen, and Windows will suggest layouts for filling the rest of your display.
How to Split Your Laptop Screen on Mac
Mac users have great tools too. Apple calls its split screen feature “Split View.” It works a little differently than Windows, but it is just as powerful. Here is how to use it on your MacBook.
Using Split View on macOS
Follow these steps to split your Mac screen into two halves:
- Open the first app you want to use.
- Move your cursor to the green fullscreen button at the top left of the window.
- Hold down the green button. A menu will appear with options.
- Choose “Tile Window to Left of Screen” or “Tile Window to Right of Screen.”
- The first app will snap to one side. Now pick the second app from the list on the other side.
- Click on the second app to fill the remaining half of your screen.
That is all there is to it. Your Mac now shows two apps side by side. You can drag the divider in the middle to make one window bigger and the other smaller. To exit Split View, move your cursor to the top of the screen and click the green button again.
Using Mission Control for Multiple Windows
Mission Control is another great Mac feature. Press F3 or swipe up with three fingers on your trackpad. You will see all your open windows and desktops. You can drag one window to the left side of the screen and another to the right. This is a quick way to arrange your workspace without entering Split View.
Quick Tips for Mac Users
- Use multiple desktops: You can create separate desktops for different tasks. Press Control plus the Up arrow to open Mission Control, then click the plus icon to add a new desktop.
- Adjust the split: Hover over the divider between the two windows and drag it to change the size of each half.
- Keyboard shortcut: On newer Macs, you can use Control plus the Left or Right arrow to switch between desktops quickly.
Using an External Monitor to Create Two Screens
The best way to truly split your laptop into two screens is to connect an external monitor. This gives you a separate display that extends your workspace. It is like having two big screens instead of one small one. Let us look at how to set this up.
What You Need
Before you start, make sure you have the right equipment. Here is a quick checklist:
- An external monitor: Any monitor with an HDMI, DisplayPort, or USB-C input will work.
- The right cable: Match your cable to your laptop and monitor ports. HDMI cables are the most common and affordable.
- A docking station (optional): A USB-C docking station adds multiple ports and makes connections easier.
- A stable surface: You need a desk or stand to hold the external monitor at a comfortable height.
Step-by-Step Setup Guide
Here is how to connect an external monitor to your laptop:
- Turn off your laptop and the external monitor.
- Connect one end of your cable to your laptop and the other end to the monitor.
- Turn on the monitor first, then turn on your laptop.
- Go to your display settings. On Windows, right-click the desktop and choose “Display settings.” On Mac, go to System Settings and click “Displays.”
- Look for the display mode options. Choose “Extend these displays” (Windows) or “Extend” (Mac).
- Arrange the monitors by dragging them in the display settings to match their physical positions on your desk.
Once you extend your display, your laptop screen and the external monitor work together as one big workspace. You can drag windows between them just like they are one screen.
Comparison: Built-in Split vs. External Monitor
| Feature | Built-in Split Screen | External Monitor |
|---|---|---|
| Cost | Free | Requires a monitor ($100+) |
| Screen Size | Same as your laptop | Bigger combined workspace |
| Setup Time | Instant | A few minutes |
| Portability | Works anywhere | Needs a desk and cables |
| Multitasking Space | Good for two windows | Excellent for multiple apps |
| Best For | Quick tasks and light work | Heavy multitasking and productivity |
Which Cable Should You Use?
The cable you need depends on your laptop and monitor ports. Here are the most common options:
- HDMI: The most widely used cable. Works with almost all monitors and many laptops.
- USB-C: Common on newer laptops and modern monitors. Some USB-C cables carry video signals.
- DisplayPort: Offers great quality and is common on desktop monitors.
- VGA or DVI: Older cables that still work but offer lower quality. Avoid these if you can.
Quick Tip: If your laptop only has USB-C ports, get a USB-C to HDMI adapter. It is cheap and solves the problem instantly.
Best Tools and Accessories for a Dual Screen Setup
While you do not need much to split your screen, a few tools can make the experience much better. Here are some of the best accessories for a dual screen setup.
Docking Stations
A docking station is a hub that connects to your laptop and provides multiple ports. You plug one cable into your laptop, and the dock handles everything else. It gives you HDMI outputs, USB ports, Ethernet, and sometimes even charging. Docking stations are perfect for people who work at a desk every day.
Some popular options include the CalDigit TS4, Anker docking stations, and the Belkin Thunderbolt Dock. They range in price from $150 to $400, but they make connecting dual monitors simple and clean.
Monitor Arms and Stands
An external monitor looks and works best when it is at the right height. A monitor arm lets you adjust the position easily. You can raise, lower, tilt, and rotate the screen to suit your needs. This also saves desk space compared to a bulky monitor stand.
Screen Splitter Software
If you want even more control over your windows, try screen splitter software. These tools let you divide your screen into more than two sections. Some popular options include DisplayFusion, FancyZones (built into Windows PowerToys), and Rectangle for Mac. They are free or low-cost and add powerful window management features.
Laptop Stands for Dual Screen Ergonomics
When using an external monitor, raise your laptop screen to eye level too. A laptop stand helps with this. It also improves airflow and keeps your laptop cooler. A good setup has your laptop screen at the same height as the external monitor. This reduces neck strain and makes working more comfortable.
Common Mistakes and How to Avoid Them
Splitting your laptop screen is straightforward, but people make a few common mistakes. Here are the ones to watch out for.
Using the Wrong Display Mode
The biggest mistake is selecting “Duplicate” instead of “Extend” in your display settings. Duplicate mode shows the same image on both screens. It does not give you extra workspace. Always choose “Extend” so your two screens work as one big display.
Ignoring Resolution Settings
Each display has its own resolution. If your external monitor has a different resolution than your laptop, things might look blurry or oversized. Go to your display settings and set the recommended resolution for each screen. This ensures everything looks sharp and clear.
Forgetting to Arrange Monitors Correctly
In your display settings, you will see two rectangles representing your screens. Drag them so they match the physical arrangement on your desk. If the right rectangle is on the left side, your mouse will jump in the wrong direction when you move between screens.
Using Low-Quality Cables
Cheap cables can cause flickering, low resolution, or no signal at all. Invest in a good quality HDMI or USB-C cable. A reliable cable costs a few dollars and saves you a lot of frustration.
Not Adjusting Scaling
If text and icons look too small or too big on one screen, check the scaling settings. On Windows, go to Display Settings and adjust the scale. On Mac, go to Displays and choose the scaled resolution. Set each screen to a comfortable size for your eyes.
How Splitting Your Screen Boosts Productivity
Research shows that using multiple screens can increase productivity by up to 30 percent. When you split your laptop screen, you spend less time switching between windows. You can keep reference material on one side and your main work on the other. This flow state helps you focus and get more done in less time.
Many professionals swear by dual screen setups. Programmers, writers, designers, and data analysts all benefit from having extra screen space. Even students find that splitting their screen helps them take better notes while watching lectures. The productivity gains are real and well worth the small effort it takes to set things up.
Expert Insight: According to a study by the University of Utah, people who use dual monitors complete tasks faster and make fewer errors than those using a single screen. The setup cost is small compared to the time and efficiency gains you get back.
Final Thoughts
So, can you split your laptop into two screens? Absolutely. You have several options depending on your needs and budget. You can use built-in split screen features for quick window arrangements. You can connect an external monitor for a true dual screen experience. Or you can combine both methods for the ultimate workspace.
The process is simpler than most people think. Whether you use Windows or Mac, the tools are already built into your system. A few cables or a docking station are all you need to go further. Start with what you have and upgrade as your needs grow.
Now that you know how to split your laptop screen into two screens, it is time to try it yourself. Pick the method that works best for you and set it up today. You will wonder how you ever worked without it. Happy multitasking!
Frequently Asked Questions
Can I split my laptop screen into two without an external monitor?
Yes, you can. Both Windows and Mac have built-in split screen features that divide your laptop display into two windows. On Windows, use Snap Assist by dragging a window to the edge of your screen. On Mac, use Split View by clicking and holding the green button on any window. These methods are free and work instantly.
What is the best way to connect a second screen to my laptop?
The best way is to use an HDMI cable or a USB-C cable, depending on your laptop’s ports. Most modern monitors use HDMI, and many newer laptops support USB-C video output. If your laptop only has USB-C, a USB-C to HDMI adapter works perfectly. A docking station is also a great option for a clean and simple setup.
Can I use two external monitors with my laptop?
Yes, many laptops support two external monitors. Check your laptop’s graphics card specifications to confirm. You may need a docking station or a display adapter that supports multiple outputs. Once connected, go to your display settings and choose “Extend” to use all three screens together.
Why is my external monitor not showing up on my laptop?
This usually happens because the display mode is set to “Duplicate” or the cable is not connected properly. Try unplugging the cable and plugging it back in. Then go to your display settings and select “Extend these displays.” If it still does not work, try a different cable or port.
Does splitting my laptop screen slow it down?
No, splitting your screen does not slow down your laptop. You are just rearranging windows on the same display. If you connect an external monitor, your laptop may use a little more graphics power, but modern laptops handle dual displays with ease. You should not notice any performance difference.
What is the difference between mirroring and extending my display?
Mirroring shows the same image on both screens. Extending creates a larger workspace where you can move windows between screens. Always choose “Extend” when you want two separate screens for multitasking. Choose “Mirror” only when you want to display the same content on both screens, like during a presentation.
=== CONCLUSION ===
Splitting your laptop into two screens is one of the simplest ways to boost your productivity. You can use built-in Windows or Mac features for quick window arrangements. You can also connect an external monitor for a true dual screen experience. Both methods are easy to set up and cost very little. Start with the tips in this article and see how much easier your work becomes. Remember, splitting your laptop screen into two screens is not just about having more space. It is about working smarter, not harder. Try it today and feel the difference.