How Can I Extend My Wifi Range With Wired Connection
Extending your WiFi range with a wired connection is one of the most reliable ways to eliminate dead zones and boost broadband speed across your home. By using an Ethernet cable to connect a secondary router or access point to your main network, you get stable, low-latency coverage that wireless extenders simply cannot match. This guide walks you through every step, from choosing the right equipment to setting up your wired backhaul for maximum WiFi coverage.
Extending your WiFi range with a wired connection is one of the smartest upgrades you can make for your home network. Whether you have a large house, thick walls, or a backyard office, a wired setup delivers reliable speed where wireless signals fall short. If you have ever struggled with buffering in the garage or slow internet in the basement, this guide is for you.
Many people reach for a WiFi extender or repeater first. These devices are cheap and easy to set up. But they cut your bandwidth in half and often create unstable connections. A wired approach solves these problems completely. You get full speed, low latency, and rock-solid coverage. In this article, we will walk you through everything you need to know about extending your network range using cables and physical hardware.
Before we dive in, it helps to understand what we mean by a wired connection. Simply put, it means using a physical Ethernet cable or a wired backhaul link to connect a secondary device to your main router. This could be another router set up as an access point, a dedicated wireless access point, or even a mesh node connected via cable. The result is a strong, stable network that covers every corner of your property.
## Why Wired Connections Are Best for Extending WiFi Range
Wireless extenders are convenient, but they come with serious limitations. A wired connection bypasses these problems entirely and gives you the best possible performance. Let us break down why going wired is the smarter choice.
### Speed and Bandwidth
When a wireless extender receives your WiFi signal, it has to rebroadcast it on the same radio. This process cuts your available bandwidth significantly. With a wired connection, the Ethernet cable carries the full speed of your internet plan to the secondary device. Your devices connected to the extended network enjoy the same fast speeds as those near your main router.
### Stability and Latency
Wireless connections are subject to interference from microwaves, baby monitors, and neighboring networks. A wired backhaul eliminates this interference completely. You get a stable LAN connection that does not drop or fluctuate. This is especially important for gaming, video calls, and streaming 4K content.
### Coverage Consistency
One of the biggest complaints about WiFi extenders is inconsistent coverage. You might get a strong signal in one spot and a weak one just a few feet away. A wired access point provides uniform coverage in its range. Every device connected to it gets the same quality of service.
### Lower Latency for Gaming and Streaming
If you are a gamer or a streamer, latency matters a lot. Wireless repeaters add milliseconds of delay because they have to translate the signal twice. A wired connection keeps latency as low as physically possible. This means smoother gameplay and higher quality streams.
## What You Need to Get Started
Setting up a wired WiFi extension is simpler than most people think. You do not need expensive equipment or advanced technical skills. Here is everything you will need before you begin.
### Ethernet Cable
This is the backbone of your setup. You will need a cable long enough to reach from your main router to the location where you want to extend coverage. Cat5e cables support speeds up to 1 Gigabit per second, while Cat6 cables handle even more bandwidth. For most homes, Cat5e is perfectly sufficient.
### Secondary Router or Access Point
You need a second device to rebroadcast your network in the extended area. You can use an old router you have lying around, or you can purchase a dedicated wireless access point. Many people also repurpose a second router by putting it in access point mode. This turns it into a simple signal broadcaster.
### Basic Networking Knowledge
You do not need to be a networking expert, but you should feel comfortable plugging in cables and accessing a router settings page. Most modern routers have simple web interfaces that you can reach by typing an IP address into your browser. We will walk you through the process step by step.
### Optional: Powerline Adapter
If running a long Ethernet cable through your walls is not practical, a powerline adapter is a great alternative. It uses your home’s existing electrical wiring to carry the network signal. While not as fast as a direct Ethernet connection, it is much more stable than a purely wireless setup. This is a popular choice for extending WiFi coverage to garages, sheds, or upper floors.
## Step-by-Step Guide to Extending WiFi With a Wired Connection
Now that you have your equipment ready, let us walk through the setup process. Follow these steps carefully, and you will have a fully extended network in under an hour.
### Step 1: Plan Your Network Layout
Before you start plugging in cables, take a moment to plan your layout. Walk around your home and identify the areas with weak or no signal. These are your internet dead zones. Decide where you want to place the secondary router or access point. The ideal spot is halfway between your main router and the dead zone, but close enough that the Ethernet cable can reach.
### Step 2: Connect the Ethernet Cable
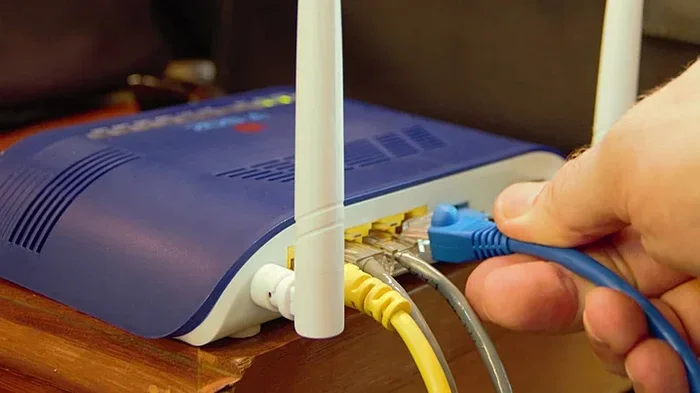
Run your Ethernet cable from one of the LAN ports on your main router to the WAN or LAN port on your secondary router. If you are using an access point, connect the cable to the designated Ethernet port. Make sure the connection is secure at both ends. A loose cable is one of the most common causes of setup failures.
### Step 3: Configure the Secondary Device
This is the most important step. You need to set up your secondary router or access point correctly. Start by connecting a computer to the device via another Ethernet cable or through WiFi. Open a web browser and go to the device’s admin panel. Look for the settings page, which is usually accessible at an address like 192.168.1.1 or 192.168.0.1.
### Step 4: Set the Secondary Router to Access Point Mode
If you are using a secondary router, change its operating mode to access point or bridge mode. This prevents double NAT, which can cause serious connectivity problems. Double NAT happens when two routers both perform network address translation, and it can block devices from accessing the internet properly. Most routers have a simple toggle or dropdown menu for this setting.
### Step 5: Match Your WiFi Settings
Set the SSID (network name) and password on the secondary device to match your main router exactly. This creates a seamless experience where your devices automatically switch between the two access points without you noticing. Use the same security type (WPA3 or WPA2) and the same password. This step is crucial for a smooth home network setup.
### Step 6: Choose the Right WiFi Channel
To avoid interference between your two devices, set them to different but non-overlapping WiFi channels. For the 2.4 GHz band, use channels 1, 6, or 11. For the 5 GHz band, you have many more options. Use a WiFi analyzer app on your phone to check which channels are least congested in your area. This simple step can dramatically improve your network range and connection stability.
### Step 7: Test Your Setup
Once everything is configured, walk around your home with a phone or laptop and test the signal in each room. Check the speed in areas that previously had weak coverage. You should see a significant improvement. If something is not working, double-check your cable connections and make sure both devices are using the same SSID and password.
## Common Mistakes to Avoid
Even with a clear plan, mistakes can happen. Here are the most common errors people make when extending their WiFi with a wired connection, and how to avoid them.
### Forgetting to Disable DHCP on the Secondary Router
DHCP is the system that assigns IP addresses to devices on your network. When you have two routers both running DHCP, they can conflict with each other. This causes devices to get incorrect addresses and lose connectivity. Always disable DHCP on the secondary router and let your main router handle all address assignments.
### Using Too Long of a Cable Run
Ethernet cables have a maximum effective length of about 100 meters (328 feet). Beyond that, signal degradation becomes a real problem. If you need to cover a longer distance, consider using a powerline adapter or adding a midpoint switch to boost the signal.
### Ignoring Firmware Updates
Old firmware can cause compatibility issues and security vulnerabilities. Before you set up your secondary device, check the manufacturer’s website for the latest firmware update. A quick update can save you hours of troubleshooting later.
### Placing the Access Point in a Poor Location
The location of your secondary router or access point matters a lot. Do not hide it inside a closet or behind a thick wall. Place it in an open area, ideally elevated on a shelf or mounted on a wall. Good placement ensures the best possible WiFi signal in the extended area.
## Wired vs. Wireless Range Extension
It is helpful to compare wired and wireless extension methods side by side. This table shows the key differences and helps you decide which approach is right for you.
| Feature | Wired Connection | Wireless Extender |
|—|—|—|
| Speed | Full bandwidth maintained | Bandwidth cut by up to 50% |
| Stability | Highly stable, no interference | Prone to interference and drops |
| Latency | Very low latency | Added latency from signal rebroadcasting |
| Setup Complexity | Moderate | Easy |
| Cost | Moderate (cable + access point) | Low (extender only) |
| Best For | Large homes, gaming, streaming | Small spaces, temporary setups |
As you can see, a wired connection wins in almost every performance category. The trade-off is slightly more effort during setup. But the results are well worth it. For a deeper look at outdoor range challenges, you might also want to check how to extend your WiFi to a shed or outbuilding, which often relies on similar wired techniques.
## Expert Tips for Maximum Coverage
Getting your basic setup working is just the beginning. These expert tips will help you squeeze every bit of performance out of your wired extension.
### Use a Dedicated Access Point Instead of a Second Router
Dedicated access points are designed for this exact purpose. They are simpler to configure and often perform better than repurposed routers. Brands like Ubiquiti, TP-Link, and Netgear make excellent access points at reasonable prices. These devices are specifically built to extend WiFi coverage in a wired setup.
### Consider a Mesh System with Wired Backhaul
If you are building a new network or upgrading, consider a mesh WiFi system that supports wired backhaul. Systems like Google Nest WiFi, Eero Pro, and Netgear Orbi let you connect mesh nodes to each other using Ethernet cables. This gives you the seamless roaming experience of mesh networking with the speed and stability of a wired connection. It is the best of both worlds.
### Add an External Antenna to Your Router
If your main router has detachable antennas, upgrading to high-gain antennas can significantly boost your signal. This is especially helpful if your main router is in a central location and needs to push signal to distant parts of your home. You can add an external antenna to your router to improve overall coverage before even adding a secondary device.
### Use Cat6 or Higher for Future-Proofing
While Cat5e handles gigabit speeds today, Cat6 and Cat6a cables support much higher bandwidths. If you are running new cable, invest in Cat6 or better. This ensures your wired setup can handle faster internet speeds as they become available. Future-proofing your cabling is a smart move that saves time and money down the road.
### Keep Your Main Router in a Central Location
No matter how good your extension setup is, your main router should be as central as possible. Walls, floors, and large metal objects all weaken WiFi signals. A central placement gives your wired access point the strongest possible input signal, which translates to better output in the extended area.
### Monitor Your Network Performance Regularly
After your setup is complete, keep an eye on performance. Use a WiFi analyzer app to check signal strength and speed in different areas. If you notice a drop in performance, check your cable connections and router settings. Regular monitoring helps you catch problems early before they affect your daily use.
## When to Consider Professional Help
Most homeowners can handle a wired WiFi extension setup on their own. But there are situations where professional help makes sense. If your home has complex wiring, thick concrete walls, or unusual layouts, a professional network installer can design a solution tailored to your specific needs. They can also run cables through walls and ceilings for a clean, invisible setup.
If you are unsure about any step in the process, do not hesitate to consult a professional. A small investment in expert help can save you from frustrating troubleshooting and ensure your network performs at its best from day one.
## Final Thoughts
Extending your WiFi range with a wired connection is one of the most effective upgrades you can make for your home network. It delivers full speed, rock-solid stability, and consistent coverage throughout your property. While it requires a bit more effort than plugging in a wireless extender, the results are far superior.
Whether you use a simple Ethernet cable to connect a secondary access point or invest in a mesh system with wired backhaul, the key is to plan your layout carefully and configure your devices correctly. Avoid common pitfalls like double NAT and DHCP conflicts, and place your access points in optimal locations.
Take the time to set up your wired extension properly, and you will enjoy fast, reliable internet in every room and every corner of your home. Say goodbye to dead zones and hello to seamless connectivity. Your wired setup will serve you well for years to come.
Key Takeaways
- Wired connections deliver superior speed and stability compared to wireless extenders and repeaters.
- You need an Ethernet cable, a secondary router or access point, and basic networking knowledge to get started.
- Powerline adapters offer a great alternative when running a physical cable is not practical.
- Proper router placement and configuration are essential for optimal network range and connection stability.
- Avoid common mistakes like double NAT and mismatched settings that can slow down your setup.
- Wired backhaul provides consistent bandwidth even in areas far from your main router, making it ideal for smart home devices.
Frequently Asked Questions
Can I extend my WiFi range without running a cable through my walls?
Yes. A powerline adapter uses your home’s electrical wiring to carry the network signal, so you do not need to run Ethernet cables through walls. While not as fast as a direct cable connection, it is a practical alternative for extending coverage to distant rooms or outbuildings.
What is the best Ethernet cable length for extending WiFi range?
Ethernet cables work reliably up to 100 meters (about 328 feet). For most home setups, a 25- to 50-foot cable is more than enough. If you need to cover longer distances, consider using a powerline adapter or adding a network switch as a midpoint booster.
Do I need a second router, or can I use a dedicated access point?
A dedicated access point is often the better choice. It is designed specifically to rebroadcast your network signal and is simpler to configure than repurposing an old router. Many modern access points also support advanced features like band steering and seamless roaming.
Will a wired WiFi extension slow down my internet speed?
No. A wired connection maintains your full internet speed because the Ethernet cable carries the signal without any loss from wireless rebroadcasting. In fact, a wired extension typically improves speed in the extended area compared to a wireless extender.
Can I use this setup to extend WiFi to my backyard or garage?
Absolutely. Running an Ethernet cable to a weatherproof access point in your garage or backyard is an excellent way to eliminate dead zones in outdoor areas. For tips on extending WiFi to sheds and outbuildings, check out our guide on extending WiFi to your shed.
What is the difference between a WiFi extender and a wired access point?
A WiFi extender receives and rebroadcasts your wireless signal, which cuts bandwidth in half. A wired access point connects to your router via an Ethernet cable and rebroadcasts the signal at full speed. The wired approach is faster, more stable, and far more reliable for consistent coverage.