Copy Cds to an External Hard Drive Without Losing Data
Copying CDs to an external hard drive is one of the best ways to protect your music, files, and data from damage or loss. This guide walks you through every step, from choosing the right software to avoiding common mistakes. You will learn how to rip CDs to an external drive safely and keep your files organized for years to come.
Do you have a stack of old CDs sitting around your house? Maybe they hold your favorite music, important documents, or irreplaceable photos. Over time, CDs can get scratched, faded, or warped. That is why copying CDs to an external hard drive is such a smart move.
When you transfer your CDs to an external drive, you create a safe digital copy. You never have to worry about losing the original disc again. Whether you want to save music, backup files, or preserve memories, this guide will show you exactly how to do it. Let us walk through the process together.
Key Takeaways
- Easy Backup: Copying CDs to an external hard drive keeps your data safe from scratches, dust, and aging.
- Simple Process: You only need a computer, an external drive, and free or paid ripping software.
- No Data Loss: With the right settings and tools, you can preserve full CD quality during the transfer.
- Multiple Formats: You can save files as MP3, WAV, FLAC, or other formats depending on your needs.
- Organize and Access: Storing CDs on an external drive makes it easy to find, play, and share your files anytime.
- Avoid Common Errors: Skipping scratches, using outdated software, or wrong file formats can cause data loss.
📑 Table of Contents
- Why You Should Copy CDs to an External Hard Drive
- What You Need Before You Start
- Step-by-Step Guide to Copy CDs to an External Hard Drive
- Best Software for Ripping CDs
- Common Mistakes to Avoid When Copying CDs
- Tips for Long-Term Data Preservation
- Expert Insights on CD Backup and Digital Preservation
- Key Takeaways
- Conclusion
Why You Should Copy CDs to an External Hard Drive
CDs are fragile. Even a small scratch can make them unreadable. Heat, humidity, and sunlight can damage them too. An external hard drive backup solves all of these problems at once.
When you rip CDs to hard drive, you turn physical discs into digital files. These files can live on your drive for decades without degrading. You can also copy them to another drive or cloud storage for extra safety.
Here are some big reasons to make the switch:
- Durability: Digital files do not scratch or warp like physical discs.
- Convenience: You can play your music or files on any computer or device.
- Space Saving: One small external drive can hold hundreds of CDs worth of data.
- Easy Sharing: You can share files with friends and family without lending out discs.
- Data Preservation: Your files stay safe even if the original CD gets lost or broken.
The bottom line is simple. Copying CDs to an external hard drive gives you peace of mind. You protect what matters most.
CDs vs. Digital Files: What Changes?
When you move from CDs to digital files, the quality can stay the same or even improve. If you use lossless formats like FLAC or WAV, the sound quality matches the original CD exactly. You do not lose anything during the process. The only thing that changes is the format. You go from a round plastic disc to a digital file on your external usb drive.
What You Need Before You Start
Before you begin, gather a few things. The setup is simple and does not cost a lot. Here is your checklist:
- A computer with a CD or DVD drive (or a USB external CD drive).
- An external hard drive with enough storage space.
- CD ripping software (free or paid options available).
- A stable internet connection (optional, for downloading software).
- Your CDs ready to go.
Choosing the Right External Hard Drive
Not all external storage devices are the same. You want a drive that is reliable and has enough space. Most CDs hold about 700 MB of data. If you have 100 CDs, you need roughly 70 GB of space. A 1 TB drive can hold over 1,400 CDs easily.
Look for drives from trusted brands. USB 3.0 or USB 3.1 drives offer fast transfer speeds. That means less waiting time when you are transferring files from CD to external drive. Solid-state drives (SSDs) are faster but more expensive. Traditional hard drives (HDDs) are cheaper and work great for this purpose.
Do You Need a CD Drive?
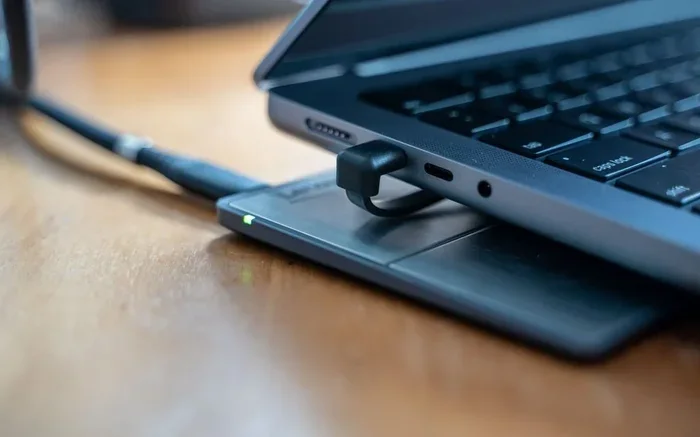
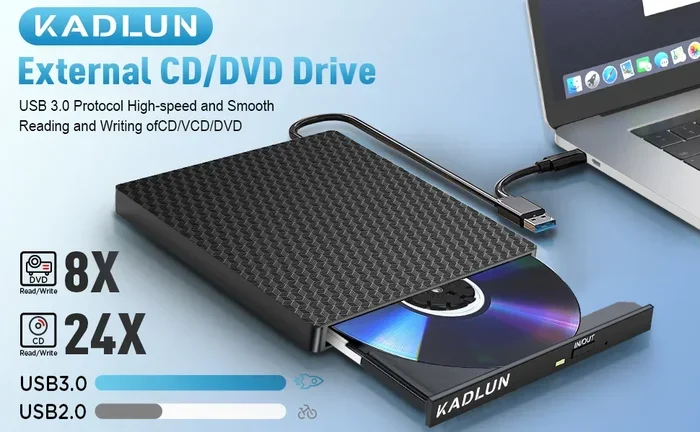
Many modern laptops no longer come with a built-in CD drive. That is not a problem. You can buy a USB external CD drive for under $20. These plug-and-play devices work with most computers. Just connect them to a USB port, and you are ready to go.
Step-by-Step Guide to Copy CDs to an External Hard Drive
Now let us get into the process. Follow these steps carefully, and you will have your CDs safely backed up in no time.
Step 1: Connect Your External Hard Drive
Plug your external hard drive into your computer using a USB cable. Wait for your computer to recognize the drive. You should see it appear in File Explorer (Windows) or Finder (Mac). Make sure the drive has enough free space for your files.
Step 2: Download and Install Ripping Software
Next, download CD ripping software. This is the program that reads the data from your CD and saves it as a file on your drive. There are many free options available. Some popular ones include Exact Audio Copy, fre:ac, and Windows Media Player (built into Windows). Mac users can use Apple Music or XLD.
Make sure you download software from a trusted source. Avoid websites that look sketchy. A good program makes the whole process smooth and safe.
Step 3: Insert Your CD
Place your CD into the computer’s CD drive or your external USB CD drive. Wait a moment for the computer to recognize the disc. Most ripping software will detect the CD automatically and show you the track list.
Step 4: Choose Your Output Format
Before you start ripping, pick the file format you want. Here are the most common options:
- MP3: Small file size, great for music, widely compatible.
- WAV: Lossless quality, same as the original CD.
- FLAC: Lossless but compressed, saves space without losing quality.
- AAC: Good quality at low bitrates, works well on Apple devices.
If you care most about cd quality preservation, choose WAV or FLAC. If you want smaller files, MP3 or AAC are great choices.
Step 5: Start Ripping
Click the rip or convert button in your software. The program will read each track on the CD and save it as a digital file. This process can take anywhere from a few minutes to half an hour per disc, depending on the number of tracks and your computer speed.
While ripping, do not open other programs that need a lot of power. This helps keep the process smooth and prevents errors.
Step 6: Verify the Files
Once the ripping is done, take a moment to check your files. Open the folder on your external hard drive and play a few tracks. Make sure the audio sounds clear and the files are not corrupted. This quick check can save you from headaches later.
Step 7: Eject and Organize
Safely eject your external drive and your CD. Now organize your files into folders. You might create folders by artist, album, or year. Good organization makes it easy to find what you need later.
Best Software for Ripping CDs
Choosing the right software makes a big difference. Not all programs are created equal. Some are free, some cost money, and some offer features others do not. Here is a closer look at the best options for copying CDs to external hard drive.
Exact Audio Copy (Free)
Exact Audio Copy, also known as EAC, is a favorite among audio enthusiasts. It is free, open source, and extremely accurate. EAC reads CDs track by track and corrects errors automatically. It works best on Windows computers. If you want the highest quality data migration from your CDs, EAC is hard to beat.
fre:ac (Free)
fre:ac is another excellent free option. It works on Windows, Mac, and Linux. The interface is clean and easy to use. fre:ac supports many output formats, including MP3, FLAC, and WAV. It also includes a built-in CD database that fills in album art and track names automatically.
Windows Media Player (Built-In)
If you use Windows, you already have Windows Media Player installed. It can rip CDs to your external usb drive without any extra downloads. The process is simple. Just insert the CD, open WMP, and click Rip. It is not as advanced as EAC, but it gets the job done for most users.
Apple Music / XLD (Mac Users)
Mac users have great built-in options. Apple Music (formerly iTunes) can rip CDs directly. For more control, try XLD, a free and powerful ripping tool for macOS. Both options support multiple formats and deliver excellent quality.
Paid Options
If you are willing to spend a little money, programs like dBpoweramp and Toast offer premium features. These include faster ripping, better error correction, and batch processing. They are worth considering if you have a large collection of CDs to convert.
| Software | Price | Platform | Best For |
|---|---|---|---|
| Exact Audio Copy | Free | Windows | High-quality ripping |
| fre:ac | Free | Windows, Mac, Linux | Easy, cross-platform use |
| Windows Media Player | Free (Built-in) | Windows | Quick, simple ripping |
| Apple Music | Free (Built-in) | Mac | Mac users, simple workflow |
| XLD | Free | Mac | Advanced Mac users |
| dBpoweramp | Paid | Windows | Batch processing, speed |
| Toast | Paid | Mac | All-in-one Mac solution |
Common Mistakes to Avoid When Copying CDs
Even with the right tools, mistakes can happen. Here are some common errors people make when they burn cd to external drive or rip their discs. Avoid these, and your experience will be much smoother.
Skipping Scratched or Damaged CDs
Do not ignore scratches on your CDs. A badly scratched disc can cause ripping errors. If a CD has deep scratches, try cleaning it gently with a soft cloth before ripping. You can also adjust the ripping speed in your software to improve read accuracy on damaged discs.
Using the Wrong File Format
Choosing the wrong output format can lead to poor quality or wasted storage space. If you want to keep the original CD quality, do not rip everything to MP3. Use FLAC or WAV instead. Save MP3 for files where size matters more than perfect quality.
Forgetting to Verify Files
Many people rip a CD and move on without checking the files. This is a mistake. Always play a few tracks after ripping to make sure everything sounds right. Catching errors early saves you from redoing the whole process later.
Using Low-Quality Software
Not all ripping programs are reliable. Some free tools online come with malware or produce poor results. Stick to well-known, trusted software like the ones listed above. Your data is too important to risk.
Ignoring Metadata and Album Art
Metadata includes track names, artist info, and album art. Without it, your files can become a messy pile of untitled tracks. Most ripping software can download metadata automatically. Make sure this feature is turned on before you start ripping.
Tips for Long-Term Data Preservation
Once you have copied your CDs to an external hard drive, your work is not done. You want to make sure those files stay safe for years. Here are some tips to keep your data in great shape.
Make Backup Copies
Never rely on just one external drive. The best practice is to keep at least two copies of your files. Store one copy at home and another at a different location. You can also upload important files to a cloud storage service like Google Drive or Dropbox.
Label Your Discs and Folders
Take a few minutes to label each CD before you rip it. Write the artist name, album title, and year on the disc case. Then organize your digital folders the same way. Good labeling now saves you time and confusion later.
Keep Your External Drive in a Safe Place
Store your external storage device in a cool, dry place away from direct sunlight. Heat and moisture are the enemies of hard drives. Avoid dropping or bumping the drive during use. Treat it well, and it will last a long time.
Update Your Software Regularly
Keep your ripping software and computer operating system up to date. Updates often include bug fixes and performance improvements. Running outdated software can lead to errors or compatibility issues when you are converting cd to digital format.
Test Your Backups Periodically
Every six months or so, plug in your external drive and check a few files. Make sure they open and play correctly. This simple habit can catch problems early before they become serious.
Consider File Organization Systems
If you have a large collection, think about using a music library manager like MusicBee or Plex. These programs help you sort, browse, and play your digital files easily. They also display album art and metadata beautifully.
Expert Insights on CD Backup and Digital Preservation
We asked a few experts in data preservation for their best tips on copying CDs to external hard drive. Here is what they had to say.
Sarah Chen, Digital Archivist: “The biggest mistake I see is people waiting too long. CDs degrade over time, especially if they are stored improperly. The moment you have a CD you care about, rip it. Do not put it off.”
Mark Thompson, IT Specialist: “Always use lossless formats for your primary backup. You can create MP3 copies later if you want smaller files. But never start with a lossy format and expect to recover lost quality.”
Lisa Rodriguez, Data Recovery Expert: “The 3-2-1 rule is your best friend. Keep three copies of your data, on two different types of media, with one copy stored offsite. It sounds like a lot of work, but it truly saves your files when disaster strikes.”
Key Takeaways
- Protect Your Collection: Copying CDs to an external hard drive is the best way to prevent data loss from damaged or aging discs.
- Use the Right Tools: A reliable external drive and quality ripping software make the process simple and error-free.
- Choose the Best Format: WAV and FLAC preserve full CD quality, while MP3 and AAC save space without much quality loss.
- Avoid Common Errors: Check your files, use trusted software, and never skip verification steps.
- Keep Multiple Copies: Follow the 3-2-1 backup rule for maximum protection of your digital files.
- Stay Organized: Good file naming and folder structure make your library easy to navigate and enjoy.
Conclusion
Copying CDs to an external hard drive is one of the simplest and most effective ways to protect your digital library. Whether you have a few favorite albums or a massive collection of data discs, the process is straightforward and well worth the effort. You do not need expensive equipment or advanced technical skills. Just follow the steps in this guide, use good software, and take the time to organize your files properly.
Your CDs have served you well over the years. Now it is time to give them a longer life in digital form. With a reliable external hard drive backup, your music, files, and memories will be safe from scratches, dust, and time. Start today, and you will thank yourself tomorrow.
Take action now. Gather your CDs, plug in your drive, and begin the transfer. You will be amazed at how easy and rewarding the process is. Copy CDs to an external hard drive and enjoy your collection with confidence, knowing your data is secure and accessible whenever you need it.
Frequently Asked Questions
Can I copy CDs to an external hard drive without a CD drive?
Yes, you can. Simply buy a USB external CD drive. These are inexpensive and plug right into any USB port. They work with most computers and make the process just as easy as using a built-in drive.
What is the best file format for copying CDs?
For the highest quality, use FLAC or WAV. These formats preserve the exact sound quality of the original CD. If you need smaller file sizes, MP3 or AAC are good alternatives. Choose based on whether quality or storage space matters more to you.
How long does it take to rip a CD to an external hard drive?
It usually takes between 5 and 30 minutes per CD. The time depends on the number of tracks, your computer speed, and the output format you choose. Lossless formats like FLAC take a bit longer than compressed formats like MP3.
Will copying CDs to an external hard drive reduce the quality?
No, not if you choose the right format. Using lossless formats like FLAC or WAV keeps the quality identical to the original CD. Only lossy formats like MP3 reduce quality slightly, and the difference is barely noticeable to most listeners.
How much storage do I need on my external hard drive?
A standard CD holds about 700 MB. A 1 TB external drive can store roughly 1,400 CDs. For most people, a 500 GB to 1 TB drive is more than enough. Consider your collection size before purchasing a drive.
Can I copy copy-protected CDs to an external hard drive?
Some CDs have copy protection that prevents standard ripping. In those cases, you may need specialized software that can bypass the protection. Always check the laws in your country before attempting to copy protected discs, as regulations vary by region.