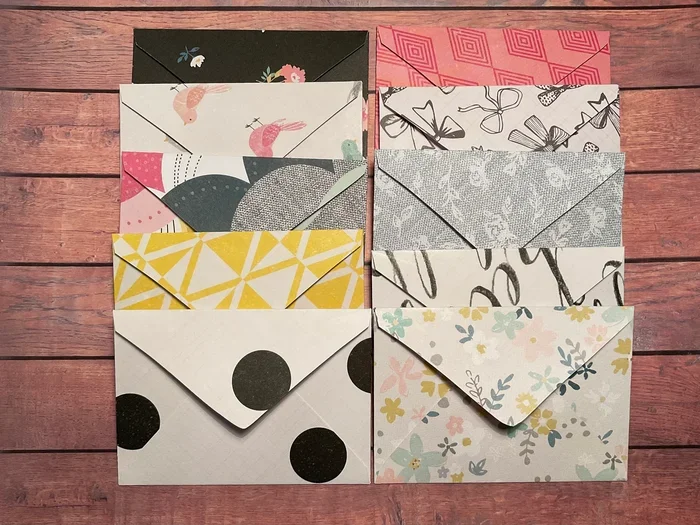
Can You Make Envelopes Out Of Cardstock Easily At Home
Can You Make Envelopes Out Of Cardstock? Absolutely. With just a few simple tools and a sheet of sturdy cardstock, you can craft custom envelopes that look store-bought but feel personal. This guide walks you through every step, from choosing the right paper weight to sealing with style. You’ll learn quick templates, design ideas, and common pitfalls to avoid.
There is something deeply satisfying about pulling a handwritten letter out of a handmade envelope. The feel of the paper, the slight texture, and the knowledge that someone took the time to create it by hand all add a layer of care that store-bought envelopes simply cannot match. Can You Make Envelopes Out Of Cardstock? Yes, and the process is easier than you might think. Cardstock, with its sturdy weight and smooth finish, turns into beautiful envelopes that protect your notes and cards. In this guide, you will learn everything you need to craft your own envelopes at home, from picking the right material to adding finishing touches that wow.
Whether you are a paper crafting beginner or a seasoned DIY enthusiast, making envelopes from cardstock opens up a world of creative possibilities. You can match the envelope to a specific invitation, create a set for a wedding, or simply send a letter that feels special. The best part is that you likely already have most of the tools at home. A few sheets of cardstock, some glue, and a ruler are all it takes to get started. Let us dive into the details and make your first homemade envelope together.
Key Takeaways
- Cardstock makes durable, elegant envelopes: Its thicker weight holds shape and resists tearing, perfect for handmade cards and gifts.
- Basic supplies are all you need: A ruler, bone folder, glue stick, and scissors are enough to start.
- You can use free templates or draw your own: Custom sizing ensures a perfect fit for any card or letter.
- Design options are endless: Patterns, liners, wax seals, and edge painting turn simple paper into art.
- Avoid common mistakes like wrong paper weight: Too thin tears; too thick won’t fold neatly.
- Store and reuse envelopes easily: Flatten them carefully and keep them in a craft binder for next time.
📑 Table of Contents
Why Cardstock Is Perfect for DIY Envelopes
Cardstock is the go-to paper for envelope making because it strikes the ideal balance between stiffness and foldability. Unlike regular printer paper, cardstock holds its shape and can carry heavier contents without buckling. When you ask yourself, Can You Make Envelopes Out Of Cardstock, the answer is a resounding yes, and here is why cardstock works so well.
What Is Cardstock?
Cardstock is a thick, heavy paper that is thicker than standard writing paper but thinner than cardboard. It usually ranges from 65 lb to 110 lb weight, which means it is sturdy enough to form an envelope yet flexible enough to fold cleanly. You can find cardstock in a rainbow of colors, textures, and finishes, from matte to glossy. This variety makes it a favorite for paper crafters, scrapbookers, and anyone who wants to add a personal touch to their mail.
Weight and Texture Matter
The weight of cardstock determines how well your envelope will hold up. A 65 lb cardstock is lightweight and easy to fold, making it perfect for everyday letters and greeting cards. An 80 lb or 110 lb cardstock is thicker and more rigid, ideal for heavier items like small photographs or gift cards. Texture also plays a role. Smooth cardstock gives a sleek, modern look, while textured cardstock adds a tactile, handcrafted feel. When choosing cardstock for envelopes, hold a sheet up to the light. If you can see your hand shadow through it, it is too thin. You want paper that blocks light but still bends without cracking.
Why It Holds Up Over Time
Cardstock envelopes resist tearing and bending, which means your letters arrive in pristine condition. The fibers in cardstock are tightly packed, giving it strength that regular paper lacks. This durability makes cardstock envelopes a smart choice for mailing, gifting, or keeping as keepsakes. They also hold embellishments well, so you can add stickers, stamps, or edge painting without the paper falling apart.
Gather Your Materials and Tools
Before you start cutting and folding, gather everything you need. Having all your materials ready makes the process smooth and enjoyable. The list is short, and you probably already own most of these items.
Essential Craft Supplies
- Cardstock: Choose a weight between 65 lb and 110 lb. Pick a color or pattern that matches your card or letter.
- Scissors: Sharp craft scissors give clean cuts. Fiskars or similar brands work great.
- Ruler: A clear acrylic ruler helps you measure and score lines accurately.
- Pencil: A regular pencil for marking measurements. Use a light hand so marks erase easily.
- Bone folder: This tool creates crisp fold lines. You can substitute a butter knife or the back of a spoon.
- Glue stick or double-sided tape: Both work well. Glue sticks are easy to use and dry clear. Double-sided tape gives a neat, invisible seam.
- Envelope template: You can print a free template or draw your own. More on this below.
Helpful Extras
While not required, a few extra items can elevate your envelopes. A paper trimmer gives perfectly straight cuts in seconds. A cutting mat protects your table and extends the life of your blade. Embossing tools, edge paint, and wax seals add decorative touches that make your envelopes truly unique. If you enjoy digital design, you might explore the advantage and disadvantages of virtual instrumentation, which can help you decide whether software-based template design fits your crafting workflow.
Step-by-Step Guide to Making Envelopes from Cardstock
Now that you have your supplies, let us make an envelope. Follow these simple steps, and you will have a finished envelope in under ten minutes. The process is the same whether you use a template or freehand your design.
Measure and Cut the Cardstock
Start by deciding the size of your envelope. A standard A2 envelope (4.375 by 5.5 inches) fits a half-sheet greeting card perfectly. For a square card, aim for a 5 by 5 inch envelope. Here is a simple way to measure.
- Place your card or letter on the cardstock.
- Add 1 inch to the height and 1 inch to the width for overlap and flap.
- Mark the dimensions with a pencil.
- Cut along the lines with sharp scissors.
For example, if your card is 4 by 5.5 inches, cut a piece that is 5 by 6.5 inches. This extra allowance ensures the envelope closes snugly without bulging.
Score and Fold the Flaps
Scoring prevents the cardstock from cracking at the fold lines. Place your ruler along each fold line and gently run the bone folder over it. Then fold each side inward, creasing firmly. The two short sides become the side flaps, and the longer bottom edge becomes the bottom flap. The top edge is your envelope opening.
Glue and Seal
Apply a thin line of glue or a strip of double-sided tape to the side flaps. Press them onto the bottom flap, holding for a few seconds until the bond sets. For a cleaner look, use a glue stick rather than liquid glue, which can warp the cardstock. If you prefer a removable seal, a small piece of washi tape works perfectly and lets the recipient open the envelope without damage.
Add a Flap Closure
To make a triangular flap, measure and cut a small triangle from the top corners of the envelope. Fold the triangle down and glue or tape it in place. This classic envelope style adds a polished look and keeps the contents secure during mailing.
Creative Design Ideas for Cardstock Envelopes
Once you master the basic envelope, you can explore endless design possibilities. Cardstock is a wonderful canvas for creativity, and small touches can transform a simple envelope into a work of art.
Patterned Paper and Liner Options
Use patterned cardstock for the outer envelope and a solid color for the liner. To add a liner, cut a piece of decorative paper slightly smaller than the envelope opening, glue it to the inside of the bottom flap, and let it dry. The liner hides the glue seam and adds a pop of color. You can also layer two patterns for a mixed-media effect. When choosing patterns, remember that the 7 basic elements of photography like line, shape, and texture can inspire your layout and color choices, helping you create envelopes that feel visually balanced and harmonious.
Adding a Personal Touch
Consider these fun additions:
- Wax seal: Melt a wax disc in a seal mold and press it onto the flap for a classic, elegant finish.
- Edge painting: Use a small brush or an edge paint pen to color the raw edges of the cardstock. Gold and silver are popular choices.
- Stamps and stickers: Add a stamp or a die-cut sticker to the front for a quick decorative boost.
- Hand-lettered address: Use a fine-tip pen to write the recipient’s address directly on the envelope. This personal touch makes the mail feel special.
Matching Envelopes to Occasions
Different events call for different styles. For weddings, use soft pastel cardstock with a subtle texture. For birthdays, choose bright colors and fun patterns. For thank-you notes, a simple white or cream cardstock with a wax seal feels classic and sincere. You can also create a set of matching envelopes for a scrapbook or a memory box. The key is to let the cardstock weight and color set the tone.
Common Mistakes to Avoid
Even simple crafts have pitfalls. Knowing what to avoid saves time and frustration. Here are the most common mistakes when making envelopes from cardstock.
Wrong Paper Weight
Using paper that is too thin causes the envelope to tear easily. Paper that is too thick, like heavy cover stock, resists folding and can crack along the score lines. Stick to cardstock in the 65 lb to 110 lb range for the best results. If you are unsure, test a small scrap by folding it several times. If it stays flat and does not crack, it is a good choice.
Incorrect Sizing
An envelope that is too small will not close. One that is too large lets the contents slide around and may arrive damaged. Always measure your card or letter first, and add the proper allowance. A quick tip is to place the card on the cardstock and physically hold the flaps in position before gluing. This dry fit ensures a perfect fit every time.
Glue Mishaps
Too much liquid glue can warp the cardstock and leave visible bumps. Use a glue stick for even coverage, or apply double-sided tape in a thin strip. If you do use liquid glue, use a toothpick to spread it thinly and evenly. Let the envelope dry completely under a light weight, like a book, before handling it.
Expert Tips for Stunning Homemade Envelopes
Take your envelope making to the next level with these tried-and-true tips from experienced paper crafters.
Quick Tips for Perfect Envelopes
- Pre-make a template: Cut a master envelope from cardboard. Use it to trace and cut multiple envelopes quickly and consistently.
- Use a paper trimmer: It gives straighter cuts than scissors and speeds up the process.
- Score before folding: This simple step makes a huge difference in the crispness of your folds.
- Let glue dry fully: Press the sealed envelope under a book for a minute to ensure a strong bond.
- Experiment with textures: Try vellum, linen cardstock, or even recycled paper for unique looks.
Storage and Reuse
Homemade envelopes store beautifully. Once the glue is completely dry, flatten them gently and slide them into a craft binder or a clear plastic sleeve. Label each sleeve with the size and color so you can grab the right envelope quickly. Cardstock envelopes can also be reused if the recipient opens them carefully. Simply remove the contents, unfold the flaps, and flatten the envelope for future use.
Frequently Asked Questions
Can You Make Envelopes Out Of Cardstock Without a Template?
Yes, you can. Measure your card or letter, add one inch to both the height and width, and cut a rectangle. Mark the fold lines for the side flaps and bottom flap, score them, and fold. Glue the flaps together, and you have a perfectly functional envelope. A template helps with consistency, but freehand works great for one-off envelopes.
What Weight Cardstock Is Best for Envelopes?
65 lb cardstock is ideal for most purposes. It is sturdy enough to hold its shape but easy to fold and glue. For heavier items like small gifts or multiple cards, use 80 lb or 110 lb cardstock. Avoid anything thinner than 60 lb, as it may tear during use.
Can You Mail an Envelope Made from Cardstock?
Absolutely. Cardstock envelopes are fully mailable. Just make sure the envelope is not too thick or heavy for the postage required. If you are mailing internationally, check the postal service guidelines for size and weight limits. A standard cardstock envelope typically falls well within normal mailing requirements.
How Do You Prevent Cardstock from Cracking When Folding?
Always score the fold lines before folding. Use a bone folder or the back of a spoon to press along the ruler. Fold in the direction of the paper grain for the smoothest result. If the cardstock still cracks, try a lighter weight cardstock or score more deeply.
Can You Use Double-Sided Tape Instead of Glue?
Yes, double-sided tape is an excellent alternative. It creates a neat, invisible seam and does not warp the cardstock. Apply a thin strip along the side flaps and press firmly. Tape is especially handy if you are making envelopes in bulk, as it speeds up the process and avoids messy glue spots.
How Can I Decorate My Cardstock Envelope?
You have many options. Try edge painting with a gold or silver pen, add a wax seal, use decorative washi tape, or stick on a die-cut sticker. You can also print a design on the cardstock before you cut it, or layer a patterned liner inside for a surprise pop of color. Let your creativity guide you.
Final Thoughts
Making envelopes out of cardstock is a simple, rewarding craft that adds a personal touch to any letter or card. With just a few supplies and a little practice, you can create beautiful, durable envelopes that stand out in a mailbox. Can You Make Envelopes Out Of Cardstock easily at home? The answer is yes, and now you have all the steps, tips, and design ideas to get started. Experiment with different weights, colors, and finishes until you find your signature style. Soon, you will be making envelopes for every occasion, from birthday cards to wedding invitations. Grab a sheet of cardstock, follow this guide, and enjoy the satisfying art of handmade envelope crafting.