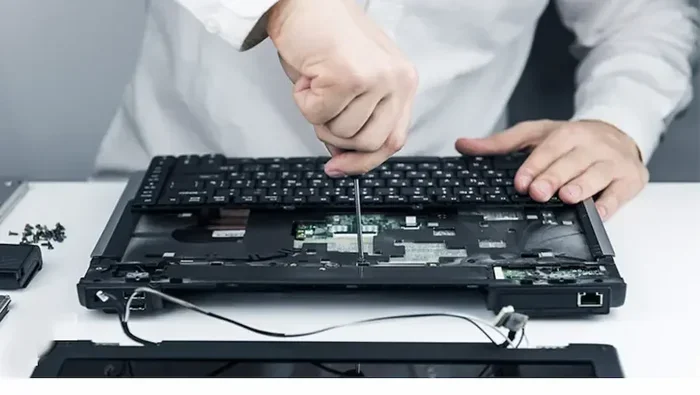
Can You Glue Laptop Keys Back On With This Easy Guide
Yes, you can glue laptop keys back on, and it is easier than you think. Whether your key popped off from a spill, heavy typing, or general wear, this guide walks you through every step. You will learn the right adhesives, tools, and techniques to reattach your keyboard keys safely and effectively.
There is nothing more frustrating than typing away on your laptop and suddenly hearing a tiny plastic click. You look down, and a key is lying on your desk. Maybe it fell off when you cleaned the keyboard. Maybe it just popped out on its own. Either way, your first thought is probably, can you glue laptop keys back on?
The short answer is yes. You absolutely can. And the good news is that you do not need to be a tech expert or spend a fortune on a new keyboard. With the right tools and a little patience, you can fix a fallen key in minutes.
This guide will show you exactly how to do it. We will cover everything from removing the key properly to choosing the best adhesive. By the end, you will feel confident tackling this repair yourself.
Key Takeaways
- Super glue and specialized adhesives work well for reattaching most laptop keys with the right technique.
- Removing the key carefully preserves the key retainer clip and prevents further damage.
- Scissor-switch and membrane keyboards have different repair approaches than mechanical ones.
- Avoid using too much glue to prevent sticky keys or damage to the keyboard mechanism.
- A key repair kit can save time and money compared to professional keyboard replacement.
- Patience and preparation are the most important factors in a successful key reattachment.
📑 Table of Contents
- Why Do Laptop Keys Fall Off?
- Can You Glue Laptop Keys Back On? The Short Answer
- Tools and Materials You Will Need
- Step-by-Step Guide to Gluing Laptop Keys Back On
- Best Adhesives for Keyboard Key Repair
- Common Mistakes to Avoid
- When to Seek Professional Help
- Preventing Future Key Damage
- How Long Does the Repair Last?
- Key Takeaways
- FAQ
- Conclusion
Why Do Laptop Keys Fall Off?
Before we dive into the fix, it helps to understand why keys pop off in the first place. Laptops use thin, lightweight keyboard mechanisms. These are not built to last forever. Over time, the clips that hold keys in place wear down.
Here are the most common reasons keys come loose:
- Spills and liquids can weaken the plastic clips over time.
- Heavy or aggressive typing puts stress on the key retainer clip.
- Aging and general wear makes the plastic brittle and prone to breaking.
- Accidental bumps during cleaning or moving the laptop.
- Dust and debris build up under the key, making it unstable.
Most laptop keyboards use what is called a scissor-switch mechanism. This means each key sits on two small plastic cross-shaped clips. These clips are what keep the key in place. When they break or stretch out, the key starts wobbling and eventually falls off.
Can You Glue Laptop Keys Back On? The Short Answer
So, can you glue laptop keys back on? Yes, you can. But the method you choose matters a lot. Using the wrong glue can make things worse. It can cause the key to stick, feel mushy, or even damage the keyboard switch underneath.
There are two main approaches to fixing a fallen key. You can either reattach the keycap to its existing mechanism using adhesive. Or, if the retainer clip is broken, you can replace the entire key assembly. Let us look at both options.
Option 1: Reattaching the Keycap with Glue
This is the most common approach. If the retainer clip is still intact and the key just needs to be stuck back on, a small amount of glue works perfectly. You simply apply a tiny drop to the plastic nub on the bottom of the keycap. Then you press it firmly back into place on the keyboard base.
This method works well for most standard laptop keys. It is quick, inexpensive, and does not require any special tools.
Option 2: Replacing the Entire Key Assembly
If the retainer clip is cracked or missing, glue alone will not fix the problem. In this case, you need a replacement keycap and retainer clip. Many laptop manufacturers sell individual key replacement kits. These kits include the keycap, the metal hinge piece, and the plastic retainer clips.
You can also find universal keycap replacement kits online. These work for most major laptop brands, including Dell, HP, Lenovo, and Apple.
Tools and Materials You Will Need
Before you start, gather everything you need. Having the right tools makes the process much smoother. Here is what you will want on hand:
- Super glue or cyanoacrylate adhesive — this is the most popular choice for key reattachment.
- A small flathead screwdriver or key puller tool — for safely removing keys without damage.
- Cotton swabs or a small brush — for cleaning the area under the key.
- Isopropyl alcohol — for removing grime and old adhesive residue.
- A replacement key kit — if the retainer clip is damaged.
- A small tray or container — to keep tiny parts organized.
- A bright light or flashlight — to see the keyboard mechanism clearly.
You do not need expensive tools for this repair. A basic super glue from any hardware store works great. Just make sure it is a thin-viscosity formula. Thick super glue is harder to control and can overflow onto the keyboard surface.
Step-by-Step Guide to Gluing Laptop Keys Back On
Now let us get into the actual repair process. Follow these steps carefully for the best results.
Step 1: Remove the Loose Key
If the key is still attached but loose, gently pry it up from the sides. Use a flathead screwdriver or a key cap puller. Work slowly and apply even pressure. Do not yank the key straight up. This can damage the retainer clip underneath.
If the key has already fallen off, skip this step. Just make sure the area around the key is clean before you proceed.
Step 2: Clean the Key and Keyboard Base
Use a cotton swab dipped in isopropyl alcohol to clean both the keycap and the keyboard base. Remove any dust, crumbs, or old glue residue. Let it dry completely before moving to the next step. This ensures the adhesive bonds properly.
Step 3: Inspect the Retainer Clip
Look at the plastic retainer clip on the keyboard base. If it is intact and firmly attached, you are good to go. If it is cracked or missing, you will need to replace it with a new one from your key replacement kit.
Step 4: Apply a Small Amount of Glue
This is the most important step. Apply a tiny drop of super glue to the plastic nub on the bottom of the keycap. Less is more here. Too much glue will seep out and make the key feel sticky or uneven.
For best results, use a thin super glue. It flows into the small gaps and creates a stronger bond. You can also use a gel-based adhesive if you want more control over where the glue goes.
Step 5: Press the Key Back Into Place
Carefully place the keycap back onto the keyboard base. Press down firmly and hold it in place for about 30 to 60 seconds. Make sure the key is aligned properly with the surrounding keys. It should sit flush and level.
Let the glue cure for at least 10 to 15 minutes before typing on the key. This gives the adhesive time to set fully.
Step 6: Test the Key
Once the glue has dried, press the key a few times. It should feel firm and responsive. If it feels loose, you may need to apply a tiny bit more glue. If it feels sticky, you may have used too much adhesive.
Best Adhesives for Keyboard Key Repair
Not all glues are created equal. Choosing the right adhesive makes a big difference in the quality and durability of your repair. Here are some of the best options:
| Adhesive Type | Best For | Pros | Cons |
|---|---|---|---|
| Super Glue (Cyanoacrylate) | General key reattachment | Fast drying, strong bond, affordable | Can be brittle if too much is used |
| Gel Super Glue | Precision application | Easy to control, less dripping | Slightly slower drying time |
| Epoxy Putty | Broken retainer clips | Very strong, fills gaps | Harder to apply, longer cure time |
| Hot Glue | Temporary fixes | Easy to apply, removable | Not as durable, can melt under heat |
| Specialized Keyboard Repair Adhesive | Professional-quality repair | Designed for keyboards, flexible bond | Harder to find, slightly more expensive |
For most people, a standard super glue works perfectly. It bonds quickly and holds the key firmly in place. Just remember to use a very small amount.
Common Mistakes to Avoid
Even though this is a simple repair, there are some mistakes that can cause problems. Here are the ones to watch out for:
- Using too much glue. This is the number one mistake. Excess glue seeps out from under the key and creates a sticky mess. It can also get into the keyboard mechanism and cause keys to stick.
- Using the wrong type of glue. Avoid wood glue, white glue, or any water-based adhesive. These do not bond well to plastic and will not hold the key in place.
- Not letting the glue dry fully. Typing on the key too soon can weaken the bond. Always wait at least 10 to 15 minutes before testing.
- Forcing a stuck key. If the key does not go back on easily, do not force it. Check that the retainer clip is properly seated first.
- Skipping the cleaning step. Dirt and oils prevent the glue from bonding properly. Always clean the surfaces before applying adhesive.
When to Seek Professional Help
Most keyboard repairs are simple and can be done at home. However, there are situations where professional help is the better choice:
- Multiple keys have fallen off. If several keys are damaged, it may be more practical to replace the entire keyboard.
- The keyboard mechanism itself is broken. If the scissor mechanism or rubber dome is damaged, glue will not fix it.
- Your laptop is still under warranty. Opening the keyboard may void your warranty. Check with the manufacturer first.
- You are not comfortable doing it yourself. There is no shame in taking your laptop to a repair professional.
A professional keyboard replacement typically costs between 50 and 150 dollars, depending on your laptop model. This is more expensive than a DIY repair, but it guarantees a proper fix.
Preventing Future Key Damage
Once you have fixed your laptop keys, you will want to keep them in good shape. Here are some simple tips to prevent future damage:
- Keep food and drinks away from your laptop. Spills are the number one cause of keyboard damage.
- Clean your keyboard regularly. Use compressed air to blow out dust and crumbs. Do this at least once a week.
- Type gently. You do not need to smash the keys. A light touch is all it takes.
- Use a keyboard cover. A thin silicone cover protects against spills and dust buildup.
- Store your laptop properly. When transporting your laptop, keep it in a padded sleeve or bag.
Taking these small precautions can significantly extend the life of your laptop keyboard. Prevention is always easier and cheaper than repair.
How Long Does the Repair Last?
A well-done key repair can last for years. The longevity depends on a few factors. The quality of the adhesive you use plays a big role. Super glue creates a very strong bond that holds up well over time.
The condition of the retainer clip also matters. If the clip is in good shape, the key should stay put for a long time. If the clip is worn out, even the best glue will not hold forever.
On average, a glued key repair lasts anywhere from one to five years. Some people report their repairs lasting even longer. It all comes down to how carefully you do the job and how gently you treat the keyboard afterward.
Key Takeaways
- Yes, you can glue laptop keys back on using super glue or a specialized adhesive for a reliable, long-lasting repair.
- Always clean the key and keyboard base before applying any adhesive to ensure a strong bond.
- Use a thin-viscosity super glue for the best control and strongest hold on keyboard key caps.
- Apply only a tiny drop of glue to avoid sticky keys, overflow, or damage to the scissor mechanism underneath.
- Hold the key in place for 30 to 60 seconds and wait at least 10 minutes before typing on it.
- Replace the retainer clip if it is cracked — glue alone cannot fix a broken key assembly.
- Prevention goes a long way — keep food and liquids away from your laptop to avoid future key loss.
FAQ
Can I use regular super glue to fix a laptop key?
Yes, regular thin-viscosity super glue works well for reattaching laptop keys. Just apply a very small amount to the plastic nub on the bottom of the keycap. Avoid using thick super glue, as it is harder to control and can overflow onto the keyboard surface.
Will gluing the key damage my laptop keyboard?
If done correctly, gluing a key will not damage your keyboard. The key is only bonded to the plastic retainer clip, which sits on top of the keyboard base. However, using too much glue or getting adhesive on the key mechanism can cause issues. Always use a minimal amount and be precise.
How long does it take for the glue to dry?
Super glue typically sets in 30 to 60 seconds, but you should wait at least 10 to 15 minutes before pressing the key. For the strongest bond, allow 24 hours for full cure. This ensures the adhesive is completely hardened and the key feels normal when typing.
Can I fix a laptop key without any glue?
Yes, if the retainer clip is intact, you can snap the keycap back on without any adhesive. Many laptop keys are designed to clip back into place. Simply align the key with the retainer clip and press down firmly until it clicks into position. Glue is only needed when the clip is worn or broken.
What should I do if the retainer clip is broken?
If the retainer clip is cracked or missing, you will need to replace the entire key assembly. You can purchase replacement key kits online for most laptop brands. These kits include the keycap, metal hinge, and plastic retainer clips. Installation is straightforward and follows the same steps as gluing a key back on.
Is it cheaper to repair a key or replace the whole keyboard?
Repairing a single key is far cheaper than replacing the entire keyboard. A small tube of super glue costs just a few dollars, and a replacement key kit usually runs between 5 and 15 dollars. A professional keyboard replacement can cost 50 to 150 dollars or more. For one or two fallen keys, a DIY repair is the clear winner.
Conclusion
So, can you glue laptop keys back on? Absolutely. With the right adhesive, a few simple tools, and a steady hand, you can fix a fallen key in under 15 minutes. This is one of the easiest and most satisfying laptop repairs you can do at home.
The key is to take your time. Clean the surfaces properly. Use only a tiny drop of glue. And make sure the retainer clip is in good shape before you start. Follow these steps, and your keyboard will look and feel as good as new.
Do not let a missing key ruin your typing experience. Grab some super glue, follow this guide, and get back to work. Your laptop keyboard does not need to be a permanent problem.