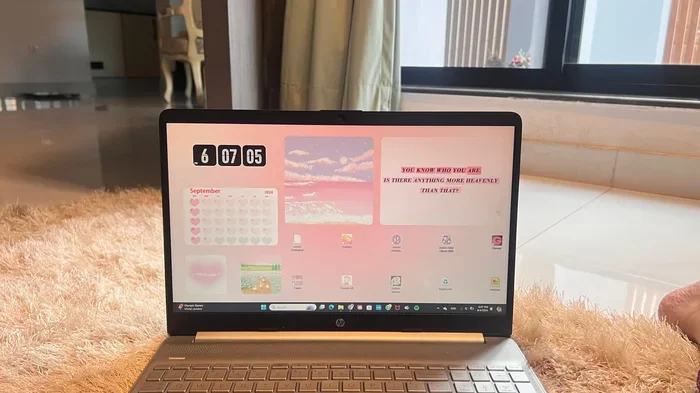
Can You Customize Your Laptop Screen Size And Display
Can You Customize Laptop Screen is an essential topic that provides valuable insights.
Key Takeaways
- Understanding Can You Customize Laptop Screen: Provides essential knowledge
📑 Table of Contents
- Understanding Your Laptop Display Basics
- How to Change Screen Resolution and Scaling
- Adjusting Brightness, Contrast, and Color
- Customizing Screen Layout and Orientation
- Advanced Display Settings and Features
- Common Mistakes When Customizing Your Laptop Screen
- Quick Tips for the Best Laptop Display Experience
- Expert Insights on Laptop Display Customization
- Key Takeaways
- Conclusion
Understanding Your Laptop Display Basics
Before you start changing settings, it helps to understand what makes up your laptop screen. Every display has a few key parts that control how things look. Knowing these basics will make the rest much simpler.
What Is Screen Resolution?
Screen resolution refers to the number of pixels on your display. More pixels mean sharper images and text. Common resolutions include 1366×768, 1920×1080, and 2560×1440. The higher the number, the crisper everything looks.
When you customize laptop screen settings, resolution is usually the first thing you adjust. A higher resolution gives you more screen real estate. But it also makes everything smaller, which can be hard on your eyes.
What Is Display Scaling?
Display scaling lets you make text, apps, and icons bigger or smaller. If you have a high-resolution screen, scaling helps you read things comfortably. Windows and macOS both offer scaling options in their settings menus.
For example, a 150% scaling level makes everything 50% bigger than the default. This is great for people who want a clear view without squinting. You can find scaling options under your display settings on both Windows and Mac computers.
What Is Panel Type?
Your laptop uses a specific type of display panel. The most common types are TN, IPS, and OLED. Each one has different strengths.
IPS panels offer great color accuracy and wide viewing angles. TN panels are fast but have weaker color reproduction. OLED panels deliver deep blacks and vibrant colors. Knowing your panel type helps you understand what your screen is capable of.
How to Change Screen Resolution and Scaling
Adjusting resolution and scaling is the most common way to customize laptop screen appearance. Both settings work together to control how content appears on your display.
Changing Resolution on Windows
Here is how to change your screen resolution on a Windows laptop:
- Right-click on your desktop background.
- Select “Display settings” from the menu.
- Scroll down to the “Scale and layout” section.
- Find the “Display resolution” dropdown menu.
- Choose your preferred resolution and click “Keep changes.”
Your screen will flicker briefly when you change the resolution. This is normal. If the new setting looks wrong, simply revert to the previous one within 15 seconds.
Changing Resolution on macOS
Mac users can follow these steps:
- Click the Apple menu in the top-left corner.
- Select “System Settings” or “System Preferences.”
- Go to “Displays.”
- Choose your preferred resolution from the options.
- macOS offers “Default for display” and “Scaled” options.
The scaled option gives you more control over how much screen space you have. You can pick a resolution that makes everything feel just right.
Finding the Sweet Spot
Not every resolution works perfectly for every person. Some people prefer more screen space and choose higher resolutions. Others prefer larger text and icons. The best approach is to test a few settings and see what feels comfortable.
A good rule of thumb is to match your resolution to your screen size. A 15-inch laptop usually looks best at 1920×1080 or higher. A 13-inch laptop may work well at 1366×768 or 1920×1080 depending on your preference.
Adjusting Brightness, Contrast, and Color
Your laptop screen looks different depending on lighting conditions. Bright sunlight can wash out your display. A dark room can make everything too dim. Learning to adjust brightness and color helps you get the best picture in any environment.
How to Adjust Brightness
Most laptops have keyboard shortcuts for brightness control. Look for sun icons on your function keys. Pressing these keys lets you raise or lower brightness quickly.
You can also adjust brightness through your operating system settings. On Windows, go to Settings > System > Display. On macOS, go to System Settings > Displays. Both offer slider controls for easy adjustment.
Color Calibration for Better Accuracy
Color calibration ensures your display shows colors accurately. This matters a lot if you do photo editing, video work, or design. A poorly calibrated screen can make your photos look too warm or too cool.
Windows includes a built-in color calibration tool. You can find it by searching for “calibrate display color” in the Start menu. macOS also offers display calibration through its Color Calibration tool in System Settings.
For the most accurate results, consider using a hardware calibration device. These tools measure your screen’s output and adjust settings automatically. They are especially useful for professionals who need precise color accuracy.
Blue Light Filters and Eye Comfort
Staring at a bright screen for hours can strain your eyes. Blue light filters reduce the amount of blue light your display emits. This can help you sleep better and reduce eye fatigue.
Windows offers “Night Light” in its display settings. macOS has “Night Shift.” Both features warm up your screen’s color temperature after sunset. You can schedule them to turn on automatically or adjust them manually.
Customizing Screen Layout and Orientation
Sometimes the way your screen is arranged just does not work for you. Maybe you need to rotate it for a document. Or perhaps you want to use multiple screens for a bigger workspace. Your laptop gives you plenty of layout options.
Rotating Your Screen
You can rotate your laptop screen in 90-degree increments. This is useful for reading long documents, coding, or working with spreadsheets. On Windows, go to Display Settings and look for the “Display orientation” dropdown. Choose Portrait or Landscape depending on your needs.
On macOS, you can also rotate your display through System Settings > Displays. Some Mac laptops may require you to hold the Option key while clicking “Scaled” to see rotation options.
Using an External Monitor
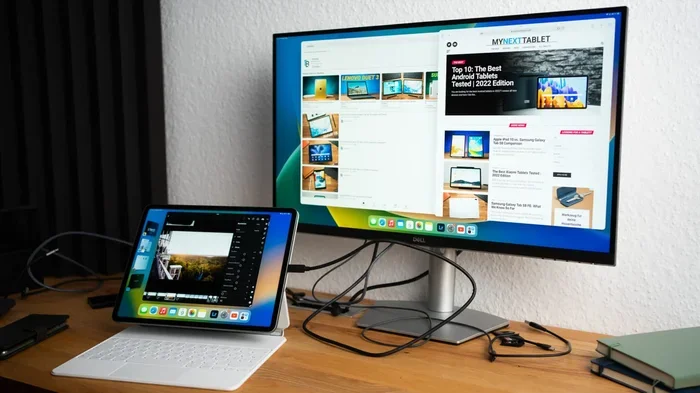
One of the best ways to customize laptop screen size is by adding an external monitor. A second screen gives you more space to work and multitask. You can drag windows between screens, extend your desktop, or mirror your display.
To connect an external monitor, use HDMI, USB-C, or a docking station. Once connected, go to your display settings and choose how you want the screens to work. You can set them to “Extend” for a larger workspace or “Duplicate” for the same image on both screens.
When choosing an external monitor, consider factors like panel type, refresh rate, and resolution. A monitor with the same resolution as your laptop screen creates a seamless experience. Look for monitors with IPS panels for the best color accuracy.
Adjusting Screen Layout on Multiple Displays
If you use multiple screens, you can arrange them to match your physical setup. In Windows Display Settings, you will see a diagram of your displays. Drag and drop them to match how they sit on your desk. This ensures your mouse moves naturally between screens.
macOS lets you do the same thing in System Settings > Displays. You can also set a primary display, which controls where your menu bar and notifications appear.
Advanced Display Settings and Features
Beyond the basics, modern laptops offer advanced features that let you fine-tune your display. These settings can make a big difference in how your screen looks and performs.
HDR and High Dynamic Range
HDR display technology offers a wider range of colors and brightness levels. It makes images look more realistic and vibrant. If your laptop supports HDR, you can turn it on in your display settings.
HDR works best with HDR-compatible content like movies and games. Not all content is HDR, so you may notice the difference more with certain apps and media.
Refresh Rate Adjustment
Refresh rate controls how many times your screen updates per second. A 60Hz screen refreshes 60 times per second. A 120Hz or 144Hz screen refreshes much faster, making motion look smoother.
Gamers and video editors benefit greatly from higher refresh rates. You can adjust this in your display settings or through your graphics driver control panel. Keep in mind that higher refresh rates may use more battery power.
Graphics Driver Updates
Your graphics driver controls how your laptop handles display output. Keeping it updated ensures the best performance and compatibility. Outdated drivers can cause blurry text, flickering, or color issues.
You can update your graphics driver through your laptop manufacturer’s website or through Windows Update. NVIDIA and AMD also offer their own driver update tools for easy installation.
Dark Mode and Theme Customization
Dark mode changes your interface to darker colors. It reduces eye strain in low-light environments and can save battery on OLED screens. Both Windows and macOS offer dark mode options in their settings.
You can also customize your desktop wallpaper, taskbar appearance, and accent colors. These small changes add up to make your screen feel more personal and comfortable to use.
Common Mistakes When Customizing Your Laptop Screen
Even with the best intentions, people make mistakes when adjusting their display settings. Here are some common pitfalls to avoid.
- Setting resolution too high: This makes everything tiny and hard to read. Always choose a resolution that matches your screen’s native capability.
- Ignoring scaling settings: A high resolution without proper scaling can cause blurry text and icons.
- Skipping color calibration: Out-of-the-box settings often look inaccurate. Taking five minutes to calibrate makes a huge difference.
- Using the wrong cable: A low-quality cable can limit your display’s performance. Use certified cables that support your desired resolution and refresh rate.
- Forgetting to update drivers: Old graphics drivers can cause display glitches and poor performance.
Avoiding these mistakes saves you time and frustration. Take a few minutes to get your settings right the first time.
Quick Tips for the Best Laptop Display Experience
Here are some quick tips to get the most out of your laptop screen:
- Match your resolution to your screen size. This ensures text and images look sharp without being too small.
- Use display scaling for comfort. Set it to a level where text is easy to read without squinting.
- Calibrate your colors regularly. Especially if you do any kind of creative work.
- Enable blue light filters at night. This protects your eyes and helps you sleep better.
- Keep your graphics drivers updated. This fixes bugs and improves performance.
- Consider an external monitor. It expands your workspace and gives you more flexibility.
- Clean your screen regularly. A clean display always looks better and reduces eye strain.
Expert Insights on Laptop Display Customization
Display technology has improved dramatically in recent years. Modern laptops offer stunning visuals right out of the box. But customization is what turns a good display into a great one.
Experts recommend starting with the basics: resolution, scaling, and brightness. Once those are set, move on to color calibration and advanced features like HDR. Each adjustment builds on the last to create a truly personalized viewing experience.
According to display professionals, the biggest mistake people make is not adjusting their settings at all. Default settings are designed for the broadest audience, not for your specific needs. Taking the time to customize your laptop screen pays off in comfort, productivity, and enjoyment.
If you are unsure where to start, try one change at a time. Adjust your resolution first, then scaling, then brightness. Test each change for a day before moving on. This approach helps you find the perfect balance without overwhelming yourself.
Key Takeaways
- You can customize your laptop screen in many ways, from resolution to color calibration.
- Display scaling and screen resolution work together to control how content appears on your display.
- Color calibration and blue light filters improve accuracy and reduce eye strain.
- External monitors expand your workspace and give you more flexibility in how you work.
- Advanced features like HDR and high refresh rates enhance your viewing experience significantly.
- Avoiding common mistakes like wrong resolution or outdated drivers saves time and frustration.
- Small adjustments add up to create a display that feels tailored specifically to you.
Conclusion
Can you customize laptop screen settings to match your exact needs? Absolutely. The tools are built right into your operating system, and they are free to use. From changing resolution and scaling to adjusting brightness and color, every setting is within your reach.
You do not need to be a tech expert to make these changes. Start with the basics and explore from there. Each small adjustment makes your screen feel more comfortable and productive. Over time, you will build a setup that works perfectly for the way you use your laptop.
Take a few minutes today to explore your display settings. You might be surprised at how much better your screen can look. Customizing your laptop screen is one of the easiest ways to improve your daily computing experience. Your eyes and your productivity will thank you.
Frequently Asked Questions
Can I change my laptop screen size physically?
No, you cannot change the physical size of your laptop screen without replacing the entire display panel. However, you can adjust how content appears on screen through resolution, scaling, and display settings. These software changes make your screen feel larger or smaller without any hardware modifications.
What is the best resolution for a 15.6-inch laptop?
For a 15.6-inch laptop, 1920×1080 (Full HD) is the most common and recommended resolution. It provides sharp text and good screen real estate. Higher resolutions like 2560×1440 also work well if your laptop supports them, but they may make text appear smaller.
How do I fix a blurry laptop screen after changing settings?
Blurry screens usually happen when the resolution does not match your display’s native setting. Go to your display settings and select the recommended or native resolution. Also check your display scaling setting, as incorrect scaling can cause blurriness.
Can I use my laptop screen as a monitor for a game console?
Yes, you can use your laptop screen as a display for a game console with the right capture card or HDMI capture device. Some laptops also support direct HDMI input, though this is rare. Check your laptop’s specifications to see if it supports external video input.
Does customizing screen settings affect laptop performance?
Higher resolutions and refresh rates can use more processing power and battery. Lowering the resolution can improve performance on older laptops. Adjusting settings like blue light filters and dark mode has minimal impact on performance but can improve comfort.
How often should I calibrate my laptop display colors?
For general use, calibrating once every few months is sufficient. If you do professional photo or video editing, calibrate monthly or use a hardware calibration tool for consistent accuracy. Environmental changes like lighting can also affect how your screen colors appear over time.
=== META DESCRIPTION ===
Learn how to customize your laptop screen size, adjust display settings, and optimize your display for the best viewing experience today.