Can I Use Curtains As Projector Screen for Home Theater
Yes, you can absolutely use curtains as a projector screen for an impressive home theater. Using curtains as a projector screen is a budget-friendly, flexible option that delivers surprisingly good results. In this guide, you’ll discover how to pick the right fabric, set up your projector, and avoid common mistakes that ruin the picture.
Key Takeaways
- Curtains work as a projector screen: A plain white curtain can turn any wall into a big movie display.
- Material matters a lot: Tightly woven white fabric gives the clearest image, while blackout curtains help in bright rooms.
- Setup is simple: You only need a rod, a few hooks, and your existing projector.
- Ambient light kills the picture: Dim the room or use a dark curtain behind the screen to boost contrast.
- DIY projector screen saves money: You skip the cost of a dedicated screen and get a custom size.
- Avoid common mistakes: Wrinkled fabric, wrong projector placement, and ignoring screen gain will hurt quality.
📑 Table of Contents
- Can I Use Curtains As a Projector Screen?
- Why a Curtain Makes a Great DIY Projector Screen
- Choosing the Right Curtain for Your Projector
- Step-by-Step Setup for a Curtain Projector Screen
- Curtain Screen vs. Traditional Projector Screen: Which Is Better?
- Common Mistakes When Using Curtains as a Screen
- Final Thoughts: Making Your Curtain Screen Work
Can I Use Curtains As a Projector Screen?
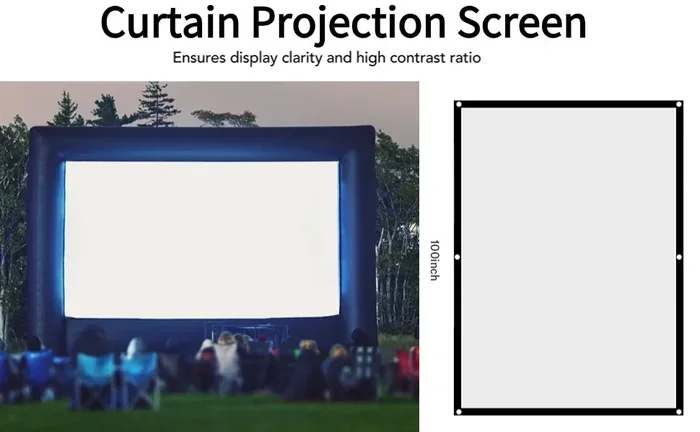
Yes, you can. Many people build a home theater with nothing more than a curtain and a projector. A curtain projector screen works because the fabric reflects light back to your eyes, just like a store-bought screen. You do not need a special wall or expensive gear. All you need is the right curtain and a little patience.
Using curtains as a projector screen is a popular DIY projector screen idea. It saves money and lets you pick the exact size you want. Whether you want a big movie night setup or a simple setup for presentations, a curtain can do the job. This guide will show you exactly how to make it work.
We will cover everything from choosing the best fabric to avoiding setup mistakes. You will learn how to get a sharp, bright picture even in a room with some light. By the end, you will know if a curtain screen fits your home cinema goals.
Why a Curtain Makes a Great DIY Projector Screen
A curtain offers several advantages over a traditional screen. First, it costs almost nothing if you already own one. Second, you can hang it anywhere a rod fits. Third, you can change the size anytime. A fixed screen limits you, but a curtain lets you go big or small with a quick adjustment.
Another benefit is portability. You can roll up a curtain and take it to a backyard party or a friend’s house. A curtain screen projector setup is easy to pack and unpack. This makes it perfect for renters or anyone who does not want to drill holes in the walls.
Curtains also come in many materials. Some fabrics are designed to block light, while others let it pass through. For a projector, you want a surface that bounces light evenly. A simple white curtain often does this better than a painted wall, which can create hot spots and uneven brightness.
When a Curtain Screen Shines
A curtain screen works best in a dedicated home theater room. If you can dim the lights or close the blinds, the picture will pop. Even in a living room, a dark curtain behind the screen can improve contrast. The curtain absorbs stray light and keeps the image crisp.
You can also use a curtain for daytime viewing if you pick the right type. A white curtain projector screen with a tight weave reflects more light. This helps fight glare from windows. However, no curtain beats a dark room for the best picture quality.
Choosing the Right Curtain for Your Projector
Not all curtains work as a projector screen. The wrong fabric can make the image look blurry or washed out. You need to think about color, weave, and thickness. Let us break down the best options.
White vs. Blackout Curtains
White curtains are the go-to choice for most people. They reflect projector light evenly and keep colors bright. A white curtain projector screen gives a neutral base that works with any projector type. Look for a tightly woven white fabric with no patterns or prints.
Blackout curtains are great if you have a lot of ambient light in the room. They block light from passing through the fabric, which boosts contrast. Some people hang a blackout curtain behind a white screen to create a dark border. This simple trick makes the image look deeper and more cinematic.
Screen Gain and Material
Screen gain is a measure of how much light a surface reflects back. A high gain screen looks brighter from the center but narrows the viewing angle. A low gain screen spreads light wider. Most curtains have a gain close to 1.0, which is perfect for a wide viewing area.
Avoid thick, textured fabrics like velvet or heavy brocade. They scatter light in random directions and create a fuzzy image. Stick with smooth, matte fabrics. A simple cotton or polyester curtain works well. If you want a dedicated projector screen fabric, you can buy special screen material, but a good curtain is just as effective for most setups.
Step-by-Step Setup for a Curtain Projector Screen
Setting up a curtain screen is easy. You do not need special tools or skills. Follow these steps to get a great picture every time.
1. Measure Your Wall and Curtain
First, decide how big you want the image. Measure the wall space where the curtain will hang. Then measure the curtain itself. A curtain that is a few inches wider than the projected image is ideal. This extra width prevents light from hitting the edges of the wall.
For the height, hang the curtain from near the ceiling to the floor. This gives you the largest possible image size. Use a sturdy curtain rod that can hold the weight without sagging.
2. Hang the Curtain Flat
Wrinkles are the enemy of a good picture. Before you hang the curtain, iron or steam it smooth. You want a flat, taut surface. If the curtain has grommets, slide them onto the rod evenly. Use curtain clips or rings to keep the fabric from bunching up.
If you are using a blackout curtain projector screen, you may need to add a second layer. Hang the blackout curtain a few inches behind the white curtain. This creates a dark border that absorbs stray light and improves black levels.
3. Position the Projector
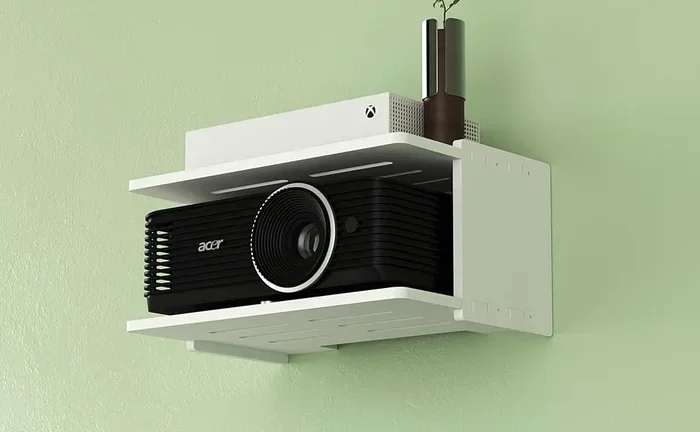
Place your projector on a stable table or ceiling mount. The distance from the curtain depends on the projector’s zoom and throw ratio. Most projectors work best when they are centered on the screen. If you mount the projector off to the side, the image may look trapezoidal.
Use the projector’s keystone correction to fix any distortion. However, try to avoid heavy keystone adjustments because they reduce image sharpness. A curtain screen projector setup works best when the projector is aimed straight at the center of the curtain.
4. Focus and Adjust
Turn on the projector and display a test image. Use the focus ring to sharpen the picture. Walk back and forth in the room to check the image from different seats. A good setup should look clear from the whole viewing area.
Adjust the projector height so the image fills the curtain evenly. You may need to raise or lower the projector slightly. Small tweaks make a big difference in how the final picture looks.
Curtain Screen vs. Traditional Projector Screen: Which Is Better?
A traditional projector screen is built for optimal image quality. It has a special coating that boosts brightness and color accuracy. A curtain, on the other hand, is a general-purpose fabric. Both have their place. Let us compare them side by side.
| Feature | Curtain Screen | Traditional Projector Screen |
|---|---|---|
| Cost | Very low (often free) | Moderate to high |
| Setup Time | 5–10 minutes | 15–30 minutes |
| Portability | High (rolls up easily) | Low (fixed or bulky) |
| Image Quality | Good in a dark room | Excellent, especially with high gain |
| Size Flexibility | Unlimited (any curtain size) | Fixed sizes |
| Ambient Light Handling | Poor unless blackout backed | Better with ALR screens |
| Durability | Good (machine washable) | Varies (some need careful care) |
As you can see, a curtain wins on cost and flexibility. A traditional screen wins on image sharpness and light handling. If you are on a tight budget or rent your home, a curtain is the smart choice. If you want the absolute best picture and have a dedicated room, a proper screen is worth the investment.
Many people start with a curtain and later upgrade to a screen. There is no rule that says you must pick one forever. A curtain is a perfect starting point for anyone who wants to test the home theater waters.
Common Mistakes When Using Curtains as a Screen
Even a simple setup can go wrong if you overlook a few details. Here are the most common mistakes and how to avoid them.
Using a Patterned or Textured Curtain
Never use a curtain with a pattern, stripes, or texture. The projector will show those patterns on the screen, ruining the image. Stick to a plain, smooth white or light gray fabric. If you want a gray screen for better contrast, use a dark gray curtain without any sheen.
Ignoring Room Lighting
A curtain cannot block sunlight on its own. If you watch movies during the day, the image will look washed out. Close the blinds, turn off lamps, or use blackout curtains on the windows. A curtain screen projector setup needs a dim room to shine.
Wrinkled or Loose Fabric
A wrinkled curtain creates a distorted image. Always iron or steam the curtain before each use. Also, make sure the fabric is pulled tight. Loose curtains sag in the middle, which bends the light and softens the picture. Use a tension rod or add weights to the bottom hem.
Wrong Projector Placement
Placing the projector too close or too far ruins the image size and focus. Check your projector manual for the recommended throw distance. Use a projector calculator if you are unsure. A DIY projector screen curtain works best when the projector is at the correct distance for the curtain size.
Final Thoughts: Making Your Curtain Screen Work
So, can I use curtains as a projector screen? The answer is a clear yes. A curtain gives you a cheap, flexible, and surprisingly effective way to enjoy big movies at home. With the right fabric, a little care, and a properly placed projector, you can get a picture that rivals many commercial screens.
Remember to choose a plain white or gray curtain, hang it smooth and tight, and control the room light. Avoid common pitfalls like patterned fabric and bad projector placement. These small steps make a huge difference in image quality.
A curtain projector screen is not just a temporary fix. It is a real solution for movie nights, gaming, and presentations. Try it once, and you may find you never need a traditional screen again. Grab a curtain, set up your projector, and enjoy your new home theater tonight.
Frequently Asked Questions
Can I use any curtain as a projector screen?
Not all curtains work well. You need a plain, smooth, white or light gray fabric without patterns or textures. A tightly woven cotton or polyester curtain reflects light evenly and gives the best results. Avoid thick, textured, or dark curtains that absorb too much light.
Do I need a special projector to use a curtain screen?
No, any standard projector works with a curtain screen. The key is to control room lighting and keep the curtain smooth. Even a basic home projector can deliver a great picture on a well-hung white curtain.
How do I make a curtain screen look better?
Iron or steam the curtain flat before each use. Hang it from ceiling to floor for the largest image. Add a dark blackout curtain behind the white screen to improve contrast. Use a projector mount or stable table to keep the projector steady.
Is a curtain screen good for daytime viewing?
It is challenging but possible. Use a white curtain with a tight weave and close all blinds and curtains on windows. Dim the room as much as you can. For the best daytime experience, consider a high-gain screen material, but a curtain still works in a very dark room during the day.
Can I wash a curtain projector screen?
Yes, most curtains are machine washable. Wash on a gentle cycle and hang dry to avoid wrinkles. Always check the care label first. A clean screen looks better and performs better because dust and dirt scatter light and reduce clarity.
What size curtain do I need for a home theater?
The size depends on your projector and room. Measure the wall space you have available. A curtain that is at least 80 inches wide and 60 inches tall works for most setups. For a bigger image, use a wider curtain and move the projector further back. Always leave a few inches of extra fabric on each side to prevent light spill.