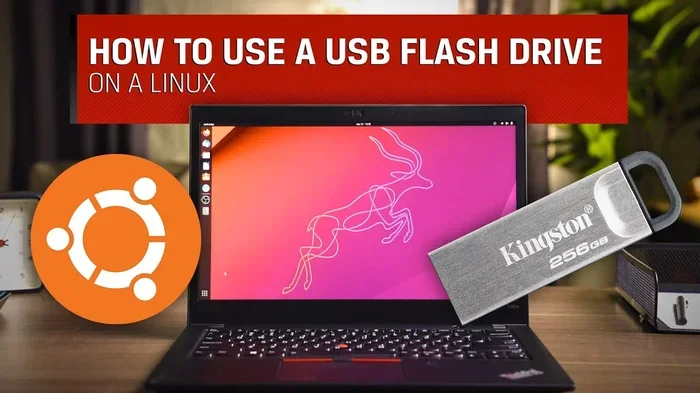
Can I Run Ubuntu From A Usb Flash Drive For Beginners
Yes, you can absolutely run Ubuntu from a USB flash drive. It lets you carry a full Linux operating system in your pocket and boot it on almost any computer. This beginner-friendly guide walks you through every step, from choosing the right USB drive to installing Ubuntu with persistent storage. Whether you want to test Ubuntu or use it daily, a bootable USB makes it possible without touching your hard drive.
Have you ever wanted to try a new operating system without installing it on your computer? Maybe you are curious about Linux but afraid of breaking something. Or perhaps you need a portable operating system you can carry anywhere. Whatever your reason, running Ubuntu from a USB flash drive is one of the easiest and safest ways to explore.
Ubuntu is a free, open source Linux distribution that millions of people use around the world. It is known for being beginner friendly, secure, and lightweight. And the best part? You do not even need to install it on your computer to use it. A simple USB flash drive is all you need to get started.
In this guide, I will walk you through everything you need to know. From picking the right USB stick to creating your first live USB, I will cover it all. By the end, you will know exactly how to boot Ubuntu from USB and whether this approach fits your needs.
Let us dive right in. No prior experience with Linux is required. If you can plug in a USB drive, you can follow along.
Key Takeaways
- You can run Ubuntu from USB: A USB flash drive acts as a portable operating system that works on any compatible computer.
- You need a few things: A USB drive of at least 8GB, a PC to create the installer, and the free Ubuntu ISO file.
- Tools like Rufus make it easy: You do not need technical skills to create a bootable USB drive in minutes.
- Persistent storage is a game changer: It saves your files, settings, and apps between sessions on the same USB drive.
- You can try it risk-free: Running Ubuntu from USB does not install anything on your computer’s hard drive.
- Boot order matters: You must change BIOS or UEFI settings to boot from the USB drive instead of your hard drive.
📑 Table of Contents
What Is Ubuntu and Why Run It From a USB Flash Drive?
Ubuntu is a popular Linux operating system built by a community of developers. It is free to download and free to use. Unlike Windows or macOS, Ubuntu is open source, which means anyone can view and modify its code. This makes it transparent, secure, and constantly improved by thousands of contributors worldwide.
People choose to run Ubuntu from a USB flash drive for many reasons. Some want to test the operating system before committing to a full installation. Others use it as a portable operating system they can carry from one computer to another. And some rely on it for computer repair, data recovery, or privacy-focused computing.
What Makes Ubuntu Different From Windows?
Ubuntu works very differently from Windows in several ways. First, it is free. You do not pay anything to download or use it. Second, it is much less prone to viruses and malware. Third, it runs well even on older hardware that struggles with modern versions of Windows. Fourth, updates are handled differently, and you have full control over what gets installed on your system.
Running Ubuntu from a USB drive gives you all of these benefits without making any permanent changes to your computer. It is like trying on a pair of shoes before you buy them. You get the full experience, but nothing is committed.
What You Need to Get Started
Before you create your bootable USB drive, you need a few things. Let me break down each requirement so you know exactly what to prepare.
1. A USB Flash Drive
You need a USB flash drive with at least 8GB of storage. 16GB or more is even better if you plan to use persistent storage. Here are some quick tips for choosing the right drive:
- Use a USB 3.0 drive for faster speeds. It makes a big difference when booting and loading apps.
- Avoid very old drives. Older USB 2.0 drives work but feel much slower.
- Brand name matters. SanDisk, Samsung, Kingston, and Lexar are reliable choices.
- Do not use a drive full of important files. Creating a bootable drive will erase everything on it.
2. A Computer to Create the Installer
You need access to any working computer to create the Ubuntu USB installer. It does not matter if that computer runs Windows, macOS, or even another version of Linux. The process works on all of them. You just need a free tool to write the Ubuntu ISO file to your flash drive.
3. The Ubuntu ISO File
An ISO file is a single file that contains the entire Ubuntu operating system. You download it for free from the official Ubuntu website. Make sure you download the desktop version unless you have a specific reason to choose the server edition.
4. A Tool to Create the Bootable Drive
You need software that can write the ISO file to your USB drive in a way that makes it bootable. There are several free options available:
- Rufus – Works on Windows. Small, fast, and widely trusted.
- BalenaEtcher – Works on Windows, macOS, and Linux. Very beginner friendly.
- DD command – Works on Linux and macOS. More technical but very powerful.
How to Create a Bootable Ubuntu USB Drive
Now comes the fun part. You are going to turn your ordinary USB flash drive into a bootable Ubuntu installer. The process takes about 10 to 15 minutes. I will walk you through it step by step.
Step-by-Step Guide Using Rufus (Windows)
Rufus is the most popular tool for creating bootable USB drives on Windows. Here is exactly what to do:
- Download Rufus from the official website. It is a small, free program.
- Download the Ubuntu ISO file from ubuntu.com. Choose the latest LTS (Long Term Support) version for the best experience.
- Plug in your USB flash drive. Make sure it has at least 8GB of space.
- Open Rufus. It will automatically detect your USB drive.
- Click the SELECT button and choose your downloaded Ubuntu ISO file.
- Leave the partition scheme as GPT for modern computers or MBR for older ones.
- Click START. Rufus will format the drive and copy all the files.
- Wait for it to finish. You will see a green checkmark when done.
That is it. Your USB installer is ready. You can now use it to boot Ubuntu on any compatible computer.
Step-by-Step Guide Using BalenaEtcher (macOS and Linux)
BalenaEtcher is the easiest option if you are on a Mac or Linux computer. Here is how it works:
- Download BalenaEtcher from etcher.io.
- Open the app and select your downloaded Ubuntu ISO file.
- Select your USB flash drive from the list of available drives.
- Click Flash. Etcher will write the ISO to the drive and verify it automatically.
- Wait a few minutes. Once done, you have a fully bootable Ubuntu USB drive.
Quick Tip: Always verify your download. Ubuntu provides a checksum for each ISO file. Checking it ensures your file was not corrupted during the download. A corrupted ISO can cause boot failures and wasted time.
How to Boot Ubuntu From Your USB Drive
With your bootable Ubuntu USB drive ready, the next step is to actually start it up on a computer. This process is called booting, and it requires you to access your computer’s boot menu or BIOS settings.
Accessing the Boot Menu
Every computer has a way to choose which device to boot from. This is the boot menu, and here is how to access it on different computers:
- Dell computers: Press F12 right after turning on the computer.
- HP computers: Press F9 or Esc during startup.
- Lenovo computers: Press F12 or Fn+F12.
- ASUS computers: Press Esc or F8.
- Acer computers: Press F12 or Esc.
When you see the boot menu, use your arrow keys to select the USB drive. Press Enter, and your computer will start loading Ubuntu from the flash drive.
Changing Boot Order in BIOS
If the boot menu does not work, you can change the boot order directly in BIOS. Here is how:
- Restart your computer. As it turns on, press the BIOS key repeatedly.
- Common BIOS keys include: F2, Del, F10, or Esc. Check your computer manufacturer’s website for the exact key.
- Navigate to the Boot section. Use your arrow keys to find it.
- Move USB to the top of the boot order. This tells your computer to look at the USB drive first.
- Save and exit. Usually by pressing F10.
Your computer will now boot from the USB drive and load Ubuntu. You will see the Ubuntu welcome screen, where you can choose to Try Ubuntu or Install Ubuntu. For now, choose “Try Ubuntu” to test it without making any changes to your computer.
Making Ubuntu Persistent on Your USB Drive
By default, when you run Ubuntu from a USB flash drive, it operates in what is called a “live” mode. This means any changes you make are lost when you restart the computer. Your files, settings, and downloads are gone. This is fine for testing, but it is not practical for daily use.
Persistent storage solves this problem. It saves your data directly to the USB drive, so everything stays there between sessions. Think of it like saving a file to a hard drive. Your settings, bookmarks, documents, and apps all persist.
How to Set Up Persistent Storage
Setting up persistent storage requires a few extra steps when creating your bootable drive. Here is an overview:
- Using Rufus: In the advanced options, look for the “Persistent partition size” setting. Set it to the amount of space you want reserved for your data. The rest of the drive will be used for the Ubuntu system itself.
- Using the terminal (Linux/macOS): You can manually create a persistent partition using the dd command and some additional formatting steps.
- Using third-party tools: Tools like mkusb (for Linux) or Ventoy can simplify the process significantly.
Ventoy is a particularly popular option right now. It lets you put multiple ISO files on a single USB drive. You just copy the ISO files to the drive, and Ventoy creates a menu that lets you choose which one to boot. It supports persistent storage through special configuration files.
Expert Insight: When setting up persistent storage, always leave at least 4GB for the Ubuntu system and allocate the rest to your persistent partition. A 16GB USB drive with 8GB for persistence and 8GB for the system works well for most users.
Benefits and Limitations of Running Ubuntu From USB
Like any approach, running Ubuntu from a USB flash drive has its advantages and its downsides. Let me walk you through both so you can make an informed decision.
The Benefits
- No installation needed. You do not touch your computer’s hard drive at all.
- Portable. Carry your operating system in your pocket and use it on any compatible computer.
- Safe for your main system. Nothing you do in live mode affects your Windows or macOS installation.
- Great for learning. It is the best way to explore Linux without any risk.
- Useful for repair. You can boot into Ubuntu to fix problems on a broken computer.
- Privacy. You can leave no trace on the computer you are using.
The Limitations
- Slower performance. USB drives are slower than internal hard drives or SSDs. You will notice this during heavy tasks.
- Wear on the USB drive. Flash memory has a limited number of write cycles. Heavy use can wear it out faster.
- Limited storage. Even a 64GB USB drive fills up quickly when you are storing files and running apps.
- No hardware acceleration in live mode. Graphics performance may be weaker compared to a full installation.
- Some features are disabled. Certain hardware features may not work properly in a live session.
Who Should Use Ubuntu From USB?
Ubuntu from USB is perfect for beginners who want to explore Linux. It is also great for IT professionals who need a portable repair toolkit. Students who want to learn about open source software will benefit greatly too. However, if you plan to use Ubuntu as your daily driver for demanding tasks like video editing or gaming, a full installation on your hard drive is a better choice.
| Feature | Live USB (No Persistence) | Persistent USB | Full Installation |
|---|---|---|---|
| Speed | Fast boot, slower use | Slower due to USB limits | Fastest on internal drive |
| Data Saved Between Sessions | No | Yes | Yes |
| Requires Installation | No | No | Yes |
| Safe for Host Computer | Yes | Yes | No (installs on disk) |
| Best For | Testing | Portable daily use | Primary operating system |
Common Mistakes to Avoid
Many beginners run into the same problems when trying to run Ubuntu from a USB flash drive. Here are the most common mistakes and how to avoid them.
Using a USB Drive That Is Too Small
A 4GB USB flash drive is not enough for modern versions of Ubuntu. The ISO file alone is over 4GB for recent releases. Always use at least 8GB, and 16GB is much better, especially if you want persistent storage.
Skipping the BIOS Boot Order
Some people plug in their USB drive and expect the computer to automatically boot from it. This does not always happen. If your computer boots straight into Windows or macOS, you need to access the boot menu or change the BIOS settings. This is the most common reason people think Ubuntu from USB does not work.
Downloading the Wrong ISO File
Make sure you download the correct Ubuntu ISO file for your needs. The desktop version is for most users. The server version is for advanced users who want to set up a server. Downloading the wrong one will lead to confusion and frustration.
Not Verifying the Download
A corrupted ISO file can cause all kinds of problems. Always check the checksum after downloading. This takes just a minute and can save you hours of troubleshooting.
Using a Low-Quality USB Drive
Cheap, no-name USB drives are more likely to fail during the boot process or corrupt your data. Stick with reputable brands. A reliable USB flash drive is a small investment that makes a big difference.
Final Thoughts
Running Ubuntu from a USB flash drive is one of the best ways to explore Linux without any risk. It is simple, free, and incredibly useful. Whether you are a complete beginner or a seasoned tech user, a bootable Ubuntu USB drive belongs in your toolkit.
You now know how to choose the right USB drive, create a bootable installer, change your BIOS settings, and even set up persistent storage. You also understand the benefits and limitations so you can decide if this approach is right for you.
The beauty of Ubuntu is that it gives you freedom. Freedom to explore, freedom to learn, and freedom to carry your operating system wherever you go. All you need is a USB flash drive and about 15 minutes of your time.
So go ahead. Download the Ubuntu ISO file. Grab a USB stick. Create your bootable drive and see what Linux has to offer. You might just discover a whole new world of computing.
Frequently Asked Questions
Can I run Ubuntu from a USB flash drive without installing it on my computer?
Yes, absolutely. When you boot from the Ubuntu USB drive, you can choose “Try Ubuntu” to run the full operating system without installing anything on your hard drive. This is called a live session, and it leaves your computer completely untouched.
What size USB flash drive do I need to run Ubuntu?
You need at least an 8GB USB flash drive. A 16GB drive is recommended, especially if you want to set up persistent storage. The Ubuntu ISO file itself is about 4 to 5GB, so anything smaller than 8GB will not work.
Will running Ubuntu from USB damage my computer?
No, it will not. Running Ubuntu from a USB flash drive in live mode does not touch your hard drive or your existing operating system. It is completely safe and reversible. You can remove the USB drive and restart your computer as normal.
Can I use a USB 2.0 flash drive to run Ubuntu?
Yes, you can. A USB 2.0 drive will work, but it will be noticeably slower than a USB 3.0 drive. Boot times will be longer, and applications may take more time to open. If possible, use a USB 3.0 drive for a much better experience.
How is persistent storage different from a live USB session?
In a live USB session, any changes you make are lost when you restart the computer. With persistent storage, your files, settings, and downloads are saved directly to the USB drive. This means everything stays with you between sessions, just like a regular computer.
Can I install software on Ubuntu when running it from a USB drive?
Yes, you can install software when running Ubuntu from a USB flash drive. However, without persistent storage, those installations will disappear when you restart. With persistent storage enabled, your installed apps and files will be saved and available the next time you boot from the USB drive.