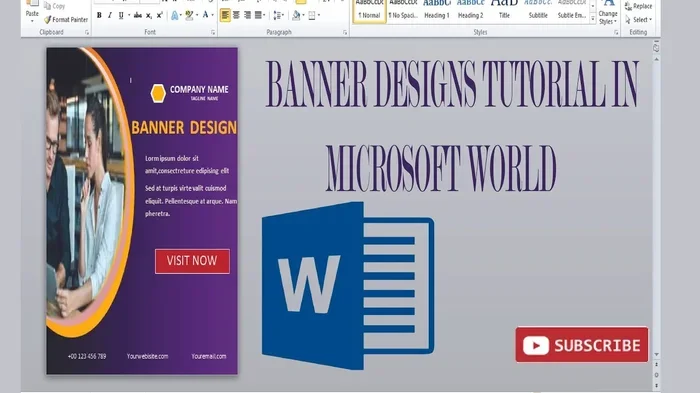
How Do I Print A Banner With Microsoft Word Easily
Learning how do I print a banner with Microsoft Word is simpler than you think. With the right page setup, templates, and print settings, you can create professional-quality banners at home or in the office. This guide walks you through every step from design to final print.
Have you ever needed a big, eye-catching banner but didn’t want to spend hundreds on a professional printing service? The good news is that how do I print a banner with Microsoft Word is a question with a straightforward answer. You can create stunning banners right from your computer without any special software or design experience.
Microsoft Word gives you all the tools you need to design, format, and print a banner that looks professional. Whether you need a banner for a party, a business event, or a school project, Word handles the job well. This guide breaks down the entire process into simple, easy-to-follow steps.
By the end of this article, you will know exactly how to set up your document, choose the right template, add your content, and print your banner with confidence. No guesswork. No frustration. Just clear instructions that get results.
Key Takeaways
- Set up your document correctly: Choosing the right page size and orientation is the foundation of successful banner printing in Word.
- Use built-in templates or design from scratch: Word offers banner templates that save time, or you can create a custom banner layout easily.
- Adjust print settings carefully: Scaling, print quality, and paper source settings make a huge difference in your final output.
- Test print first: Always do a test run on regular paper before printing on expensive banner material.
- Choose the right printer: Inkjet printers handle banner paper better than laser printers for most home users.
- Troubleshoot common issues: Knowing how to fix blurry images and alignment problems saves time and money.
📑 Table of Contents
Setting Up Your Document for Banner Printing
Before you add any text or images, you need to set up your Word document correctly. This step is the most important part of the entire process. If your document size is wrong, your banner will look stretched, cropped, or blurry no matter how good your design is.
Choosing the Right Page Size
Standard Word documents use letter size (8.5 x 11 inches). But a banner needs to be much larger. You can customize the page size to match your needs. Go to the Layout tab and click Size. Then select More Paper Sizes at the bottom of the dropdown menu.
Here you can type in any dimensions you want. Common banner sizes include:
- 24 x 36 inches — Great for medium-sized events and presentations
- 36 x 48 inches — Ideal for trade shows and large displays
- 18 x 24 inches — Perfect for smaller promotional banners
- 48 x 96 inches — Best for large outdoor banners
Keep in mind that your printer has limits. Most home printers can handle paper up to 11 x 17 inches (tabloid size). For larger banners, you will need to print on multiple pages and tape them together. This is called tiling, and Word makes it easy to set up.
Configuring Page Orientation
Next, you need to decide on your page orientation. Most banners look better in landscape mode because it gives you more horizontal space. To change this, go to the Layout tab and select Orientation. Choose Landscape from the options.
If you are making a tall, vertical banner, portrait orientation works fine. But for most purposes, landscape gives you the best results. The extra width lets you spread out your text and images without crowding them together.
Finding or Creating a Banner Template in Word
Now that your document is set up, it is time to add content. You have two main paths here. You can use a pre-made Word banner template, or you can build your design from a blank page. Both approaches work well depending on your needs.
Using Built-In Templates
Word comes with dozens of built-in templates. To access them, open Word and click on File. Then click New. In the search bar, type “banner” and press Enter. Word will show you a variety of banner designs to choose from.
These templates include pre-sized layouts, color schemes, and placeholder text. You simply replace the sample text with your own message and swap out the images. This is the fastest way to get a professional-looking result, especially if you are new to design.
Some popular template categories include:
- Event banners — birthdays, weddings, graduations
- Business banners — grand openings, sales promotions
- School banners — sports events, fundraisers
- Holiday banners — Christmas, Halloween, Fourth of July
Designing Your Own Banner Layout
If none of the templates fit your vision, you can create your own design from scratch. Start with a blank document at your custom page size. Use the Insert tab to add text boxes, shapes, images, and SmartArt graphics.
Drag elements around the canvas until you are happy with the layout. Use the Format tab to adjust colors, borders, and effects. A good rule of thumb is to keep your design simple. Too many elements make a banner look cluttered and hard to read from a distance.
Designing Your Banner Content
The content of your banner is what captures attention. Whether you are printing a color banner or a simple black-and-white design, the content needs to be clear, bold, and easy to read from a distance.
Adding Text and Fonts
Choose fonts that are large and easy to read. Sans-serif fonts like Arial, Calibri, or Helvetica work best for banners. Avoid thin or decorative fonts because they lose clarity when printed at a large size.
Your main headline should be the largest text on the banner. Aim for a font size between 72 and 150 points depending on the banner size. Supporting text can be smaller, but it should still be easy to read from several feet away.
Here are some quick tips for text on banners:
- Use no more than three different fonts
- Keep text aligned to one side or centered
- Use high-contrast colors between text and background
- Leave plenty of white space around text
- Limit your message to the most important information
Inserting Images and Graphics
Images make your banner more visually appealing. To add an image, go to Insert and click Pictures. You can choose from your computer files, online sources, or built-in Word clip art.
When selecting images, choose high-resolution files. Low-resolution images will look pixelated and blurry when printed at a large size. A good rule is to use images that are at least 300 DPI (dots per inch) for the best banner resolution.
To resize an image, click on it and drag the corners. Hold the Shift key while dragging to keep the proportions correct. Never stretch an image by dragging the sides only, or it will look distorted.
Print Settings and Configuration
Getting the design right is only half the battle. The print settings you choose determine how your banner actually looks on paper. Taking a few extra minutes to configure these settings can make a huge difference.
Selecting the Right Printer
Not all printers are created equal when it comes to large format printing. Inkjet printers generally produce better results for banners because they handle large paper sizes and vibrant colors well. Laser printers can work too, but they often have size limitations.
Check your printer’s maximum paper size before you start. Most inkjet printers support tabloid (11 x 17 inches) or even larger paper sizes. If you need a banner bigger than your printer can handle, consider printing in sections and joining them together.
For the best results, use a printer with individual color ink cartridges. This gives you more control over color accuracy and lets you replace only the color that runs out.
Adjusting Print Quality and Scale
Before you hit print, go to File and then Print. Click on Printer Properties to access detailed settings. Look for a quality or resolution setting and choose the highest available option.
If your banner is larger than a single sheet of paper, you need to use the tiling or scaling feature. In the print settings, look for an option called “Scale to Fit” or “Poster Printing.” This tells Word to split your banner across multiple pages and add alignment marks.
The alignment marks are small tick marks at the corners of each page. They help you line up the pages perfectly when you tape them together. Without these marks, your banner edges will not match up correctly.
Printing Your Banner: Step-by-Step
Now that everything is set up, it is time to print. Follow these steps carefully to get the best possible result.
Printing on Standard Paper First
Always do a test print on regular paper before printing on expensive banner material. This lets you check the layout, colors, and text alignment without wasting costly supplies.
Load a sheet of regular printer paper and send your document to the printer. Walk through the entire output and check for any issues. Look for cut-off text, blurry images, or misaligned sections. Make any necessary adjustments to your design or settings before printing the final version.
This one simple step saves time, money, and frustration. It is especially important if you are printing a custom banner design for an important event or business use.
Printing on Banner Material
Once your test print looks perfect, you are ready to print on the actual banner material. Load your banner paper or vinyl sheet into the printer tray. Make sure the paper feeds straight and does not curl or jam.
Here are a few tips for printing on specialty materials:
- Use the manual feed tray if your printer has one
- Adjust the paper thickness setting in your printer preferences
- Let the ink dry completely before handling the printed banner
- Use heavy-duty banner paper for outdoor use
- Consider applying a lamination sheet for extra durability
If you are printing a very large banner, you will need to print it in sections and tape the pages together. Align the pages carefully using the registration marks. Use clear tape on the back and avoid covering any printed areas.
Troubleshooting Common Banner Printing Issues
Even with careful preparation, you may run into some issues when printing a banner. Here are the most common problems and how to fix them.
Image Quality Problems
If your printed images look blurry or pixelated, the issue is usually the source file resolution. Low-resolution images do not have enough detail to look good at a large size. The fix is to start with higher-quality images.
Before inserting an image into Word, check its resolution. You can do this by right-clicking the file and selecting Properties. Look for the resolution details. Aim for images that are at least 1500 x 1500 pixels for a standard banner size.
Another common cause of poor image quality is excessive scaling. If you stretch a small image to fill a large area, it will lose clarity. Try to use images that are close to the final print size you need.
Alignment and Cutting Issues
When printing a tiled banner, the sections may not line up perfectly. This usually happens because the printer feeds paper slightly differently each time. To fix this, use the same paper tray for all pages and make sure the paper is snug against the guides in the tray.
If your sections still do not align, try printing a test page with crosshair marks. Compare the printed crosshairs to the original design to see where the offset is. You can then adjust your design slightly to compensate.
For cutting, use a sharp craft knife and a metal ruler. Cut along the outer edges of the printed area, not along the design itself. A clean cut makes your finished banner look much more professional.
Expert Tips for Better Banner Printing
Here are some extra tips from experienced users that can take your banner printing to the next level:
- Use a color calibration tool to ensure your printed colors match what you see on screen
- Save your banner design as a template so you can reuse it for future events
- Add bleed area by extending your background color or image slightly beyond the trim edge
- Print on both sides if your banner will be viewed from either direction
- Use waterproof ink or vinyl for outdoor banners that need to withstand the elements
- Check your printer’s ink levels before starting a large print job to avoid running out mid-print
These small extra steps can make a big difference in the final quality of your printed banner. Taking a few minutes to prepare properly saves you from disappointing results.
Conclusion
How do I print a banner with Microsoft Word is a question that has a clear and satisfying answer. With the right document setup, a good template or custom design, and proper print settings, you can create professional-quality banners without any special equipment or training.
Start by setting your page size and orientation correctly. Choose a template or build your own design with bold text and high-quality images. Adjust your print settings for the best quality and scale. Always test print on regular paper first. And finally, print on your banner material with care and patience.
The process is straightforward once you know the steps. You do not need expensive software or a professional printing service. Microsoft Word gives you everything you need to create and print a banner that looks great and serves its purpose perfectly. Give it a try for your next event or project, and you will be impressed with the results.
Frequently Asked Questions
Can I print a banner larger than my printer’s maximum paper size?
Yes, you can. Use the tiling or poster printing feature in Word to split your banner across multiple pages. Print each section on the largest paper your printer supports, then tape the pages together carefully. The alignment marks help you match up the sections perfectly.
What type of paper is best for printing banners at home?
Heavyweight matte or glossy banner paper works best for indoor use. For outdoor banners, choose waterproof vinyl or thick synthetic paper. You can find these materials at most office supply stores or online. Always check that the paper weight is compatible with your printer before loading it.
Why does my printed banner look different from what I see on screen?
This is usually caused by differences in color profiles between your monitor and printer. Monitors use RGB color mode while printers use CMYK. To get closer color matches, use the sRGB color profile in your design and do a test print to adjust colors before the final run.
Do I need a special printer to print a banner?
No, you do not need a special printer. Most inkjet printers can handle banner paper up to 11 x 17 inches or larger. For very large banners, you can print in sections and join them together. Laser printers also work but may not produce as vibrant colors as inkjet printers.
How can I make my banner text easier to read from a distance?
Use large, bold fonts in high-contrast colors against your background. Keep your message short and focused on the most important information. Avoid thin fonts and busy backgrounds that make text hard to decipher. A good test is to print a small section and view it from across the room.
Can I save my banner design in Word for future use?
Absolutely. Once you have created your banner, go to File and click Save As. Choose Word Template (.dotx) as the file format. This saves your design as a reusable template that you can open and customize with new text and images whenever you need another banner.