Does The Microsoft Lifecam Have A Built In Mic Check
The Microsoft Lifecam series does include a built-in microphone on most models, making it a convenient all-in-one solution for video calls and streaming. You can easily check and set up the mic on Windows 10 or 11 without installing extra software. Below, we walk you through every model, setup step, and common fix to get your Lifecam mic working perfectly.
If you have a Microsoft Lifecam sitting on your desk, you might be wondering whether it has a microphone built in. The short answer is yes, most Lifecam models do include a mic. But the details matter. Not every model is the same, and the audio quality can vary quite a bit depending on which version you own.
In this guide, we will walk you through everything you need to know about the Microsoft Lifecam built-in mic. We will look at which models have microphones, how to check if yours is working, and how to set it up in just a few clicks. We will also cover common problems and easy fixes so you can get crystal-clear audio for calls, streaming, and recording.
Whether you use your Lifecam for work meetings on Zoom, family calls on Skype, or casual video chats, having a reliable webcam microphone makes a huge difference. You will not need to buy a separate mic or fiddle with extra cables. Let us dive right in and make sure your Lifecam mic is ready to go.
Key Takeaways
- Most Microsoft Lifecam models come with a built-in microphone: You do not need a separate mic for basic calls and recordings.
- You can verify the mic in Windows settings: Go to Sound Settings to check if your Lifecam is recognized as an audio input device.
- Setup is plug and play: Simply connect the USB cable and Windows should auto-detect the microphone.
- Audio quality varies by model: The Lifecam HD and Studio series offer better noise handling than entry-level versions.
- Common issues are easy to fix: Updating drivers or adjusting privacy settings usually resolves mic problems.
- The Lifecam mic works with Zoom, Skype, and Teams: It is fully compatible with all major video conferencing tools.
📑 Table of Contents
What Is the Microsoft Lifecam?
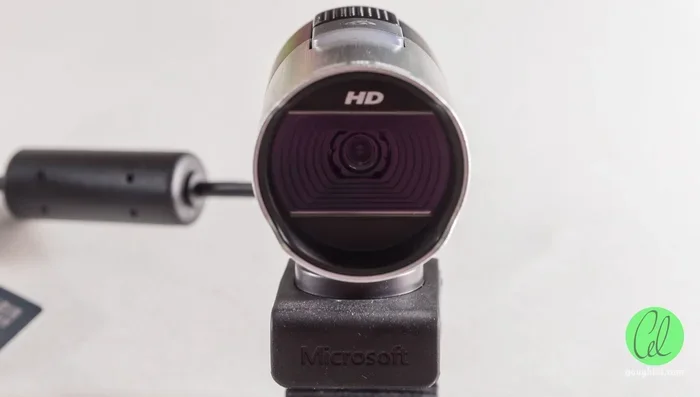
The Microsoft Lifecam is a line of USB webcams made by Microsoft. These cameras are designed for everyday users who need a simple and affordable way to add video to their computer setup. They plug right into a USB port and work instantly with most operating systems.
The Lifecam series includes several models. Each one is built for a slightly different purpose. Some are great for basic video calls. Others are better for streaming or recording videos. But almost all of them share one key feature: a built-in microphone.
Why People Choose the Lifecam
There are several reasons the Lifecam is popular. First, it is affordable. You do not need to spend a lot of money to get a decent webcam. Second, it is plug and play. There is no complicated setup process. Third, the built-in microphone saves you from buying a separate mic. This makes the Lifecam a great all-in-one solution for anyone who wants simple video and audio in one device.
The Lifecam also works well with Windows 10 and Windows 11. Microsoft designed these cameras to integrate smoothly with their operating system. That means your mic and camera should be recognized right away when you plug them in.
Does Every Microsoft Lifecam Model Have a Built-In Mic?
This is one of the most common questions people ask. The answer is mostly yes, but there are a few exceptions. Let us break it down by the most popular Lifecam models.
Lifecam HD Series
The Lifecam HD models are among the most popular webcams Microsoft has ever made. These include the Lifecam HD-3000 and the Lifecam HD-6000. Both of these models come with a built-in microphone. The mic is small but it works well for everyday video calls. The audio is clear enough for meetings on Zoom, Skype, or Microsoft Teams.
If you own one of these models, you already have a webcam microphone ready to use. You just need to make sure it is set as your default input device in your computer settings.
Lifecam Cinema
The Lifecam Cinema is a step up from the HD series. It was designed for users who want better image quality and improved audio. This model also has a built-in microphone. The mic on the Cinema series tends to sound a bit better than the HD models. It picks up voice clearly and handles background noise a little more effectively.
Many people use the Lifecam Cinema for streaming and recording. The built-in mic works well for these tasks too, though serious streamers might want to use a dedicated microphone for even better sound.
Lifecam Studio
The Lifecam Studio is the most advanced model in the lineup. It was built for users who need professional-quality video and audio. The Studio model has a high-quality built-in microphone that delivers rich, clear sound. It is one of the best built-in webcam mics you will find in this price range.
If you use your Lifecam for podcasting or video content creation, the Studio model is a great choice. The microphone captures voice naturally and reduces unwanted background noise better than the other models.
Older and Budget Models
Some older or very budget-friendly Lifecam models may not have a microphone. These are rare, but they do exist. If you are not sure whether your specific model has a mic, check the product label or the original box. You can also look up the model number on Microsoft’s website for full specifications.
How to Check If Your Microsoft Lifecam Has a Microphone
Not sure if your Lifecam has a mic? There are a few simple ways to check. You do not need to be a tech expert to do this. Here is how you can verify your webcam microphone is working.
Method 1: Check Windows Sound Settings
Windows makes it easy to see all audio input devices connected to your computer. Here is what to do:
- Right-click the speaker icon in your taskbar.
- Select Sound Settings from the menu.
- Scroll down to the Input section.
- Look for your Microsoft Lifecam in the list of devices.
If you see your Lifecam listed there, it has a microphone. You can also test it by speaking into the camera and watching the input level bar move. If the bar moves, your mic is working.
Method 2: Check Device Manager
Another way to confirm is through Device Manager. Here is how:
- Right-click the Start button and select Device Manager.
- Expand the Audio inputs and outputs section.
- Look for your Lifecam listed there.
If your Lifecam appears under audio devices, it has a built-in microphone. If it does not appear, try unplugging and replugging the USB cable, or check if you need to update the driver.
Method 3: Test in a Video Call
The simplest way to check is to make a test call. Open Zoom, Skype, or Microsoft Teams and start a test meeting. Go to the audio settings and select your Lifecam as the microphone. Speak into the camera and see if your voice comes through clearly.
This method gives you real-world proof that your webcam microphone is working. It also lets you hear the audio quality for yourself.
Setting Up the Microsoft Lifecam Mic on Windows
Setting up your Lifecam microphone is quick and easy. Most of the time, Windows will detect the mic automatically when you plug in the USB cable. But sometimes you need to adjust a few settings to get the best results.
Step-by-Step Setup Guide
- Plug the Lifecam into a USB port on your computer.
- Wait a few seconds for Windows to recognize the device.
- Go to Settings and then System, then Sound.
- Under Input, select your Lifecam as the default microphone.
- Speak into the mic and check the volume level bar.
That is it. Your Microsoft Lifecam mic should now be active and ready to use. Most video calling apps will automatically detect the default input device, so you should be good to go.
Adjusting Mic Volume and Sensitivity
Sometimes the mic volume is too low or too high. You can adjust this in the Sound Settings page. Click on your Lifecam microphone and use the slider to change the input volume. You can also click on Device Properties to access more advanced settings like microphone boost.
Be careful with microphone boost. Turning it up too high can introduce background noise and static. Keep it at a moderate level for the cleanest audio.
Privacy Settings for Microphone Access
Windows 10 and Windows 11 have privacy settings that control which apps can access your microphone. If your Lifecam mic is not working in a specific app, this might be the reason. Go to Settings, then Privacy, then Microphone. Make sure the toggle for Allow apps to access your microphone is turned on. Also check that the specific apps you use (like Zoom or Skype) are listed and allowed.
Audio Quality and Real-World Performance
How good is the microphone on the Microsoft Lifecam? That depends on the model and what you expect. For everyday video calls, the built-in mic does a solid job. But if you are looking for studio-quality audio, you might want to use a separate microphone.
What to Expect From the Built-In Mic
The Lifecam microphone is designed for clear voice communication. It picks up your voice well at normal speaking distances, which is usually about one to two feet from the camera. The audio is clear enough for work meetings, online classes, and casual video calls with friends and family.
However, the built-in mic is not perfect. It can pick up background noise like keyboard clicks, fan sounds, or room echo. If you are in a noisy environment, the audio quality might suffer. This is true for most built-in webcam microphones, not just the Lifecam.
Tips to Improve Mic Audio Quality
Want to get better sound from your Lifecam mic? Here are some easy tips:
- Sit close to the camera: The mic picks up your voice better when you are nearby.
- Reduce background noise: Close windows and turn off fans if possible.
- Use a soft surface: Placing the Lifecam on a soft pad can reduce vibrations and handling noise.
- Adjust mic settings: Use the Windows mic settings to fine-tune the volume and sensitivity.
- Use a USB extension cable: This can help you position the camera closer to your face for better audio capture.
Lifecam Mic vs. External Microphones
The Lifecam built-in mic is convenient, but it cannot match a dedicated external microphone. If you are a podcaster, a streamer, or someone who records videos professionally, an external mic will give you much better sound quality. The Lifecam mic is perfect for everyday use, but it is not a replacement for a proper recording microphone.
That said, for the price and convenience, the Lifecam mic is hard to beat. It saves you money and keeps your setup simple. Most users will find it more than adequate for their needs.
Troubleshooting Common Microsoft Lifecam Mic Issues
Sometimes the Lifecam microphone does not work as expected. This can be frustrating, but most issues have simple fixes. Let us look at the most common problems and how to solve them.
Mic Not Detected by Windows
If Windows does not recognize your Lifecam mic, the first thing to try is unplugging the USB cable and plugging it into a different port. USB ports can sometimes fail to detect devices properly. You should also try a different USB cable if you have one available.
If that does not work, open Device Manager and look for any yellow warning signs near the Lifecam entry. This usually means the driver needs updating. Right-click the device and select Update Driver. Windows will search for the latest driver online.
Mic Sounds Distorted or Muffled
If your voice sounds distorted or muffled through the Lifecam mic, check the input volume settings. A volume level that is too high can cause distortion. Lower the volume slider in Sound Settings and test again.
Also, make sure nothing is blocking the mic hole on the Lifecam. The microphone is a small opening on the camera body. If it is covered by a sticker, a case, or your hand, the audio will suffer.
Mic Works in Some Apps but Not Others
This is a common issue and it is usually caused by app permissions. Some apps have their own microphone settings that override the Windows default. For example, Zoom has its own audio settings where you need to select the Lifecam as the input device.
Go into the settings of the app you are using and check the audio input. Make sure it is set to the Microsoft Lifecam microphone. Also check the privacy settings in Windows to make sure that specific app has permission to access the microphone.
Background Noise Is Too Loud
The Lifecam does not have advanced noise cancellation features. If your environment is noisy, the mic will pick up all of it. One way to reduce this is to use the Windows Sound Settings to adjust the microphone sensitivity. Lowering it slightly can reduce background noise without affecting your voice quality too much.
Another option is to use a free noise suppression tool like NVIDIA RTX Voice or Krisp. These tools can clean up your audio in real time and work with any microphone, including the Lifecam built-in mic.
Lifecam Mic Stops Working After a Windows Update
Windows updates can sometimes cause driver conflicts. If your Lifecam mic suddenly stops working after an update, try rolling back the driver. Go to Device Manager, find the Lifecam under audio devices, right-click it, and select Properties. Then go to the Driver tab and click Roll Back Driver.
If that does not work, uninstall the device from Device Manager and then restart your computer. Windows will reinstall the driver automatically when it detects the Lifecam again.
Final Verdict
So, does the Microsoft Lifecam have a built-in mic? Yes, it does. Almost every model in the Lifecam lineup comes with a microphone that works well for video calls, online meetings, and casual streaming. The setup is simple, the mic is easy to use, and it integrates smoothly with Windows and all major video conferencing apps.
The audio quality is good enough for most everyday uses. It might not match a dedicated external microphone, but for the price and convenience, it is an excellent feature to have. If you are shopping for a new webcam and audio quality matters to you, look at the Lifecam Cinema or Studio models for the best built-in microphone experience.
We hope this guide has answered all your questions about the Microsoft Lifecam microphone. Now you know how to check, set up, and troubleshoot your webcam mic with confidence. Plug in your Lifecam, test the mic, and enjoy clear audio on all your video calls.
Frequently Asked Questions
Do all Microsoft Lifecam models have a built-in microphone?
Most Lifecam models do include a built-in mic, including the HD-3000, HD-6000, Cinema, and Studio series. However, some very old or budget-specific variants may not have one. Always check the product specifications before purchasing if the microphone is important to you.
How do I know if my Lifecam mic is working?
You can check by going to Windows Sound Settings and looking for your Lifecam under the Input devices. Speak into the camera and watch the input level bar. If it moves, your microphone is active and working properly.
Can I use the Lifecam mic for streaming on Twitch or YouTube?
Yes, the Lifecam built-in microphone works for streaming. It is compatible with OBS Studio, Streamlabs, and other popular streaming software. For professional-quality streams, an external mic is recommended, but the Lifecam mic is perfectly fine for casual and beginner streamers.
Why is my Lifecam mic so quiet?
This is usually caused by low input volume or incorrect default device settings. Go to Windows Sound Settings, select your Lifecam microphone, and increase the volume slider. You can also check the mic boost setting for additional volume.
Do I need to install drivers for the Lifecam microphone?
In most cases, no. The Microsoft Lifecam is plug and play. Windows 10 and Windows 11 include the necessary drivers automatically. If the mic is not recognized, try updating the driver through Device Manager or restarting your computer.
Can I use the Lifecam mic with a Mac computer?
Yes, the Lifecam works with Mac computers, and the built-in microphone should be recognized. However, Mac support for Lifecam features is more limited than on Windows. You may need to adjust permissions in System Settings under Privacy and Security to allow microphone access.
=== CONCLUSION ===
The Microsoft Lifecam is a reliable and affordable webcam that comes with a built-in microphone on nearly every model. Whether you use the HD-3000, HD-6000, Cinema, or Studio version, you have a functional webcam mic ready to go right out of the box. Setting it up is simple, and troubleshooting common issues is straightforward.
For everyday video calls, online classes, and casual streaming, the Lifecam microphone delivers clear and dependable audio. While it may not replace a professional recording microphone, it is more than enough for most users. With the tips and fixes shared in this guide, you should be able to get the best performance out of your Microsoft Lifecam mic and enjoy crystal-clear audio on every call.