How Do I Insert A Text Box In Openoffice Writer
Inserting a text box in OpenOffice Writer is simple once you know the right steps. Whether you need a text frame for flyers, a pull quote in a document, or a custom layout element, this guide covers everything. You will learn how to access the Insert Text Box tool, adjust sizing, add borders, and position your box precisely on the page.
Have you ever wanted to highlight a specific piece of text on your page? Maybe you are designing a newsletter, a flyer, or a report and need a text box in OpenOffice Writer to draw attention to key information. A text box lets you place text anywhere on the page, independent of your main document flow.
Many people find the process confusing at first. The menus are not always obvious, and the options can feel overwhelming. But here is the good news — inserting a text box in OpenOffice Writer is much simpler than it looks. Once you learn the basic steps, you will be adding styled, positioned text boxes in minutes.
This guide walks you through every step in detail. We will cover how to insert the box, how to format it, how to move it around, and how to avoid common mistakes. By the end, you will feel confident creating professional text boxes for any project.
Key Takeaways
- Easy Access: The Insert Text Box option lives under the Insert menu in OpenOffice Writer.
- Full Customization: You can resize, recolor, add borders, and change the background of any text box.
- Flexible Positioning: Text boxes can be anchored to paragraphs, pages, or characters for precise placement.
- Multiple Text Boxes: You can link several text boxes together for flowing text across a page.
- Quick Tips Available: Keyboard shortcuts and formatting tricks save time and improve your workflow.
- Beginner-Friendly: No design experience is needed to create professional-looking text boxes.
📑 Table of Contents
What Is a Text Box in OpenOffice Writer?
A text box in OpenOffice Writer is essentially a container for text. It sits on top of your page content and can be moved anywhere you want. Unlike regular paragraphs, a text box does not flow with the rest of your document. It stays exactly where you place it.
People use text boxes for many reasons. Some use them for pull quotes in articles. Others use them for sidebars in reports. You can also use them for labels, captions, or decorative elements on a page. The possibilities are wide open.
Key Features of OpenOffice Text Boxes
- Free Positioning: Place your box anywhere on the page or page margin.
- Custom Borders: Add outlines, shadows, or remove borders entirely.
- Background Colors: Fill your box with any color or make it transparent.
- Text Wrapping: Control how your main document text flows around the box.
- Linking Boxes: Connect multiple text boxes so text flows from one to the next.
- Rotation: Rotate your text box to any angle for creative layouts.
How to Insert a Text Box in OpenOffice Writer
The process of inserting a text box in OpenOffice Writer is straightforward. There are two main ways to do it, and both work great. Let us walk through each method step by step.
Method 1: Using the Insert Menu
This is the most common way to add a text box. Follow these simple steps:
- Open your document in OpenOffice Writer.
- Place your cursor where you want the text box to appear.
- Click on the Insert menu at the top of the screen.
- Hover over Text Box from the dropdown menu.
- A blank text box will appear on your page, ready for you to type in.
That is it! You now have a text box on your document. You can start typing inside it right away. The box will appear with default settings, but you can change everything about it later.
Method 2: Using the Drawing Toolbar
If you prefer using toolbars, the Drawing Toolbar offers another quick way. Here is how:
- Go to View in the top menu.
- Click on Toolbars.
- Select Drawing to enable the toolbar.
- Click the Text Box icon on the Drawing Toolbar.
- Click and drag on your page to draw the text box at your desired size.
Using the Drawing Toolbar gives you more control over the initial size of your box. This method is great when you already know how big you want the box to be before you start typing.
Quick Tip: Keyboard Shortcut
Did you know there is a quick way to insert a text box using your keyboard? Press Alt + I to open the Insert menu, then press T to select Text Box. This shortcut works in most versions of OpenOffice and can save you a lot of time.
Formatting Your Text Box
Once your text box is on the page, formatting is where the real fun begins. A plain text box looks okay, but a well-formatted one looks professional and polished. Let us explore the different formatting options available.
Changing the Size of Your Text Box
Resizing a text box in OpenOffice Writer is easy. Click on the box to select it. You will see small green squares around the edges. Drag any of these squares to make the box larger or smaller.
For precise sizing, right-click the text box and select Properties. In the properties window, you can enter exact width and height values. This is perfect when you need your box to match a specific measurement.
Adding Borders and Shadows
Borders make your text box stand out. To add or change a border:
- Right-click the text box.
- Select Properties.
- Go to the Borders tab.
- Choose your border style, thickness, and color.
You can also add a drop shadow for a more dramatic effect. The shadow option is found in the same properties window under the Shadow tab. A subtle shadow gives your box depth and makes it pop off the page.
Changing the Background Color
Want to make your text box stand out even more? Change the background color. Here is how:
- Right-click the text box.
- Choose Properties.
- Click on the Background tab.
- Select a color from the palette or use a custom color.
You can also make the background transparent. This is useful when you want the text box to blend with your page design. A transparent background keeps the focus on the text inside.
Adjusting Text Alignment and Font
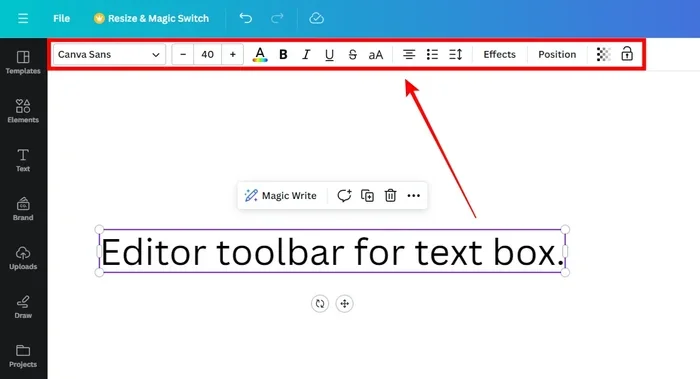
The text inside your box follows the same formatting rules as regular document text. You can change the font, size, color, and alignment just like you would with any paragraph. Select the text inside the box and use the formatting toolbar at the top.
Pro tip: Use bold or italic sparingly inside a text box. Too much formatting can make the box look cluttered and hard to read. Keep it clean and simple for the best results.
Positioning and Anchoring Your Text Box
One of the best things about a text box in OpenOffice Writer is that you can place it anywhere on the page. But placing it precisely takes a little know-how. Let us look at how anchoring and positioning work.
Understanding Anchor Types
When you insert a text box, it needs an anchor point. The anchor determines how the box behaves when you edit the document around it. There are three main anchor types:
- To Paragraph: The box moves with the paragraph it is attached to.
- To Page: The box stays fixed in the same position on the page, even if text is added above it.
- To Character: The box moves with the specific character it is anchored to.
To change the anchor, right-click the text box, go to Properties, and look for the Anchor section. Choose the type that fits your layout needs best.
Moving Your Text Box
To move a text box, simply click on it and drag it to the new location. If you need pixel-perfect positioning, use the Position settings in the Properties window. Enter exact X and Y coordinates for precise placement.
Another helpful trick: hold down the Shift key while dragging to move the box in a straight line horizontally or vertically. This prevents accidental diagonal movement.
Wrapping Text Around a Text Box
By default, your main document text will not flow around the text box. If you want text to wrap around the box, you need to change the wrap settings. Right-click the text box, go to Properties, and find the Wrap tab. Choose from options like:
- No Wrap: Text ignores the box completely.
- Page Wrap: Text wraps around the box at the page level.
- Optimal Page Wrap: Text adjusts to fit around the box as tightly as possible.
Choosing the right wrap option makes a big difference in how your page looks. Optimal Page Wrap is usually the best choice for most documents.
Advanced Text Box Techniques
Once you are comfortable with the basics, you can explore some more advanced features. These techniques will help you create professional-quality layouts in OpenOffice Writer.
Linking Multiple Text Boxes
Need text to flow across more than one box? You can link multiple text boxes together. This is especially useful for newsletters and brochures. Here is how:
- Create your first text box and add text to it.
- Create a second text box where you want the overflow text to go.
- Click on the first text box.
- Go to the Insert menu and select Text Box.
- Choose Link Text Boxes and click on the second box.
Now text will automatically flow from the first box into the second when the first box fills up. This saves you from manually copying and pasting text between boxes.
Rotating and Flipping Text Boxes
Want to create a vertical text box or a mirrored layout? You can rotate or flip your text box easily. Right-click the box, select Properties, and go to the Rotation tab. Set the rotation angle to your desired value.
To flip a box horizontally or vertically, right-click the box and choose Flip Horizontal or Flip Vertical from the context menu. These options are great for creating symmetrical designs.
Using Text Boxes in Templates
If you create documents regularly, consider saving your formatted text boxes as part of a template. This way, you can reuse the same styles and layouts without starting from scratch every time.
To save a text box as a template element, insert your formatted box into a document, then save the document as an OpenOffice Template (.ott file). Next time you start a new document from that template, your text box will be ready to use.
Common Mistakes to Avoid
Even experienced users make mistakes when working with text boxes in OpenOffice Writer. Here are some common errors and how to avoid them.
Forgetting to Anchor the Box Properly
One of the most common mistakes is not setting the anchor type correctly. If your box is anchored to a paragraph, it will move every time you add or remove text above it. This can mess up your entire page layout. Always check your anchor settings before finalizing your document.
Ignoring Text Overflow
When you add too much text to a small box, the text will overflow and become invisible. OpenOffice does not always warn you about this. To fix it, either make the box larger or reduce the font size. You can also link the box to another box to let the text flow into a second container.
Using Too Many Text Boxes
It is tempting to add a text box for every little element on your page. But too many boxes make a document look messy and hard to edit. Use text boxes only where they add value. Keep your layout clean and organized.
Not Saving Custom Styles
If you spend time creating a beautifully formatted text box, save that style for future use. Go to Format > Styles and Formatting, right-click, and choose New Style from Selection. This saves you time and keeps your documents consistent.
Comparing Text Boxes in OpenOffice vs. Other Tools
Text boxes are not unique to OpenOffice. Many word processors and design tools offer similar features. Here is a quick comparison of how text boxes in OpenOffice Writer stack up against other popular tools.
| Feature | OpenOffice Writer | Microsoft Word | Google Docs |
|---|---|---|---|
| Insert Text Box | Insert > Text Box | Insert > Text Box | Insert > Drawing > Text Box |
| Custom Borders | Yes | Yes | Limited |
| Background Color | Yes | Yes | Yes |
| Link Text Boxes | Yes | Yes | No |
| Rotation Support | Yes | Yes | Limited |
| Free Positioning | Yes | Yes | Limited |
| Price | Free | Paid | Free |
As you can see, OpenOffice Writer holds its own against paid alternatives. The free price tag makes it an excellent choice for anyone who needs text box functionality without the cost.
Frequently Asked Questions
Can I insert a text box in OpenOffice Writer on a Mac?
Yes, the process is the same on Mac as it is on Windows. Open your document, go to the Insert menu, and select Text Box. The interface looks slightly different on Mac, but all the same features are available.
How do I resize a text box after inserting it?
Click on the text box to select it. You will see green handles around the edges. Drag any handle to resize the box. For exact dimensions, right-click the box, choose Properties, and enter your preferred width and height values.
Can I add an image inside a text box in OpenOffice Writer?
Absolutely. You can insert an image into a text box just like you would in a regular document. Place your cursor inside the text box, go to Insert, and choose Image. The image will appear inside the box and can be resized and positioned within it.
How do I remove the border from a text box?
Right-click the text box and select Properties. Go to the Borders tab and set all border options to none. Click OK to apply the changes. Your text box will now have a clean, borderless look.
Can I link multiple text boxes together in OpenOffice Writer?
Yes, you can link text boxes so that text flows from one box to the next. Create your first box, add text, then create a second box. Go to Insert > Text Box and choose Link Text Boxes, then click on the second box to connect them.
Is there a difference between a text box and a text frame in OpenOffice?
Not really. OpenOffice uses the terms interchangeably in most cases. Both serve the same purpose: they create a contained area for text that you can position and format independently from your main document flow.
=== CONCLUSION ===
Learning how to insert a text box in OpenOffice Writer opens up a world of layout possibilities for your documents. Whether you are a student creating a class project, a professional designing a report, or a hobbyist putting together a flyer, text boxes give you the flexibility and control you need. From the simple Insert menu method to advanced techniques like linking boxes and adjusting anchor points, this guide has covered everything you need to get started.
Remember to experiment with formatting options like borders, colors, and text wrapping. These small touches make a big difference in how your final document looks. And always keep an eye on common mistakes like text overflow and improper anchoring. A little attention to detail goes a long way.
Now that you know the steps, try creating a text box in OpenOffice Writer today. Start with a simple box, add your text, and play around with the formatting options. You will be surprised at how quickly you can create polished, professional-looking documents. The more you practice, the more natural it will become.