How Do I Create A 3d Printer File Easily And Quickly
Creating a 3d printer file is easier than you think, even if you are a complete beginner. This guide will show you exactly how to design or download a digital model and turn it into a physical object using the right software. You will learn the simple steps to go from an idea to a printed object in no time.
Have you ever wondered how to turn a digital idea into a real object? How do I create a 3d printer file? The process might sound hard, but it is actually quite simple. You just need the right steps and a little patience. Creating a 3d printer file is the very first step in the 3d printing journey. Without a good digital file, your printer cannot do its job. This guide will walk you through every step. You will learn how to design, prepare, and export your digital file like a pro.
Many people think you need years of training to make a 3d model. That is simply not true. Anyone can learn how to create a 3d printer file. You can design from scratch or download existing files. The key is knowing which software to use. You also need to understand the basic settings. 3d printer file creation does not have to be scary. It is a fun and rewarding process. Let us dive right in and make it easy.
Key Takeaways
- Choose the right software: You need either CAD tools for designing or slicer software to prepare your file for printing.
- Start with existing models: Downloading a ready-made 3d printer file is the fastest way to begin your 3d printing journey.
- Adjust your print settings: Layer height and infill percentage are crucial for a successful print.
- Export as STL or G-code: The STL format holds your 3d model, while G-code tells the printer how to move.
- Use supports for overhangs: Adding support structures prevents your design from collapsing during the printing process.
- Check the mesh: Always verify your digital file for errors before sending it to the printer.
📑 Table of Contents
What Is A 3d Printer File?
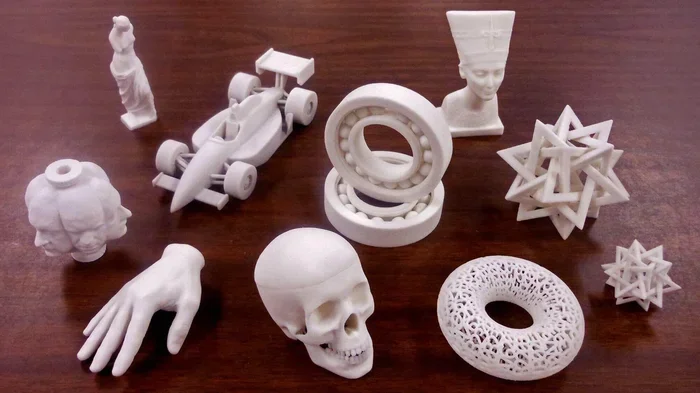
A 3d printer file is a set of instructions. It tells your printer exactly what to do. The printer reads this file layer by layer. It builds your object from the bottom up. Think of it like a very detailed recipe. The file holds all the shape and size data. It also holds the path the print head must follow.
When you send a file to your machine, the printer starts at the bottom. It draws a thin layer of plastic. Then it moves up a tiny bit. It draws the next layer. It keeps doing this until the object is complete. This is the magic of the 3d printing process. Each layer sticks to the one below it. Soon, you have a solid three-dimensional object.
The physical size of your object depends entirely on the file. If your file is huge, the printer will make a huge object. If the file is small, the print will be tiny. You control this by changing the digital file before you slice it. This gives you amazing flexibility. You can make a tiny keychain or a huge statue from the exact same software. The only limit is the size of your printer’s bed. Always check the build volume of your machine before you design.
The file format is what makes this magic possible. Your computer cannot just send a picture to the printer. It needs a specific set of data. This data tells the printer the exact shape of the object. It also tells the printer where to move the hot end. Without the right format, the printer would not know what to do. This is why 3d printer file creation is so important. You must save your work in a way the machine understands.
Why File Format Matters
The format of your file is super important. It determines what your printer can read. Most desktop printers use a specific type of mesh file. This format holds the shape of your object. It breaks the shape into tiny triangles. The more triangles, the smoother your object looks. But too many triangles can cause problems. Your computer might slow down. You need to find the right balance for your 3d design.
Another common format is OBJ. It works just like STL. It holds color data too. But STL is the most popular. Almost all slicer software can read it. You should always save your final work as an STL. This makes the next step much easier. STL stands for Standard Tessellation Language. It is a simple way to describe a 3D surface. It uses triangles to fill the shape. This makes it easy for machines to read.
STL vs G-code
You will hear two main terms often. The first is STL. The second is G-code. An STL file holds your 3d model. It is like a blank clay shape. The printer does not know how to print an STL directly. You must convert it first. This is where G-code comes in. G-code is the actual instruction set. It tells the printer where to move. It controls the speed and the heat. You need both formats to finish a job. 3d printer file creation always involves this conversion step.
Think of STL as the blueprint. Think of G-code as the worker. The blueprint has the shape. The worker knows how to build it. Without the worker, the blueprint is useless. Without the blueprint, the worker has no plan. Both are essential for a successful print. G-code uses simple X, Y, and Z coordinates. These coordinates tell the printer exactly where to go. The printer follows this path perfectly every time.
How To Create A 3d Printer File From Scratch
Making your own file is very exciting. It lets you create anything you can imagine. To start, you need 3d modeling software. This software is also called CAD software. CAD stands for Computer Aided Design. You use it to draw your object on a screen. Once you are happy with the look, you save it. Then you convert it for your printer.
Designing from scratch gives you total control. You decide the exact object dimensions. You choose the exact shape. You can make it as simple or complex as you want. This is the true power of 3d printer file creation. You are not limited by what others have made. You make exactly what you need. You can fix mistakes easily too. You just hit undo and try again.
Picking The Right CAD Software
There are many CAD programs out there. Some are free, and some cost money. Free options are great for beginners. They let you learn the basics without spending a dime. Pick a program that fits your computer. Make sure it exports the right file type. Most programs will save your work as an STL file. This is the standard for the 3d printing world.
TinkerCAD is a great choice for total beginners. It runs right in your web browser. You do not need to install anything. Fusion 360 is a bit more advanced. It is perfect for functional parts. Blender is amazing for art and organic shapes. Pick the one that matches your goal. If you want to make functional parts, use an engineering tool. If you want to make art, use a sculpting tool.
Designing Your Object
Start with simple shapes. Do not try to build a complex engine right away. Draw a simple box or a cylinder first. Change the object dimensions to fit your needs. You can stretch, shrink, or rotate the shape. Use the push and pull tools. These tools move the surfaces of your model. Add or remove material as you go. Save your work often. A crash can lose hours of work.
As you get better, add more details. Make holes for screws. Add curved edges. Paint the surface with colors. These details make your 3d model look real. Remember to keep the shape watertight. A watertight model has no holes. If there are holes, plastic will leak out. Your printer needs a closed shell to work properly. Check your design carefully before you move on.
Exporting The File
When your design is ready, you must export it. Look for the export or save as option. Choose the STL format. This creates your 3d printer file. Make sure the scale is correct. Sometimes software exports in millimeters. Your printer might need inches. Double check this before you print. A wrong scale means your object will not fit. 3d printer file creation ends with a successful export.
Before you export, look at your model from all angles. Spin it around. Make sure it looks right. Check for any spikes or weird shapes. Fix them now. It is much harder to fix them later. A clean design makes a clean print. Take your time with this step. A little extra care now saves a lot of trouble later.
Using A Slicer To Prepare Your File
You cannot send an STL file straight to your printer. You must slice it first. Slicer software cuts your model into thin layers. It then writes the G-code. This G-code is the final language your printer understands. Without a slicer, your 3d printer is just a paperweight. Slicer software turns a digital model into real actions.
The slicer reads your digital file. It calculates the exact path for the nozzle. It decides how fast the head should move. It decides how much plastic to push out. All of this becomes a long list of commands. This list is your G-code. Your printer reads this list line by line. It follows every command perfectly.
What Does A Slicer Do?
A slicer software does many important jobs. It reads your STL file. It then calculates the path for the print head. It adds heat and speed commands. It also adds support structures if your model has overhangs. Overhangs are parts that stick out sideways. Without supports, these parts would fall down. The slicer builds tiny bridges to hold them up. You can remove these supports after the print is done.
The slicer also adds a raft. A raft is a thick base layer. It helps your object stick to the bed. It stops the corners from curling up. This is very helpful when you use filament like ABS. The raft acts like a safety net. It gives your print a solid foundation to start on. You can adjust the raft settings in your slicer.
Key Print Settings
The slicer gives you many options. These options control how your object looks and feels. You must understand the main print settings. Here are the most important ones:
- Layer Height: This is the thickness of each layer. A lower number means more detail. But it also takes more time. Use 0.2mm for a good balance.
- Infill Percentage: This is how solid the inside is. A 100% infill is very heavy. A 20% infill is light and strong enough for most things.
- Print Speed: Faster is not always better. Slow down for detailed parts to avoid mistakes. Fast speeds can cause rough surfaces.
- Filament Type: Different plastics need different temperatures. Always match your settings to your material. PLA likes lower heat than ABS.
Quick Tips For Slicing
Do not change every setting at once. Change one thing at a time. This helps you learn what works. Always use a raft for small objects. A raft gives your print a solid base. It stops your object from warping. Watch a few test prints closely. They tell you if your settings are good.
Also, use a skirt or a brim. These are extra lines of plastic around your object. They help the plastic flow smoothly. They also check if the bed is level. A small extra step saves a lot of wasted filament. These simple print settings make a huge difference. Spend a few minutes tweaking them before your big print.
Downloading Ready Made 3d Printer Files
Not everyone wants to design from scratch. That is perfectly fine! You can find thousands of ready-made files online. This is the fastest way to start 3d printing. You just download the file, slice it, and print. It is like ordering a pizza instead of making the dough.
Many people share their designs for free. You can find toys, tools, and home decor. You can even find replacement parts for broken items. This community sharing is one of the best parts of 3d printing. You can learn a lot by looking at other people’s files.
Where To Find Free Models
Many websites offer free 3d printer files. Sites like Thingiverse and Printables are very popular. You can find almost anything there. Just search for what you need. Always check the file type. Make sure it is an STL or OBJ file. These are the easiest to use with your slicer software.
Some sites also offer 3d scanning files. These are scans of real objects. They are very detailed. But they can be very large. Large files take longer to slice. They might also have mesh errors. Be careful when downloading very complex scans. Always read the comments on the download page.
How To Choose A Good Download
Not all downloads are created equal. Some files have errors. They might have holes in the mesh. A bad file will cause your printer to fail. Look at the comments left by other users. If many people say it works, it probably does. Also, check the file size. A very small file might be missing details. 3d printer file creation from downloads still needs a little review.
Before you slice a downloaded file, open it in your viewer. Spin it around. Look for missing faces. Look for weird lines. If it looks clean, you are good to go. If it looks messy, find another file. A clean 3d model saves you a lot of headaches later. A good download is the start of a great print.
Common Mistakes When Creating 3d Printer Files
Everyone makes mistakes when they start. The good news is that you can avoid the common traps. Knowing what goes wrong saves you time and plastic. Here are the biggest mistakes people make with their digital file.
Ignoring The Mesh
A mesh is the skin of your model. Sometimes meshes have hidden holes. These holes let the plastic leak out during printing. Always check your model before you slice it. Most CAD programs have a repair tool. Use it to fix any holes. A clean mesh makes a perfect print.
Another mesh problem is flipped normals. This sounds scary, but it is simple. It means the inside of your model is facing out. The printer gets confused. It tries to print the inside of the shape. This wastes a lot of filament. Always make sure your normals are facing out. Your slicer will thank you. You can usually fix this with a repair tool in your CAD software.
Forgetting Support Structures
Skipping supports is a big no-no. If your design has a bridge or a hole, it needs help. The printer cannot print in mid-air. It needs something to build on. Forgetting support structures will ruin your print. The plastic will sag and droop. Always add supports to tricky areas. You can easily snap them off later.
Some slicers add supports automatically. You just turn on the setting. You can set the support to touch only the build plate. This makes removal easier. You will not have to carve out support from the inside of your object. Good support settings make 3d printer file creation much smoother. Take a few minutes to set them up correctly.
Using The Wrong Scale
This happens more than you think. You design a part in inches but print in millimeters. The result is a tiny or huge object. Always double check your units. Make sure your CAD software and your slicer agree. A quick check saves a lot of wasted filament. This is one of the easiest mistakes to fix. Just look at the settings before you start. A simple unit check can save your whole print.
Expert Tips For Perfect 3d Prints
Once you know the basics, you can aim for higher quality. Professional makers use a few tricks to get great results. These tips will help you avoid common headaches. They will make your prints look amazing.
Optimizing Layer Height
Layer height changes everything. A 0.2mm layer is a good default. It balances speed and detail nicely. If you want a rough draft, use 0.3mm. If you want a smooth vase, use 0.1mm. The 3d printing process is all about finding the right balance. Test different heights to see what you like.
Thinner layers take longer. But they look much better. Thicker layers are faster. But they look a bit bumpy. You have to decide what matters most. For display pieces, use thin layers. For quick test prints, use thick layers. Adjusting this one print setting changes the whole result. Experiment with different values to find your sweet spot.
Expert Insights On Filament
Your choice of material matters a lot. PLA is the best filament for beginners. It prints easily and does not warp. ABS is stronger but needs a heated bed. PETG is a great middle ground. It is strong and prints well. Always store your filament in a dry place. Moisture ruins the quality of your 3d model. Wet filament makes bubbly, rough prints.
Each type of filament needs different temperatures. Check the guide on the spool. Set your hot end and bed correctly. If the temperature is too low, the plastic will not stick. If it is too high, the plastic will burn. Finding the right temperature is a key part of 3d printer file creation. Keep a log of your favorite settings for each material.
Comparison Table: Free vs Paid Software
Choosing software can be confusing. Here is a quick look at free and paid options.
| Software Type | Pros | Cons |
|---|---|---|
| Free CAD | No cost, great for learning | Fewer advanced tools |
| Paid CAD | More features, professional output | Costs money, steeper learning curve |
| Free Slicer | Works great, lots of community support | Basic interface |
| Paid Slicer | Advanced settings, faster slicing | Not needed for most users |
Most beginners do great with free tools. You only need to pay if you are a professional engineer. For how do I create a 3d printer file tasks, free is the way to go. Start free, learn the ropes, and upgrade later if you must. The skills you learn on free software transfer to paid software easily. You will not have to start from scratch again.
Final Thoughts On 3d Printer File Creation
Now you know the full process. You can design your own model or download one. You can slice it with the right settings. You can avoid the common pitfalls that ruin prints. Creating a 3d printer file is a skill you can build over time. Do not be afraid to experiment. Try new designs and new settings every day. The more you practice, the better your prints will become.
Remember that every expert was once a beginner. Your first print might not be perfect. That is completely okay. Learn from any mistakes you make. Adjust your print settings and try again. Soon, you will be creating complex objects with ease. 3d printer file creation opens a world of possibilities. You can make gifts, fix broken items, or start a small business. The power is in your hands. Start your first project today and see where it takes you.
Take your time and have fun. Do not let mistakes discourage you. Every failed print is a lesson. You will learn what went wrong and how to fix it. The 3d printing process is all about iteration. You print, you learn, you improve. Keep a notebook of your settings. Write down what worked and what did not. This will save you so much time in the future. Soon, you will be a master of 3d printer file creation. The world of making is open to you. Go build something amazing today!
Frequently Asked Questions
What software do I need to create a 3d printer file?
You need two main types of software. First, you need CAD software to design your model. Second, you need slicer software to prepare the file. Both are essential for the 3d printing process. Many free options work great for beginners.
Is it hard to create a 3d printer file?
No, it is not hard at all. You can start with simple shapes and learn as you go. Many people learn the basics in just a few hours. The key is to practice regularly. 3d printer file creation becomes easier with time.
Can I create a 3d printer file from a real object?
Yes, you can! This is called 3d scanning. You use a scanner to capture the shape of a real object. The scanner creates a digital file. You then clean up the file and slice it for your printer.
What file format should I use for 3d printing?
You should use the STL format. It is the most common and widely supported format. It works with almost all slicer software. STL files describe the surface shape of your 3d model using tiny triangles.
How do I fix a broken 3d printer file?
Most CAD and slicer programs have a repair tool. You can use it to fix holes in the mesh. Flipped normals are another common issue. These tools will automatically fix many errors in your digital file.
What is the difference between a 3d model and a 3d printer file?
A 3d model is just the shape. It is like a digital sculpture. A 3d printer file has the instructions too. It tells the printer how to build the object layer by layer. The slicer software creates this final file.