Can You Use A Regular Projector For Halloween Decor
Yes, you absolutely can use a regular projector for Halloween decor! A standard home projector works great for creating spooky shadows, animated ghosts, and eerie light shows on your walls or outdoor surfaces. This guide covers everything you need to know about setting up your projector for the best Halloween display, from choosing the right content to positioning tips that make your haunt look professional.
Halloween is right around the corner, and you want your house to look amazing. But here’s the question on every DIY haunter’s mind: can you use a regular projector for Halloween? The short answer is a big yes. You don’t need some expensive, specialized device to make your home look like a haunted mansion. A standard projector you already own can do incredible things for your Halloween decorations.
People spend hundreds of dollars on pre-made Halloween projection kits every year. But the truth is, a regular home projector paired with free or cheap content does the same job. Whether you want to cast spooky shadows on your house, project ghostly figures onto your trees, or create an eerie light show in your yard, a standard projector handles it all.
This guide walks you through everything. We’ll cover setup tips, the best content sources, placement ideas, and common mistakes to avoid. By the end, you’ll know exactly how to use your regular projector for Halloween and make your neighbors jealous.
Key Takeaways
- Any standard projector works: You don’t need a fancy Halloween-specific device. A regular home projector creates amazing spooky effects.
- Content matters most: Free Halloween videos on YouTube and Netflix make setup easy and affordable.
- Placement is key: Positioning your projector correctly makes the difference between a meh display and a jaw-dropping haunt.
- DIY screens save money: A white sheet or plain wall works perfectly for outdoor Halloween projections.
- Brightness and distance affect quality: Understanding these basics helps you get the best image for your Halloween setup.
- Safety first: Keep cables covered and equipment dry, especially for outdoor Halloween displays.
- It’s budget-friendly: Using what you already own beats renting expensive Halloween equipment every year.
📑 Table of Contents
- Why A Regular Projector Works Great For Halloween
- Setting Up Your Projector For Halloween
- Best Content For Halloween Projections
- DIY Halloween Projection Screen Ideas
- Common Mistakes To Avoid
- Safety Tips For Outdoor Halloween Projections
- Expert Tips To Level Up Your Halloween Projection
- Budget-Friendly Halloween Projection Ideas
- How A Regular Projector Compares To Specialty Halloween Projectors
- Final Thoughts
Why A Regular Projector Works Great For Halloween
You might think you need a special Halloween projector. But honestly, most standard projectors work perfectly fine. The technology behind them is the same. They all project light through an image or video source to create a big, visible display. For Halloween, that’s all you need.
Modern home projectors have come a long way. Even budget models produce bright, clear images that look fantastic for Halloween decorations. The key factors are brightness, resolution, and placement. As long as your projector has decent lumens and can connect to a laptop or streaming device, you’re golden.
What Makes A Projector Good For Halloween Displays
Not all projectors are created equal, but most regular ones do the job. Here’s what to look for in the projector you already have:
- Brightness: At least 2,000 lumens works well for outdoor Halloween projections at night. For indoor use, even 1,500 lumens is plenty.
- Resolution: 720p or 1080p gives you sharp, clear spooky images. You don’t need 4K for Halloween effects.
- HDMI or USB ports: These let you connect easily to laptops, streaming sticks, or USB drives loaded with Halloween content.
- Built-in speakers: Nice to have but not essential. You can pair external speakers if you want sound with your Halloween projector setup.
- Portability: Lighter projectors are easier to move around your yard or reposition indoors.
The great thing is, you probably already own a projector that checks all these boxes. Before you buy anything new, try what you have. You might be surprised at the results.
Setting Up Your Projector For Halloween
Setting up a regular projector for Halloween is simpler than you think. You don’t need an engineering degree or a professional installation crew. With a little planning, you can have a stunning display ready in under an hour.
Indoor vs Outdoor Setup
Where you place your projector changes everything. Indoor setups are easier and safer, but outdoor setups create the biggest wow factor. Let’s look at both.
Indoor Halloween Projection: Set your projector on a table or shelf facing a blank wall. Point it at the wall opposite your front door for maximum visibility when trick-or-treaters arrive. A white wall works perfectly as your projection surface. No need for a fancy screen. If your wall isn’t perfectly white, hang a white bedsheet behind it to create a clean backdrop.
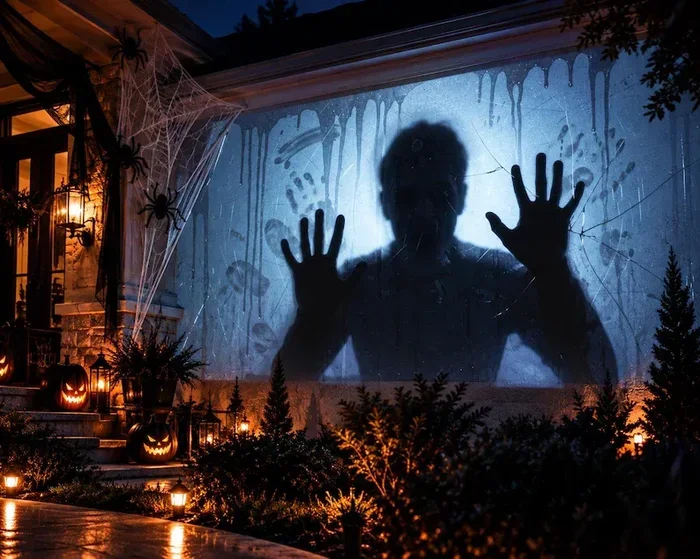
Outdoor Halloween Projection: This is where things get really fun. You can project onto your house siding, garage door, or even trees in your yard. For outdoor use, make sure your projector is protected from moisture. A covered porch or garage works great as a staging area. You can use a projector on your wall outside and achieve surprisingly professional results with just a standard home unit.
Positioning Tips That Make A Big Difference
Where you place the projector determines how your Halloween decorations look. Here are some practical tips:
- Distance matters: Move the projector farther from the wall for a bigger image. Closer means a smaller but sharper picture.
- Angle your projector: Most projectors need to be placed flat or slightly tilted. If you angle it too much, the image gets distorted. Some projectors have keystone correction to fix this.
- Keep it hidden: Hide the projector behind a bush, in a window, or inside a decorated box. You want people to see the spooky images, not the device itself.
- Face away from light sources: Position your projector so streetlights or porch lights don’t wash out the projection.
For the best results, test your setup before Halloween night. Walk around your house and check the image from different angles. Adjust the position until you’re happy with how it looks.
Best Content For Halloween Projections
The projector is only half the equation. What you project matters just as much. The good news is there are tons of free and cheap options for Halloween projection content. You don’t need to create anything from scratch.
Free Halloween Videos Online
YouTube is a goldmine for Halloween projection content. Search for “Halloween projection videos” and you’ll find hundreds of options. Channels dedicated to spooky animations, ghostly figures, and creepy scenes are perfect for your setup. These videos are free, high quality, and updated every year.
You can also find Halloween loops that play on a continuous cycle. This means you don’t have to keep restarting the video. Just queue it up and let it run all evening. Popular themes include floating ghosts, pumpkin animations, skulls, and haunted house scenes.
Streaming Halloween Movies And Shows
If you want something more polished, streaming services have you covered. You can project Netflix from your laptop to projector and display Halloween-themed movies or shows on a big scale. Classic spooky films like “Hocus Pocus” or “The Nightmare Before Christmas” make fantastic projections that kids and adults love.
Another option is to use your laptop to access Halloween content directly. Open a browser, find a spooky animation or video, and cast it to your projector. The process is straightforward and gives you tons of variety.
Creating Your Own Halloween Projections
Feeling creative? You can make your own Halloween projection content. Use free tools like Canva or PowerPoint to design spooky graphics. Create animations of bats flying, ghosts floating, or cobwebs growing. Export them as video files and load them onto a USB drive.
This approach gives you full control over what people see. You can include your family’s faces in ghostly scenes or add your house number in a creepy font. It’s personal, unique, and absolutely free. Plus, it’s a fun project to do with the kids before Halloween night.
DIY Halloween Projection Screen Ideas
You don’t need to buy a fancy projector screen for Halloween. In most cases, you already have everything you need. A regular sheet as a projector screen works surprisingly well and costs almost nothing.
Using A White Sheet
Hang a white bedsheet on a clothesline or fence. Make sure it’s stretched tight and wrinkle-free for the clearest image. A wrinkled sheet creates a distorted projection that looks messy. Smooth it out before you start your Halloween display.
If the sheet isn’t bright enough, try ironing it or using a white tablecloth instead. The smoother and whiter the surface, the sharper your Halloween projector setup will look.
Projecting Onto Your House
Your house itself can be the screen. White or light-colored walls work best for outdoor projections. Point your projector at the side of your house, garage door, or even your windows. The larger the surface, the more dramatic the effect.
For best results, project onto surfaces that face away from direct light. A wall that’s in shadow looks much better than one blasted by porch lights. If your house has dark siding, consider hanging a white sheet on the exterior to create a better projection surface.
Window Projections
Don’t forget about your windows! You can project spooky images through your windows so they’re visible from the street. This works especially well for front windows facing the sidewalk. People walking by will see ghostly figures and creepy animations right through the glass.
Just make sure the window is clean on the outside. Any dirt or smudges will blur the projection. If you’re projecting from inside, close the curtains behind the projector to keep ambient light out.
Common Mistakes To Avoid
Even with a great setup, a few common mistakes can ruin your Halloween projection display. Here’s what to watch out for so your haunted house looks amazing instead of amateur.
Placing The Projector In The Wrong Spot
The biggest mistake people make is putting the projector where it’s visible. You want the spooky images to be the star, not the device. Hide it behind decorations, in a corner, or inside a covered area. If people can see the projector, it takes away from the magic.
Ignoring Ambient Light
Outdoor projections need darkness to look their best. If your porch light is too bright or there are too many yard lights, the projection will look washed out. Turn off unnecessary lights and let the projector do its work. A dark environment makes your Halloween decorations pop.
Using Low-Quality Content
Not all Halloween videos are created equal. Some look pixelated or poorly animated. Take time to find high-quality content that matches your projector’s resolution. Blurry or low-res videos make the whole display look cheap, no matter how good your projector is.
Forgetting About Sound
Projection without sound is like a haunted house without screams. Add some spooky audio to complete the experience. You can use portable Bluetooth speakers to play Halloween sound effects or eerie music alongside your visuals.
Safety Tips For Outdoor Halloween Projections
Outdoor setups need extra care. You’re dealing with electricity, weather, and foot traffic. A few safety precautions keep your Halloween display fun and accident-free.
- Use outdoor-rated extension cords: Regular indoor cords aren’t safe outside. Get cords rated for outdoor use and keep all connections off the ground.
- Protect the projector from moisture: Even if it’s not raining, dew and humidity can damage electronics. Cover the projector with a plastic bin or weatherproof housing.
- Secure all cables: Use tape or cable covers to keep cords from becoming tripping hazards. Trick-or-treaters will be running around in the dark.
- Keep the projector cool: Projectors generate heat. Don’t enclose them in airtight containers. Allow airflow to prevent overheating during long Halloween sessions.
- Turn everything off before bed: Don’t leave your projector running overnight. Unplug it and store it safely to prevent fire hazards.
Taking these precautions means you can enjoy your Halloween display worry-free. Safety and spooky fun go hand in hand.
Expert Tips To Level Up Your Halloween Projection
Want to take your Halloween projector setup from good to jaw-dropping? Here are some expert-level tips that make a real difference.
Layer your projections. Use two projectors if you have them. One can project ghosts or animations on the house, while another casts spooky shadows on the ground. Layering creates depth and makes the display feel three-dimensional.
Add real props. Projections work best when combined with physical decorations. Place fake skeletons or pumpkins near the projection area. The combination of real props and projected images creates a much more immersive experience.
Use a projector with a longer throw distance. This lets you place the projector farther away, making it easier to hide. A longer throw also means a bigger projection without losing image quality.
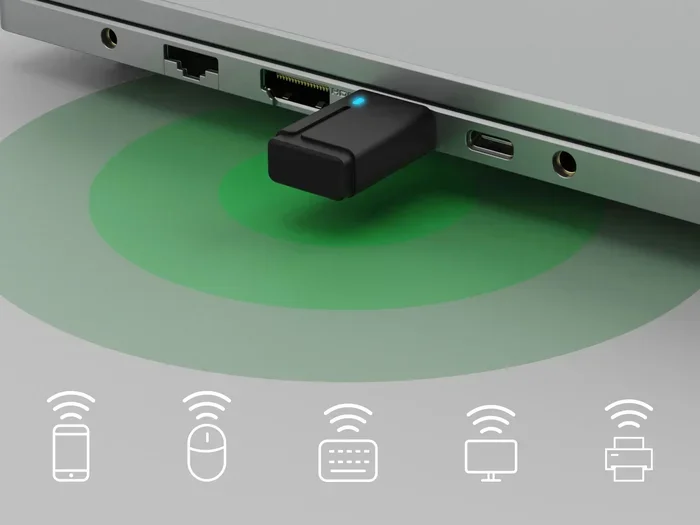
Consider a plug-in Wi-Fi device if your projector doesn’t have wireless connectivity. A small Wi-Fi adapter lets you stream Halloween content directly without running long cables from your laptop.
Test your full setup the night before Halloween. Don’t wait until trick-or-treaters arrive to discover problems. Run through the entire setup, check the image quality, and make adjustments. This way, you’re ready when the kids come knocking.
Budget-Friendly Halloween Projection Ideas
One of the best things about using a regular projector for Halloween is how affordable it is. You’re probably already paying for the equipment. Here are some budget-friendly ideas to maximize your setup.
- Use a USB drive instead of a laptop: Load Halloween videos onto a USB thumb drive and plug it directly into the projector. No need for a separate device.
- Free Halloween apps: Many apps offer free Halloween animations designed for projection. Download them and cast to your projector through a streaming stick.
- Reuse old content: Last year’s Halloween videos still work perfectly. Don’t feel pressured to buy new content every year.
- Borrow equipment: If you don’t own a projector, ask a friend or neighbor. Many people have one sitting in a closet that they rarely use.
The point is, you don’t need a big budget to create an impressive Halloween display. A little creativity goes a long way with a standard projector and some free content.
How A Regular Projector Compares To Specialty Halloween Projectors
You might wonder how a regular projector stacks up against those Halloween-specific devices sold in stores. Let’s compare them honestly.
| Feature | Regular Home Projector | Specialty Halloween Projector |
|---|---|---|
| Price | $200 – $1,000 (already owned) | $50 – $200 |
| Brightness | 2,000+ lumens (typically) | 1,000 – 2,000 lumens |
| Resolution | 720p – 1080p | 480p – 720p |
| Content Flexibility | Unlimited (any video or image) | Pre-loaded Halloween content only |
| Year-Round Use | Yes – movies, gaming, work | No – Halloween only |
| Setup Complexity | Slightly more setup needed | Plug and play |
As you can see, a regular projector wins in almost every category except convenience. Specialty Halloween projectors are simpler, but they limit what you can project. A standard home projector gives you unlimited flexibility and can be used all year long for movie nights, game nights, and presentations.
So before you spend money on a dedicated Halloween projector, try what you already have. You might find it does everything you need and more.
Final Thoughts
Can you use a regular projector for Halloween? Absolutely. A standard home projector is one of the best tools you can use to create an unforgettable Halloween display. It’s affordable, versatile, and produces professional-looking results that will wow every trick-or-treater who walks by your house.
You don’t need expensive equipment or technical skills. Just a projector, some free content, and a little creativity. Set up your Halloween decorations in a dark spot, hide the device, and let the spooky images do the talking. Whether you project onto your house, a white sheet, or your backyard trees, the results are sure to impress.
This Halloween, skip the expensive kits and use what you already own. With the right setup and content, your regular projector will create the most memorable haunted display on the block. Start planning now, test everything before October 31st, and get ready to be the house everyone talks about.
Frequently Asked Questions
Do I need a special projector for Halloween decorations?
No, you don’t need any special projector. A regular home projector works perfectly for Halloween. As long as it has decent brightness and an HDMI or USB input, you can create amazing spooky displays with free online content.
Can I use a regular projector outdoors for Halloween?
Yes, you can use a regular projector outdoors. Just make sure to protect it from moisture and position it in a shaded area away from direct light. Outdoor Halloween projections look incredible when the environment is dark enough for the images to pop.
What’s the best surface for Halloween projector displays?
White walls and plain white sheets work best for Halloween projections. A smooth, light-colored surface gives you the clearest and brightest image. You can also project directly onto your house siding or garage door for a dramatic effect.
How far should I place my projector from the wall for Halloween?
It depends on your projector’s throw ratio and how big you want the image. Generally, placing the projector 8 to 15 feet away works well for most homes. Test different distances to find the sweet spot that fills your desired area without losing image quality.
Can I connect my laptop to a regular projector for Halloween content?
Yes, most regular projectors connect to laptops via HDMI cable. You can stream Halloween videos from Netflix or YouTube directly on your laptop and project them. This gives you access to thousands of spooky videos and animations for free.
What type of Halloween videos work best for projections?
High-resolution looping animations work best. Look for videos featuring floating ghosts, animated pumpkins, skulls, or haunted house scenes. Avoid low-quality pixelated content. Search YouTube for “Halloween projection videos” and you’ll find plenty of options designed specifically for this purpose.
=== CONCLUSION ===
Using a regular projector for Halloween is one of the smartest and most affordable ways to elevate your seasonal decorations. You don’t need specialty equipment or a big budget. A standard home projector, some free Halloween content, and a little creativity are all you need to transform your house into the most haunted spot on the block.
From positioning tips to content sources, safety precautions to DIY screen ideas, this guide has everything you need to get started. The beauty of using a regular projector is that it works year-round for movies and entertainment, so it’s not a one-use gadget collecting dust after Halloween.
So grab your projector, find some spooky videos, and set up your display. Your neighbors will be talking about your Halloween haunt for years to come. Happy haunting!