Can You Plug Hdmi Directly Into Switch Here Is The Answer
Yes, you can plug HDMI directly into the Nintendo Switch, but you need the official dock or a compatible USB-C to HDMI adapter. The Switch does not have a built-in HDMI port, so a direct cable connection is not possible without the right accessory. This guide walks you through every method, common errors, and the best setups for gaming on a big screen.
You just bought a Nintendo Switch and want to play your favorite game on the big screen. You grab an HDMI cable, look at your console, and wonder, can you plug HDMI directly into Switch? It seems like it should be simple, right? But the answer is not as straightforward as you might think.
The Nintendo Switch is a unique hybrid console. It works both as a handheld device and a home console. This design means the connection process is a little different from what you might expect. Many new players get confused by the lack of a standard HDMI port on the Switch itself. Let us clear up the confusion once and for all.
In this article, we will explain exactly how HDMI works with the Switch. We will cover the dock, adapters, cables, and common mistakes. By the end, you will know everything you need to connect your Switch to any TV or monitor with confidence.
Key Takeaways
- The Switch lacks a built-in HDMI port and requires the dock or an adapter to output to a TV.
- The official Nintendo dock is the most reliable and simplest way to connect HDMI.
- USB-C to HDMI adapters work as a direct alternative if you do not have the dock.
- Using a cheap or incompatible cable can cause display issues and damage your console.
- HDMI 2.0 or higher is recommended for the best resolution and refresh rate on your TV.
- Portable play is still possible without any HDMI connection at all.
- Always check your TV input source after connecting to see the Switch screen.
📑 Table of Contents
- Can You Plug HDMI Directly Into Switch
- How to Connect Your Switch to a TV the Right Way
- HDMI Cables and Ports You Need to Know
- Common Mistakes When Connecting HDMI to the Switch
- Best HDMI Setup for Nintendo Switch Gaming
- Switch Lite and HDMI Connection
- Can You Use an HDMI Switch or Splitter with the Nintendo Switch?
- Expert Insights on Switch HDMI Connectivity
- Key Takeaways
- Conclusion
Can You Plug HDMI Directly Into Switch
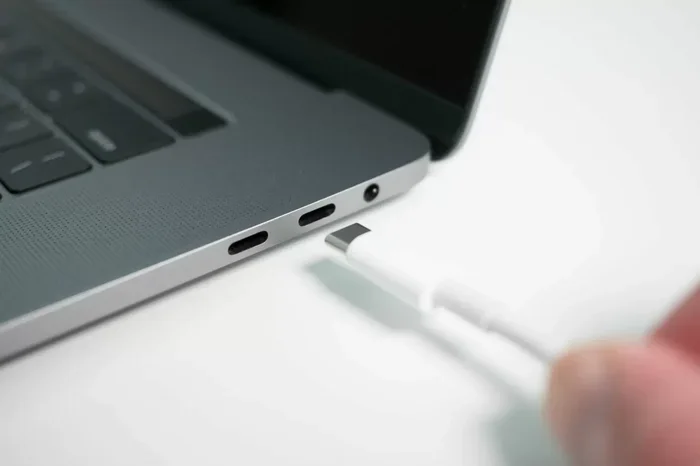
The short answer is no. The Nintendo Switch does not have a built-in HDMI port on the console body. You cannot take an HDMI cable and plug it straight into the Switch handheld unit. The console uses a USB-C port for charging and data transfer, not a standard HDMI female port.
So how do you connect the Switch to a television or monitor? You need an intermediary device. This is where the official Nintendo dock or a third-party USB-C to HDMI adapter comes in. These accessories bridge the gap between your Switch and your TV screen.
Think of it this way. The Switch outputs a video signal through its USB-C port. That signal needs to be converted into an HDMI signal your TV can read. The dock or adapter handles this conversion automatically. Without one, there is no way to send the picture to your television.
Why the Switch Does Not Have a Built-In HDMI Port
Nintendo designed the Switch to be portable first. Adding a full-size HDMI port would make the console bulkier and less convenient to carry around. By using USB-C, they kept the Switch slim and versatile. The trade-off is that you always need a dock or adapter for TV play.
This design choice also keeps manufacturing costs lower. The Switch can serve multiple purposes without needing extra ports. When you want to play on the go, you use the handheld screen. When you want to play at home, you dock it and connect to your TV.
The USB-C port on the Switch supports video output through a protocol called DisplayPort Alt Mode. This is the same technology used by many laptops and tablets. It allows the Switch to send high-definition video through a USB-C connection when paired with the right accessory.
How to Connect Your Switch to a TV the Right Way
Connecting your Switch to a TV is easy once you know the correct method. There are two main ways to do this. The first is using the official Nintendo dock. The second is using a USB-C to HDMI adapter. Both methods work well, but they have some differences.
Method 1: Using the Official Nintendo Dock
The official Nintendo Switch dock is the simplest and most reliable option. It comes included with every Switch console purchase. Here is how you set it up step by step:
- Place the Nintendo Switch dock on a flat surface near your TV.
- Connect the HDMI cable from the dock to your TV’s HDMI input port.
- Plug the USB-C power cable into the dock and into a wall outlet.
- Slide the Switch console into the dock with the screen facing the dock rail.
- Turn on your TV and select the correct HDMI input source.
- Your Switch home screen should appear on the TV immediately.
This method is plug and play. You do not need to install any drivers or software. The dock handles all the signal conversion automatically. It also charges your Switch while you play on the TV.
The official dock supports up to 1080p resolution when the Switch is in docked mode. This is the standard HD resolution most TVs use. The signal is stable and reliable with no flickering or audio issues when using the genuine Nintendo dock.
Method 2: Using a USB-C to HDMI Adapter
If you do not have the official dock or you want a more portable setup, a USB-C to HDMI adapter works great. These small adapters plug directly into the Switch’s USB-C port and have an HDMI female port for your cable.
Here is how to use one:
- Plug the USB-C to HDMI adapter into the Switch console.
- Connect an HDMI cable from the adapter to your TV.
- Plug in the USB-C power cable to keep the Switch charged.
- Switch your TV to the correct HDMI input.
- The Switch screen should display on your TV now.
Not all USB-C to HDMI adapters work with the Switch. You need one that supports DisplayPort Alt Mode and the Switch’s specific video output. Cheap adapters from unknown brands may not work or could cause overheating. Stick with reputable brands like Anker, Belkin, or Amazon Basics for best results.
Some adapters also include a USB pass-through port. This lets you charge the Switch while using the adapter. This is very convenient for long gaming sessions on your TV without needing the dock.
HDMI Cables and Ports You Need to Know
Not all HDMI cables are the same. The type of cable you use can affect your picture quality and resolution. Understanding HDMI basics helps you get the best experience from your Switch setup.
HDMI Cable Types and Versions
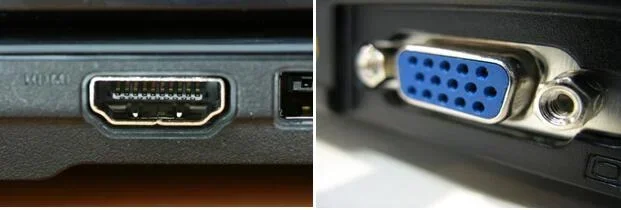
The most common HDMI cable types you will encounter are standard HDMI, Mini HDMI, and Micro HDMI. The Nintendo Switch uses standard full-size HDMI through the dock. The cable that comes with most Switch packages is an HDMI 2.0 cable.
HDMI 2.0 supports 4K resolution at 60Hz, but the Switch maxes out at 1080p in docked mode. So you do not need an expensive 4K cable. A standard HDMI 2.0 cable is more than enough for the Switch. It delivers a crisp and clear picture on any modern TV.
Here are the HDMI versions and what they support:
- HDMI 1.4: Supports 1080p at 60Hz. Works fine with the Switch.
- HDMI 2.0: Supports 1080p at 60Hz and 4K at 30Hz. The recommended choice.
- HDMI 2.1: Supports 4K at 120Hz and 8K. Overkill for the Switch but future-proof.
What Is DisplayPort Alt Mode
DisplayPort Alt Mode is a technology that allows USB-C ports to carry video signals. The Nintendo Switch uses this mode to output video through its USB-C port. When you use a dock or adapter, it reads this signal and converts it to HDMI.
Not every USB-C cable supports DisplayPort Alt Mode. This is why you cannot just use any random USB-C cable to connect the Switch to a TV. The cable and the dock or adapter must both support the correct protocol for video output to work.
Common Mistakes When Connecting HDMI to the Switch
Many players run into problems when setting up their Switch for TV play. Most of these issues come from simple mistakes that are easy to avoid. Here are the most common errors people make.
Using an Incompatible Cable or Adapter
This is the number one mistake. Not every HDMI cable or USB-C adapter works with the Switch. Some cables only carry power and no data. Others carry data but do not support video output. Always use the official Nintendo dock or a certified USB-C to HDMI adapter that specifically supports the Switch.
Forgetting to Select the Correct TV Input
After connecting everything, many people forget to switch their TV to the right input source. If your TV is still on the cable box or streaming app input, you will not see the Switch screen. Use your TV remote to press the input or source button and select the HDMI port where your Switch is connected.
Not Powering the Switch While Docked
The Switch needs power to output video to a TV. If you do not connect the power cable to the dock or adapter, the Switch may turn off or refuse to display on the TV. Always make sure the power supply is connected before you expect to see a picture on your screen.
Using a Damaged or Worn Dock
Over time, the metal contacts inside the dock can get dirty or bent. This causes intermittent connection problems. If your Switch screen flickers or goes black when docked, try cleaning the contacts with a soft dry cloth. You can also try a different dock or adapter to rule out hardware failure.
Best HDMI Setup for Nintendo Switch Gaming
Want the best possible picture and sound from your Switch? Here is how to set up an optimal HDMI gaming setup at home.
Choosing the Right TV
Any TV with an HDMI port will work with the Switch. But for the best experience, look for a TV with at least one HDMI 2.0 port. A 1080p or 4K TV both work great. The Switch outputs at 1080p maximum, so a 4K TV will simply display the image at its native resolution with no extra benefit.
Consider the TV size and viewing distance too. A 40 to 55 inch TV is perfect for most living rooms and bedrooms. Make sure the TV has enough HDMI ports for all your devices. A TV with at least three HDMI inputs gives you room for a Switch, a streaming stick, and a cable box.
Audio Setup Options
When you dock the Switch and connect to a TV, the audio automatically routes through the TV speakers. This is the easiest setup. But if you want better sound, you have options.
Most modern TVs support optical audio output. You can connect an optical cable from your TV to a soundbar or home theater system. Some players also use Bluetooth speakers paired directly to the TV. The Switch itself does not support Bluetooth audio output in docked mode, so the TV acts as the middleman for audio.
Quick Tips for the Best Setup
- Use an HDMI cable that is 6 feet or shorter for the best signal quality.
- Keep the Switch dock on a stable, flat surface to prevent it from tipping.
- Update your Switch system software to the latest version for the best compatibility.
- Turn off your TV’s motion smoothing or picture smoothing features for sharper game visuals.
- Label your HDMI cables so you always know which one is for the Switch.
Switch Lite and HDMI Connection
The Nintendo Switch Lite is a handheld-only version of the console. It does not have a dock and cannot connect to a TV natively. If you own a Switch Lite, you will need a USB-C to HDMI adapter to output video to a screen. The official dock does not fit the Switch Lite because it lacks the dock rails.
Using an adapter with the Switch Lite works the same way as with the standard Switch. Plug the adapter into the USB-C port, connect an HDMI cable, and switch your TV input. The experience is nearly identical, but you will need to keep the Switch Lite powered through the adapter or a separate charger.
Can You Use an HDMI Switch or Splitter with the Nintendo Switch?
Some players want to connect multiple devices to one TV or share a Switch between multiple TVs. An HDMI switch or splitter can help with this. An HDMI switch lets you plug in multiple devices and toggle between them with a button. An HDMI splitter sends the same signal to multiple TVs at once.
Using an HDMI switch with the Switch is straightforward. Plug the Switch dock or adapter into the switch input. Connect the switch output to your TV. Then plug in any other HDMI devices like a Blu-ray player or streaming stick. Use the switch button to toggle between inputs when you want to play your Switch.
An HDMI splitter is useful if you want to play on two TVs in different rooms. The splitter duplicates the signal so both screens show the same thing. Keep in mind that splitters do not extend the distance well. You may need an active HDMI extender for longer cable runs between the splitter and the second TV.
Expert Insights on Switch HDMI Connectivity
Many tech experts recommend sticking with the official Nintendo dock for the most reliable experience. Third-party docks and adapters work well for most users, but they may not always deliver the same level of performance. Compatibility issues can arise with certain TV brands or HDMI cable lengths.
If you experience any display problems, try these troubleshooting steps:
- Unplug the HDMI cable from both the dock and the TV.
- Check the cable for any visible damage or bent pins.
- Reconnect the cable firmly and make sure it clicks into place.
- Restart your Switch by holding the power button for 12 seconds.
- Change the TV input source to the correct HDMI port.
- Try a different HDMI cable to rule out a faulty cable.
Most HDMI connection issues with the Switch are caused by loose cables or incorrect TV input settings. A simple reconnection usually fixes the problem. If the issue persists, the dock or adapter may need to be replaced.
Key Takeaways
- The Switch lacks a built-in HDMI port and requires the dock or an adapter to output to a TV.
- The official Nintendo dock is the most reliable and simplest way to connect HDMI.
- USB-C to HDMI adapters work as a direct alternative if you do not have the dock.
- Using a cheap or incompatible cable can cause display issues and damage your console.
- HDMI 2.0 or higher is recommended for the best resolution and refresh rate on your TV.
- Portable play is still possible without any HDMI connection at all.
- Always check your TV input source after connecting to see the Switch screen.
Conclusion
So, can you plug HDMI directly into Switch? The answer is no, not without an intermediary device. The Nintendo Switch does not have a built-in HDMI port. You need either the official Nintendo dock or a compatible USB-C to HDMI adapter to connect your Switch to a TV. Both methods work well and are easy to set up.
By following the steps in this guide, you can enjoy your favorite Switch games on a big screen with confidence. Avoid common mistakes like using incompatible cables or forgetting to select the right TV input. Invest in quality accessories and your setup will run smoothly for years.
The Nintendo Switch is a versatile console that adapts to how you want to play. Whether you are gaming on the go or on your living room TV, the connection process is simple once you know how it works. Grab your HDMI cable, dock your Switch, and get ready for a great gaming experience on the big screen.
Frequently Asked Questions
Can I use any HDMI cable with the Nintendo Switch?
Yes, any standard HDMI cable works with the Switch as long as it connects to the dock or adapter. You do not need an expensive or specialty cable. A basic HDMI 2.0 cable is more than enough for the Switch’s 1080p output.
Why does my Switch not show up on the TV when connected?
The most common reason is that the TV is set to the wrong input source. Press the input or source button on your TV remote and select the HDMI port where the Switch is connected. Also make sure the power cable is plugged in and the Switch is properly seated in the dock.
Can I use a USB-C to HDMI adapter without the official dock?
Yes, you can use a USB-C to HDMI adapter as a standalone solution. Make sure the adapter supports DisplayPort Alt Mode and is compatible with the Nintendo Switch. Avoid cheap, uncertified adapters as they may not work reliably or could damage your console.
Does the Switch support 4K HDMI output?
No, the Nintendo Switch does not support 4K output. The maximum resolution in docked mode is 1080p. Even with an HDMI 2.1 cable or a 4K TV, the Switch will only output at 1080p. This is by design and is not a limitation of your cable or TV.
Can I connect multiple TVs to one Nintendo Switch using an HDMI splitter?
Yes, an HDMI splitter can duplicate the Switch signal to multiple TVs. However, all screens will show the same content and there may be a slight delay on longer cable runs. Splitters work best for short distances and casual sharing rather than competitive multiplayer setups.
Is it safe to leave the Switch docked and connected to HDMI overnight?
Yes, it is safe. The Switch is designed to be left docked for extended periods. It will stop charging once the battery reaches 100 percent and will not overheat. Just make sure the dock is on a stable surface with good ventilation to prevent any heat buildup.