Can You Connect Hdmi To Macbook Pro And How To Do It
Yes, you can connect HDMI to MacBook Pro using a USB-C to HDMI adapter or a Thunderbolt dock. This guide walks you through every step, from choosing the right cable to setting up your external display. You will learn about compatibility, common issues, and expert tips for a seamless connection.
Have you ever wanted to hook your MacBook Pro up to a big screen TV or an external monitor and thought, “Can you connect HDMI to MacBook Pro?” The short answer is yes. The longer answer is that it depends on your model, the right adapter, and a few simple steps. This guide breaks it all down so you can get your screen mirroring or extended display up and running in minutes.
Connecting your MacBook Pro to an external display opens up a world of possibilities. You can present slideshows at work, stream movies on your TV, or just extend your workspace for better productivity. Whether you own a latest-generation MacBook Pro 16-inch or an older model, the process is straightforward once you know what gear you need.
In this article, we will cover every angle of HDMI connectivity for MacBook Pro. You will learn about the different ports, the best adapters, step-by-step setup instructions, and how to fix common problems. We will also share quick tips that save time and prevent frustration. Let us dive right in.
Key Takeaways
- HDMI Connection Is Possible: You can connect HDMI to MacBook Pro with the right adapter, regardless of your model year.
- USB-C to HDMI Is the Standard: Most modern MacBook Pro models use USB-C or Thunderbolt ports that need a simple adapter.
- Check Your Model First: Older MacBook Pro models with Mini DisplayPort need a different adapter than newer USB-C models.
- Audio and Video Work Together: HDMI carries both audio and video signals through a single cable.
- Troubleshooting Is Simple: Most HDMI connection issues can be fixed with a reset, cable swap, or adapter update.
📑 Table of Contents
Understanding HDMI and MacBook Pro Compatibility
Before you grab any cable, it helps to understand what kind of port your MacBook Pro has. Apple has used different port types over the years, and each one affects how you connect an HDMI display. Knowing your port type is the first step to a successful setup.
USB-C and Thunderbolt Ports
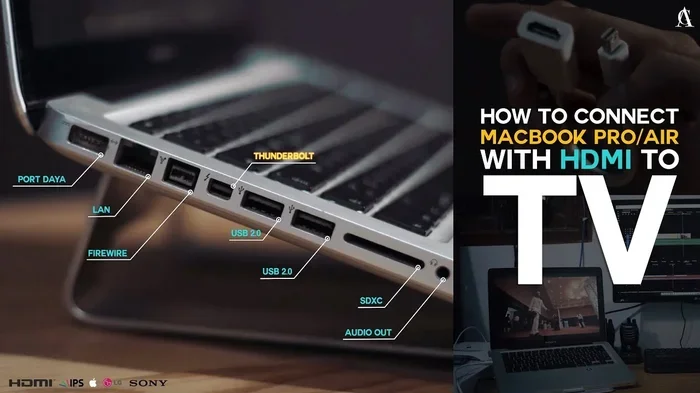
Most modern MacBook Pro models come with USB-C or Thunderbolt ports. These small, oval-shaped ports support video output through the right adapter. If your MacBook Pro was made after 2016, there is a very good chance it uses USB-C or Thunderbolt. A simple USB-C to HDMI adapter will do the job. You plug one end into your Mac and the other end into your TV or monitor.
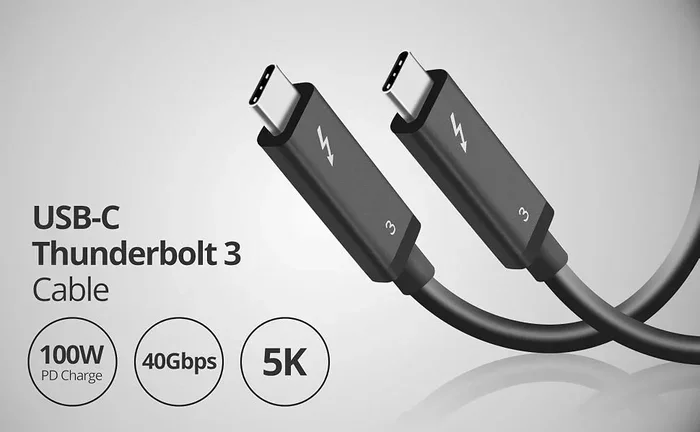
Thunderbolt ports are even more versatile. They support data, video, and charging through a single cable. When you use a Thunderbolt to HDMI adapter, you get a reliable digital connection with excellent display resolution support. Many users prefer Thunderbolt docks because they offer multiple ports in one compact device.
Mini DisplayPort on Older Models
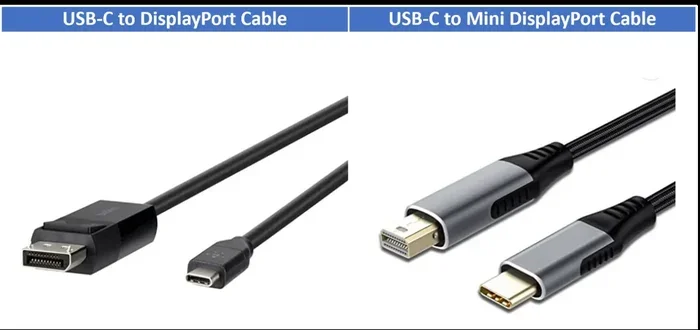
If you own an older MacBook Pro made before 2016, you might have a Mini DisplayPort. This port looks different from USB-C. It is smaller and has a slightly different shape. To connect HDMI on these models, you need a Mini DisplayPort to HDMI adapter or cable. These adapters are still widely available and work well for basic setups.
Which MacBook Pro Model Do You Have?
Not sure which port type you have? Check the side of your laptop. USB-C ports are small and oval. Thunderbolt ports look the same but have a small lightning bolt icon next to them. Mini DisplayPort is slightly larger and has a rectangular shape with a notch on one side. Once you identify your port, choosing the right adapter becomes easy.
How to Connect HDMI to MacBook Pro Step by Step
Now that you know which port you have, let us walk through the actual connection process. The steps are simple and take less than five minutes.
Step 1: Get the Right Adapter
Buy a quality adapter that matches your port type. For USB-C MacBook Pro models, a USB-C to HDMI adapter works perfectly. For older models, grab a Mini DisplayPort to HDMI adapter. You can also use a Thunderbolt dock if you need extra ports like USB-A, SD card slots, or Ethernet.
Here are some quick tips for choosing the right adapter:
- Check the HDMI version. HDMI 2.0 supports 4K at 60Hz. HDMI 2.1 supports even higher resolutions.
- Buy from trusted brands. Anker, Belkin, and Apple make reliable adapters.
- Avoid cheap no-name cables. They may cause signal loss or overheating.
- Consider a docking station. A USB-C docking station gives you HDMI plus multiple other connections in one hub.
Step 2: Plug in the Adapter
Insert the adapter into your MacBook Pro port. Then connect one end of the HDMI cable to the adapter and the other end to your TV or monitor. Make sure each connection is firm and secure. A loose cable is the most common reason for no signal issues.
Step 3: Switch Your TV or Monitor Input
On your TV or external monitor, change the input source to HDMI. Use your remote control to select the correct HDMI port. Most TVs have multiple HDMI inputs labeled HDMI 1, HDMI 2, and so on. Select the port where you plugged in the cable.
Step 4: Configure Display Settings on Your Mac
Once the physical connection is done, go to your MacBook Pro display settings. Click the Apple menu, then System Settings, then Displays. Your external screen should appear automatically. You can choose to mirror your screen or extend it as a second display. This gives you flexibility whether you are presenting or working.
Common HDMI Connection Issues and How to Fix Them
Even with the right gear, you might run into problems. Do not worry. Most HDMI issues are easy to fix. Here are the most common problems and their solutions.
No Signal on the External Display
If your TV or monitor shows no signal, start by checking the cable connections. Unplug the HDMI cable from both ends and plug them back in firmly. Then try a different HDMI port on your TV. Sometimes the port you picked is not working properly.
You can also try resetting your MacBook Pro display settings. Go to System Settings, Displays, and click “Detect Displays.” This forces your Mac to look for connected screens again.
Flickering or Distorted Image
A flickering screen often means your cable or adapter is not fully compatible. Try a different HDMI cable first. If that does not work, check the adapter. Cheap adapters sometimes struggle with higher resolutions. Lower the display resolution on your Mac to see if the problem goes away.
No Audio Through HDMI
HDMI carries both video and audio, but sometimes the audio does not switch automatically. To fix this, go to System Settings, then Sound, then Output. Select your HDMI display from the list of output devices. Your Mac should now send audio through the HDMI cable to your TV or monitor.
Adapter Overheating
Some adapters get warm during use. This is normal to a degree. However, if the adapter is too hot to touch, disconnect it and let it cool down. Using a high-quality adapter from a reputable brand reduces overheating risks significantly.
Best Adapters and Accessories for HDMI Connections
Not all adapters are created equal. Some deliver rock-solid performance, while others cause headaches. Here is a quick comparison of popular options for connecting HDMI to your MacBook Pro.
| Adapter Type | Port | Max Resolution | Price Range |
|---|---|---|---|
| USB-C to HDMI | USB-C | 4K @ 60Hz | $15 – $40 |
| Thunderbolt to HDMI | Thunderbolt 3/4 | 4K @ 60Hz | $20 – $50 |
| Mini DisplayPort to HDMI | Mini DP | 1080p @ 60Hz | $10 – $25 |
| USB-C Docking Station | USB-C | 4K @ 60Hz | $50 – $150 |
| HDMI Switch | HDMI | 4K @ 30Hz | $10 – $30 |
When picking an adapter, think about what else you need. If you travel often, a compact USB-C to HDMI adapter is perfect. If you work at a desk all day, a docking station gives you HDMI plus USB ports, Ethernet, and charging. For home entertainment setups, a reliable HDMI cable and a quality adapter make all the difference.
One thing many people overlook is using their MacBook Pro as a cable TV alternative. Instead of paying for expensive satellite service, you can stream content directly from your laptop to your TV. Services like Netflix, Hulu, and YouTube work great on a big screen when connected via HDMI. If you want to explore options for replacing traditional cable, check out alternatives to Dish Network and DirectTV for ideas on cutting the cord without losing your favorite channels.
Expert Tips for the Best HDMI Experience
Here are some insider tips that make a big difference in your daily use. These small adjustments improve performance and save you from frustration.
- Use high-speed HDMI cables. Standard HDMI cables work for 1080p, but 4K content needs a high-speed or premium high-speed cable. Look for cables rated for HDMI 2.0 or higher.
- Keep your macOS updated. Apple often releases display driver updates that fix compatibility issues with external monitors and TVs.
- Use a cable manager. A simple cable clip or sleeve keeps your HDMI cables tidy and prevents accidental disconnections.
- Test your setup before important meetings. Always test your HDMI connection before a presentation. Nothing is worse than a last-minute display failure.
- Consider wireless alternatives. If running cables feels messy, look into wireless screen mirroring options like AirPlay or Chromecast for simpler setups.
Another expert insight is to avoid daisy-chaining adapters. Plugging an adapter into another adapter creates signal loss and instability. Always connect your HDMI cable directly to the adapter that plugs into your MacBook Pro. This ensures the strongest and most stable digital connection possible.
Key Takeaways
- HDMI Connection Is Possible: You can connect HDMI to MacBook Pro with the right adapter, regardless of your model year.
- USB-C to HDMI Is the Standard: Most modern MacBook Pro models use USB-C or Thunderbolt ports that need a simple adapter.
- Check Your Model First: Older MacBook Pro models with Mini DisplayPort need a different adapter than newer USB-C models.
- Audio and Video Work Together: HDMI carries both audio and video signals through a single cable.
- Troubleshooting Is Simple: Most HDMI connection issues can be fixed with a reset, cable swap, or adapter update.
- Quality Gear Matters: Investing in a good adapter and high-speed HDMI cable saves you from headaches down the road.
- Explore Cord-Cutting Options: Use your MacBook Pro HDMI setup to stream content instead of relying on traditional cable providers.
Frequently Asked Questions
Can I connect HDMI directly to a MacBook Pro without an adapter?
No, you cannot connect HDMI directly to a MacBook Pro. All MacBook Pro models use USB-C, Thunderbolt, or Mini DisplayPort. You need an adapter to convert the signal to HDMI. A USB-C to HDMI adapter is the most common and affordable solution for modern MacBook Pro models.
Does connecting HDMI to MacBook Pro support 4K resolution?
Yes, connecting HDMI to MacBook Pro supports 4K resolution, but only with the right adapter and cable. Make sure your adapter supports HDMI 2.0 or higher and use a high-speed HDMI cable rated for 4K. Older adapters may be limited to 1080p or 4K at lower refresh rates.
Can I use HDMI to connect my MacBook Pro to a TV for screen mirroring?
Absolutely. Using an HDMI adapter, you can mirror your MacBook Pro screen to any TV with an HDMI input. Go to System Settings, Displays, and choose “Mirror Display.” This is great for watching movies, giving presentations, or sharing photos on a bigger screen with friends and family.
Why is there no sound when I connect HDMI to my MacBook Pro?
This usually happens because macOS does not automatically switch the audio output to HDMI. To fix it, go to System Settings, then Sound, then Output, and select your HDMI display. The audio will start playing through your TV or monitor speakers right away.
What is the difference between USB-C to HDMI and Thunderbolt to HDMI adapters?
The main difference is the port type. USB-C to HDMI adapters work with standard USB-C ports. Thunderbolt to HDMI adapters work with Thunderbolt ports, which are physically the same shape but offer faster data transfer and more bandwidth. For video output, both work equally well for HDMI connections. The Thunderbolt version is better if you also need fast data transfer alongside video.
Can I connect multiple external displays to my MacBook Pro using HDMI?
Yes, you can connect multiple external displays, but it depends on your MacBook Pro model. Newer M-series MacBook Pro models support multiple external displays. You can use multiple USB-C to HDMI adapters or a Thunderbolt docking station with multiple HDMI outputs. Check your specific model’s display support limits before setting up a multi-monitor configuration.
Conclusion
Connecting HDMI to MacBook Pro is easier than most people think. With the right adapter and a decent HDMI cable, you can turn any TV or monitor into an extension of your laptop screen. Whether you are working from home, giving a big presentation, or just want to watch your favorite shows on a larger display, the setup takes only a few minutes.
Remember to check your port type first, invest in quality gear, and keep your macOS updated. These small steps make a huge difference in performance and reliability. Now that you know how to connect HDMI to MacBook Pro, you are ready to set up your external display and enjoy a bigger, better viewing experience.
Start today. Grab your adapter, plug in, and enjoy the seamless connection between your MacBook Pro and your external display. You will wonder why you did not set it up sooner.