How To Connect Airpods To Windows Laptop Step By Step
Yes, you can connect AirPods to a Windows laptop easily using Bluetooth. This guide walks you through every step, from initial pairing to fixing common connection problems. Whether you own AirPods Pro, AirPods Max, or the original AirPods, you will find clear instructions to get them working on your PC.
You just got a new Windows laptop. Maybe you switched from a Mac. Or perhaps you want to use your favorite wireless earbuds for work calls and music without carrying extra headphones. Whatever the reason, the question is simple: can you connect AirPods to a Windows laptop?
The short answer is absolutely yes. Connecting AirPods to a Windows laptop is easy, fast, and works with nearly every model. You do not need any special software or expensive adapters. A few clicks in your Bluetooth settings, and you are good to go.
But here is the thing. The process is not quite the same as pairing AirPods with an iPhone. Windows handles Bluetooth devices a little differently. There are a few extra steps, some settings to check, and occasionally a hiccup that needs fixing. This guide covers everything you need to know.
We will walk you through every step from opening your AirPods case to troubleshooting common problems. By the end, you will know exactly how to connect AirPods to Windows laptop and keep them working smoothly. Let us get started.
Key Takeaways
- Bluetooth Pairing: Connecting AirPods to a Windows laptop is a straightforward process that takes under two minutes.
- Troubleshooting Matters: Knowing how to reset and re-pair your AirPods solves most connection issues on Windows 10 and Windows 11.
- Audio Output Switching: You can easily set AirPods as your default audio output device in Windows sound settings.
- Microphone Support: AirPods work as a microphone on Windows laptops for calls and voice recordings.
- Battery Monitoring: While limited, you can check AirPods battery levels through Windows Bluetooth settings.
- Firmware Updates: Keeping your AirPods updated ensures the best performance and compatibility with Windows.
- Multiple Devices: AirPods can switch between your Windows laptop and other Apple devices seamlessly.
📑 Table of Contents
- Why Connect AirPods to a Windows Laptop?
- How to Connect AirPods to Windows Laptop Step by Step
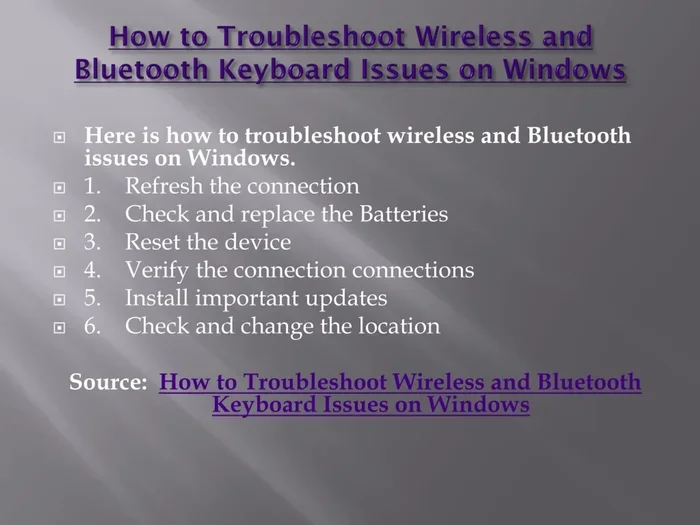
- Troubleshooting Common Connection Issues
- AirPods Model Compatibility with Windows
- Tips to Get the Best Experience with AirPods on Windows
- Common Mistakes to Avoid When Connecting AirPods to Windows
- Expert Tips for AirPods on Windows
- Frequently Asked Questions
- Conclusion
Why Connect AirPods to a Windows Laptop?
You might wonder why anyone would use AirPods with a Windows PC. There are actually many good reasons. Let us look at the most common ones.
You Already Own AirPods
Maybe you have an iPhone at home and a Windows laptop at work. Instead of buying a second pair of headphones, you simply use your AirPods with both devices. It saves money and keeps things simple.
Better Audio Quality Than Built-In Laptop Speakers
Most laptop speakers sound okay but nothing special. AirPods deliver much clearer sound with better bass and detail. For music, videos, and gaming, the difference is noticeable right away.
Wireless Freedom for Calls and Meetings
If you work from home, wireless earbuds make life easier. You can walk around your room during Zoom calls without being tangled in a cable. The built-in microphone on AirPods picks up your voice clearly.
No Extra Equipment Needed
Unlike some wireless headphones that need a USB dongle, AirPods use standard Bluetooth. Your Windows laptop already has Bluetooth built in. No extra purchases required.
How to Connect AirPods to Windows Laptop Step by Step
Here is the main process. It takes less than two minutes once you know the steps. Follow along carefully and your AirPods will be connected in no time.
Step 1: Prepare Your AirPods
First, make sure your AirPods are charged. Put both earbuds inside the charging case. Keep the case lid open. If your AirPods are inside the case with the lid open, they are ready to pair.
Check the battery level. You can look at the small LED light on the front of the case. A green light means fully charged. An amber light means the charge is low. You want at least some charge before pairing.
Step 2: Open Bluetooth Settings on Your Windows Laptop
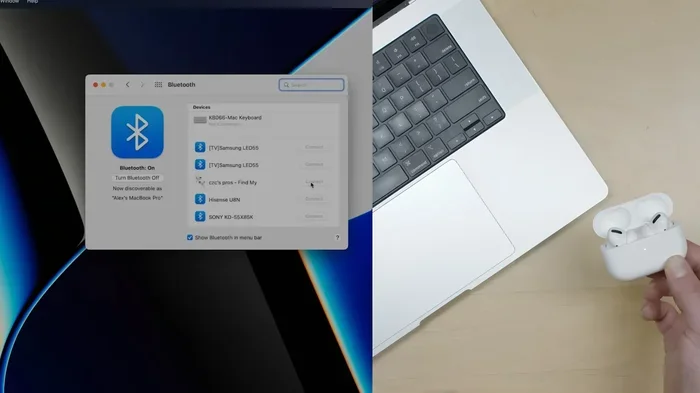
Click the Start menu and go to Settings. Then click on Bluetooth and devices. Make sure Bluetooth is turned on. If it is off, toggle the switch to turn it on.
On Windows 11, you can also click the network icon in your taskbar. This is the little Wi-Fi symbol near the clock. Click it and then click Bluetooth to open quick settings. This is a faster way if you are in a hurry.
Step 3: Put AirPods in Pairing Mode
With the lid open and your AirPods inside the case, press and hold the small button on the back of the case. Hold it for about five seconds. The LED light on the front of the case will start flashing white. This means your AirPods are now in pairing mode.
If the light flashes amber instead, your AirPods need to be reset first. We will cover that in a later section.
Step 4: Add AirPods to Your Windows Laptop
Back on your laptop, go to Settings, then Bluetooth and devices. Click the Add device button. Select Bluetooth from the list that appears. Your laptop will start searching for nearby devices.
After a few seconds, your AirPods should appear in the list. Click on them to select them. The name usually shows as “AirPods” followed by your name if you have used them with an iPhone before. Click Connect and wait a moment.
You will see a message saying the device is connected. Close the settings window. Your AirPods are now paired with your Windows laptop.
Step 5: Set AirPods as Default Audio Output
Sometimes your laptop might not automatically send audio to your AirPods. To fix this, right-click the speaker icon in your taskbar. Click on Sound settings or Open sound settings.
Look for the Output section. Find your AirPods in the list and click on them. They should now be set as your default audio output device. Any sound you play will come through your AirPods.
Troubleshooting Common Connection Issues
Sometimes things do not go as smoothly as we hope. Your AirPods might not show up in the Bluetooth list. Or they connect but no sound comes through. Here are the most common problems and how to fix them.
AirPods Not Showing Up in Bluetooth List
This is the most common issue. If your AirPods do not appear when you click Add device, try these fixes:
- Make sure Bluetooth is on. Go to Settings, Bluetooth and devices, and confirm the toggle is switched on.
- Check your AirPods battery. Low battery can prevent pairing. Put them back in the case and charge for at least 10 minutes.
- Move closer to your laptop. Bluetooth has a limited range. Stay within about 10 feet of your laptop during pairing.
- Restart your laptop Bluetooth. Turn Bluetooth off, wait 10 seconds, then turn it back on.
- Restart your AirPods. Put them back in the case, close the lid, wait 30 seconds, then open the lid and try again.
AirPods Connected But No Sound
If your AirPods connect but you hear nothing, check a few things. First, make sure they are set as the default output device. Right-click the speaker icon and select your AirPods from the output list.
Second, check the volume. Press the volume up button on your keyboard or click the speaker icon in the taskbar. Sometimes the volume gets muted accidentally.
Third, try disconnecting and reconnecting. Go to Settings, Bluetooth and devices, find your AirPods, click the three dots, and select Remove device. Then repeat the pairing process from the beginning.
AirPods Keep Disconnecting
If your AirPods disconnect randomly, interference might be the cause. Other Bluetooth devices, USB 3.0 ports, and even microwave ovens can cause Bluetooth interference.
Try moving away from other wireless devices. Also, make sure your Windows laptop has the latest Bluetooth drivers. Go to Device Manager, expand Bluetooth, right-click your Bluetooth adapter, and click Update driver.
Reset Your AirPods for a Fresh Start
When nothing else works, resetting your AirPods often solves the problem. Here is how to do it:
- Put both AirPods in the charging case.
- Close the lid and wait 30 seconds.
- Open the lid and go to your laptop Bluetooth settings.
- Find your AirPods and click Remove device or Forget device.
- Close the lid again and wait 30 seconds.
- Open the lid, press and hold the button on the back of the case until the light flashes amber, then white.
- Go back to Bluetooth settings and pair your AirPods again.
AirPods Model Compatibility with Windows
Good news. Almost all AirPods models work with Windows laptops. Here is a quick look at what works and what to expect.
| AirPods Model | Works with Windows? | Notes |
|---|---|---|
| AirPods (1st, 2nd, 3rd Gen) | Yes | Full Bluetooth audio and mic support |
| AirPods Pro (1st and 2nd Gen) | Yes | All features work including noise cancellation |
| AirPods Max | Yes | Heavy but works well for music and calls |
| AirPods with Wireless Charging Case | Yes | Same as standard AirPods, just different case |
All AirPods models use standard Bluetooth technology. Windows laptops support Bluetooth, so they communicate without any issues. You might miss some features like automatic device switching that works on Apple devices. But the core audio and microphone functions work perfectly fine.
Tips to Get the Best Experience with AirPods on Windows
Once your AirPods are connected, there are a few things you can do to improve your experience. These small tips make a big difference.
Keep Your AirPods Firmware Updated
AirPods update their firmware when connected to an iPhone or iPad. If you want to keep them updated while using Windows, place them in their case near your iPhone. When the iPhone connects, the firmware will update automatically. Updated firmware improves stability and sound quality.
Use a Bluetooth Adapter for Better Performance
If your laptop has an older Bluetooth version, you might experience lag or poor sound quality. A USB Bluetooth 5.0 or 5.3 adapter can improve performance significantly. These adapters are affordable and plug right into a USB port.
Adjust Microphone Settings for Calls
When using AirPods for work calls, you want your microphone to sound clear. Go to Settings, System, Sound, and find your input device. Select AirPods as the default input. You can also test your microphone by speaking into it and watching the input level bar move.
Manage Battery Usage
AirPods drain battery faster when connected to Windows than when connected to Apple devices. This is because Windows does not optimize power sharing as efficiently. To save battery, turn off Bluetooth on your laptop when you are not using your AirPods.
Use Keyboard Shortcuts for Volume
You cannot use the AirPods touch controls for volume on Windows. Instead, use your keyboard. The function keys or the volume slider in the taskbar work well. Some users also install third-party apps like Volume2 for more control.
Common Mistakes to Avoid When Connecting AirPods to Windows
Avoiding mistakes saves time and frustration. Here are the most common errors people make when connecting AirPods to a Windows laptop.
- Forgetting to open the case lid. Your AirPods will not appear in Bluetooth if the case lid is closed. Always keep the lid open during pairing.
- Not holding the pairing button long enough. A quick tap does not work. Hold the button for at least five seconds until the light flashes.
- Connecting to the wrong device. If you have multiple Bluetooth devices nearby, your AirPods might connect to your phone instead of your laptop. Turn off Bluetooth on other devices temporarily.
- Skipping the remove-and-reconnect step. If something goes wrong, do not just try to reconnect. Remove the device first and pair fresh. This fixes most issues.
- Ignoring driver updates. Outdated Bluetooth drivers cause many connection problems. Check for updates regularly in Device Manager.
Expert Tips for AirPods on Windows
Here are some pro tips that experienced users swear by. These small tweaks can make your AirPods work better on Windows.
Tip 1: Name Your AirPods Clearly. In Bluetooth settings, right-click your AirPods and rename them. Use a name like “Work Laptop AirPods.” This helps you identify which device is connected when you have multiple Bluetooth devices.
Tip 2: Use the Quick Settings Panel. On Windows 11, the Quick Settings panel makes Bluetooth management much faster. Click the network icon in your taskbar, then click the Bluetooth tile to toggle it on or off. You can also click the pencil icon to add Bluetooth to your Quick Settings if it is not there.
Tip 3: Check for Interference from USB Devices. USB 3.0 and USB-C devices can create electromagnetic interference that disrupts Bluetooth signals. If you experience dropouts, try unplugting unnecessary USB devices and see if the connection improves.
Tip 4: Clean Your AirPods and Case. Dust and debris in the charging contacts can cause pairing failures. Wipe the contacts inside the case with a dry cloth. Clean the metal pads on the AirPods themselves. This simple maintenance prevents many connection issues.
Tip 5: Restart Both Devices. When in doubt, restart your laptop and place your AirPods back in the case for 60 seconds. This clears temporary glitches and often resolves stubborn connection problems instantly.
Frequently Asked Questions
Can I Use AirPods Microphone on a Windows Laptop?
Yes, your AirPods microphone works on Windows laptops. After connecting, go to Sound settings and select AirPods as your input device. You can use them for Zoom calls, voice recordings, and video meetings. The microphone quality is clear and works well for most situations.
Why Do My AirPods Keep Disconnecting From My Windows Laptop?
Disconnections usually happen due to Bluetooth interference or outdated drivers. Move closer to your laptop, remove other Bluetooth devices from the area, and update your Bluetooth drivers. If the problem continues, remove the AirPods from Bluetooth settings and pair them again.
Do AirPods Work With Windows 10?
Absolutely. AirPods work with Windows 10 just as well as Windows 11. The pairing process is the same. Go to Settings, Bluetooth and devices, and follow the steps we outlined above. Windows 10 has supported Bluetooth audio devices for many years.
Can I Connect AirPods to Multiple Devices at Once?
AirPods can technically connect to multiple devices, but Windows does not support the same seamless switching that Apple devices do. On Windows, you will need to manually switch the audio output when you want to use your AirPods with a different device. It is not as smooth as the Apple ecosystem experience.
How Do I Check AirPods Battery on Windows?
Windows does not show AirPods battery levels natively like macOS does. However, you can check the battery from the Bluetooth settings panel. Click on your AirPods in the Bluetooth device list and look for battery information. For detailed battery monitoring, you can download a free third-party app like AirBattery.
Is It Safe to Use AirPods With a Windows Laptop?
Yes, it is completely safe. AirPods use standard Bluetooth technology that is built into Windows laptops. There are no security risks or compatibility issues. Your data and privacy remain protected just like with any other Bluetooth audio device.
Conclusion
Connecting your AirPods to a Windows laptop is simple and straightforward. You just need to open your case, go to Bluetooth settings, and pair the devices. Within two minutes, you will be listening to music, taking calls, and watching videos with wireless freedom.
Remember that occasional hiccups can happen. Bluetooth connections are not always perfect, especially between different operating systems. But with the troubleshooting steps in this guide, you can fix almost any issue quickly.
Keep your AirPods updated, manage your Bluetooth settings wisely, and follow the tips we shared. Your AirPods will work beautifully with your Windows laptop for music, work calls, gaming, and everything in between.
Now you know exactly how to connect AirPods to Windows laptop and keep them running smoothly. Try it out today and enjoy the wireless experience on your PC.