Can I Use A Normal Printer For Edible Prints At Home
Can I Use A Normal Printer For Edible Prints is an essential topic that provides valuable insights.
Key Takeaways
- Understanding Can I Use A Normal Printer For Edible Prints: Provides essential knowledge
📑 Table of Contents
- Can I Use A Normal Printer For Edible Prints?
- Which Printers Work Best For Edible Printing?
- What Supplies Do You Need For Edible Prints?
- Step By Step Guide To Printing Edible Images
- Common Mistakes To Avoid With Edible Printing
- Benefits Of Using A Normal Printer For Edible Prints
- Safety Considerations For Edible Printing
- Key Takeaways
Can I Use A Normal Printer For Edible Prints?
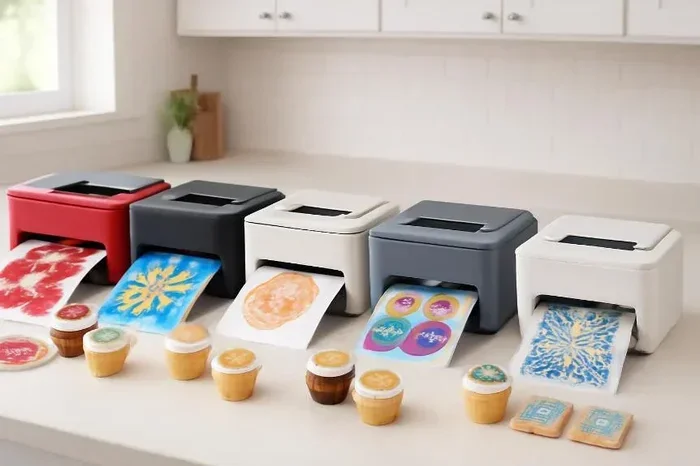
The idea of using a regular printer for edible prints might sound too good to be true. But it is actually quite simple. Most standard inkjet printers can produce beautiful edible images when paired with the correct paper and ink. The key is understanding what makes a print truly food safe.
A normal printer uses liquid ink that sits on the surface of regular paper. When you switch to edible paper, the ink absorbs differently. This means you need to adjust your expectations and your setup. But the printer itself does not need to be a fancy, expensive food printer.
How Edible Printing Works
Edible printing relies on the same basic technology as regular printing. Tiny droplets of ink are sprayed onto a special sheet of paper. That paper is then placed on a cake, cookie, or other treat. The image transfers seamlessly, creating a professional-looking finish.
Here is how the process works step by step:
- You design or select your image on a computer.
- You load edible paper into your standard inkjet printer.
- You print the image using edible ink cartridges.
- You let the print dry for a few minutes.
- You place the printed sheet onto your frosted cake or cookie.
That is it. No special equipment is needed beyond the edible supplies. This is what makes home edible printing so accessible and fun.
Which Printers Work Best For Edible Printing?
Not all printers are created equal when it comes to edible image printing. Some models work better than others. Let us look at what to look for in a printer that will handle cake decorating prints with ease.
Inkjet vs Laser Printers
Inkjet printers are the clear winner for edible printing. They use liquid ink that bonds well with edible paper and wafer paper. Laser printers use heat to fuse toner onto paper, which does not work with edible materials.
Here is a quick comparison:
| Feature | Inkjet Printer | Laser Printer |
|---|---|---|
| Works with edible paper | Yes | No |
| Print quality | High resolution | High resolution |
| Food-safe ink options | Yes | No |
| Home-friendly price | Affordable | Moderate |
| Best for edible prints | Excellent | Not suitable |
Popular Printer Models For Edible Printing
Many home baking enthusiasts swear by these inkjet printer models for edible image transfers:
- Canon Pixma series — known for vibrant colors and reliable performance.
- Epson EcoTank series — cost-effective with refillable ink tanks.
- HP Envy series — great all-around printers with sharp print quality.
- Canon Selphy — a compact option perfect for small frosting sheet prints.
Any standard inkjet printer can work. You do not need to spend a fortune. The real investment is in edible ink cartridges and edible paper.
Quick Tips
- Always check that your printer uses dye-based ink, not pigment-based ink for best results.
- Run a test print on regular paper first to check colors and alignment.
- Clean your printer rollers before loading edible wafer paper.
What Supplies Do You Need For Edible Prints?
Using a normal printer for edible printing requires a few specific supplies. You cannot just print on regular paper and eat it. Here is what you will need to get started.
Edible Paper Options
Edible paper comes in several forms. Each type has its own unique qualities and best uses:
- Wafer paper — thin, lightweight, and made from potato starch. Perfect for cake toppers and cookie decorating.
- Icing sheets — pre-printed or blank sheets made from sugar. They dissolve smoothly on moist cakes.
- Frosting sheets — similar to icing sheets but designed to stick directly to frosted surfaces.
- Sugar paper — a thicker option great for cupcake toppers and gift tags.
Edible Ink Cartridges
Edible ink cartridges are the most critical supply for safe food-grade printing. Regular printer ink contains chemicals that are not meant for consumption. Food-safe ink is made from ingredients like water, sugar, and food coloring.
Look for edible ink cartridges that are specifically labeled as food-grade and non-toxic. Brands like Magic Edibles and Edible Ink Jet offer reliable options that work with most standard inkjet printers.
Other Helpful Supplies
- A clean, dry surface for placing printed sheets.
- Soft-bristle brush for gently smoothing sheets onto cakes.
- A damp cloth for cleaning edges.
- Food-safe glue or water for attaching edible images to treats.
Step By Step Guide To Printing Edible Images
Now that you have your supplies ready, let us walk through the actual process of creating edible prints at home. Following these steps will help you achieve the best results every time.
Step 1: Prepare Your Design
Start by choosing or creating your image. High-resolution photos work best for edible image printing. Use editing software to adjust brightness and contrast so the colors pop on wafer paper. Keep in mind that colors may appear slightly different once printed on edible sheets.
Step 2: Load Edible Paper Into Your Printer
Place your edible paper into the printer tray with the printable side facing up. Go slowly and make sure the paper is aligned properly. Wafer paper can be delicate, so handle it gently to avoid tearing.
Step 3: Install Edible Ink Cartridges
Swap out your regular ink cartridges for edible ink cartridges. This is the most important safety step. Never use regular printer ink for anything that will touch food. Food-grade ink ensures your prints are completely safe to consume.
Step 4: Print and Let Dry
Send your image to the printer and let it do its work. Once printed, allow the edible image to dry for at least 10 to 15 minutes. The ink needs time to set on the paper. You can speed this up with a cool fan, but avoid using heat.
Step 5: Apply to Your Treat
Gently place the dried edible print onto your frosted cake, cookie, or cupcake. Use a soft brush or clean hands to smooth out any air bubbles. The image will adhere to the frosting and create a stunning custom cake design.
Expert Insights
Professional cake decorators recommend printing a test image on regular paper first. This helps you check sizing, colors, and alignment before using your precious edible paper. It also saves you from wasting expensive supplies on mistakes.
Common Mistakes To Avoid With Edible Printing
Even with the best intentions, mistakes can happen when you are starting out with edible image printing. Here are the most common errors and how to avoid them.
Using Regular Printer Ink
This is the number one mistake. Regular printer ink contains chemicals that are not food safe. Always use edible ink cartridges that are specifically designed for food-grade printing. Your health and your guests’ health depend on this.
Using the Wrong Type of Paper
Do not try to print edible images on regular copy paper or photo paper. The ink will not be food safe, and the paper will not taste good or dissolve properly. Always use purpose-made edible paper, wafer paper, or icing sheets.
Skipping the Drying Time
Applying a wet edible print to a cake will cause the ink to bleed and smear. Always let your prints dry completely before placing them on any food item. Patience here pays off with crisp, vibrant results.
Ignoring Humidity
Edible paper is sensitive to moisture and humidity. Store your supplies in a cool, dry place. If your kitchen is very humid, the wafer paper may become sticky or warp before you even print on it.
Benefits Of Using A Normal Printer For Edible Prints
There are many reasons why home bakers love using their existing printer for edible printing. Here are some of the biggest advantages:
- Cost savings — you do not need to buy a separate food printer.
- Convenience — print anytime right from your kitchen.
- Creative freedom — design anything from photos to custom messages.
- Professional results — edible prints look just like those from a bakery.
- Easy to learn — the process is simple and beginner-friendly.
- Perfect for gifts — create personalized cake toppers and cookie decorations for any occasion.
The accessibility of edible printing is what makes it so popular. You do not need to be a professional pastry chef or own expensive equipment. A basic inkjet printer and a few supplies are all it takes to create impressive custom cake designs.
Safety Considerations For Edible Printing
Food safety should always come first when edible image printing. Here are some important safety guidelines to keep in mind.
- Only use inks that are explicitly labeled as food-grade and non-toxic.
- Make sure your edible paper is from a reputable manufacturer.
- Never reuse edible ink cartridges that have been exposed to regular ink.
- Keep your printer clean and dedicated to food-safe printing if possible.
- Check for any allergies among your guests before serving printed treats.
Following these simple precautions ensures that your edible prints are not only beautiful but also completely safe to eat.
Key Takeaways
- Yes, you can: A normal inkjet printer works great for edible prints at home.
- Use edible ink only: Always swap regular cartridges for food-safe edible ink cartridges.
- Choose the right paper: Wafer paper, icing sheets, and frosting sheets are your best options.
- Let prints dry: Always allow edible images to dry before applying to cakes or cookies.
- Start simple: Practice with test prints before committing to expensive edible paper.
- Safety first: Only use supplies that are explicitly labeled as food-grade and non-toxic.
- Have fun: Edible printing is a creative and rewarding hobby for bakers of all skill levels.
Frequently Asked Questions
Can any inkjet printer be used for edible prints?
Most standard inkjet printers can handle edible printing without any issues. Brands like Canon, Epson, and HP all work well with edible paper and edible ink cartridges. Just make sure your printer uses dye-based ink and is clean before loading edible supplies.
Is edible ink really safe to eat?
Yes, food-grade edible ink is specifically formulated to be non-toxic and safe for consumption. It is made from ingredients like water, sugar, and food coloring. Always purchase edible ink cartridges from reputable brands and check that they are labeled as food-safe.
What is the best edible paper for beginners?
Wafer paper is the best starting point for beginners. It is affordable, easy to handle, and works well with most inkjet printers. Icing sheets are also a great option if you want a slightly sweeter finish that dissolves smoothly on moist cakes.
Can I use a laser printer for edible prints?
No, laser printers use heat and toner, which are not compatible with edible paper. Inkjet printers are the only type of printer suitable for edible image printing. The liquid ink from an inkjet bonds properly with edible materials.
How long do edible prints last on a cake?
Edible prints can last several days on a properly frosted cake stored in a cool, dry place. However, moisture from the cake can cause the paper to soften over time. For best results, apply the print close to when you plan to serve the cake.
Where can I buy edible ink cartridges and edible paper?
You can find edible ink cartridges and edible paper online through retailers like Amazon, specialty baking stores, and dedicated edible printing supply websites. Look for kits that include both paper and ink for the best value when starting out with home edible printing.
=== CONCLUSION ===
Can I use a normal printer for edible prints? Absolutely. With the right supplies and a little practice, you can create beautiful edible prints at home using your existing inkjet printer. The process is simpler than most people think, and the results are genuinely impressive.
Edible printing opens up exciting possibilities for cake decorating, cookie designing, and custom bakery treats. Whether you are making birthday cakes, holiday cookies, or personalized gifts, edible images add a professional touch that will wow your friends and family.
Start with a simple wafer paper project and work your way up to more complex frosting sheet designs. Invest in quality edible ink cartridges and always prioritize food safety. Before long, you will be creating stunning custom cake designs that look like they came straight from a professional bakery. Happy printing and happy baking!