Can I Repair My Laptop Myself Heres What You Need To Know
You can repair many laptops yourself with basic tools and patience. This guide covers DIY laptop repair steps, risks, costs, and expert tips to help you decide if a DIY fix is right for your device.
Your laptop is acting up again. The screen flickers, the fan roars nonstop, or maybe the keyboard just stopped working. And right away, your mind jumps to the same thought: Can I repair my laptop myself?
The short answer is yes. In many cases, you absolutely can. But the longer answer depends on what is broken, your skill level, and how comfortable you are with tiny screws and delicate parts. DIY laptop repair has become incredibly popular. People save hundreds of dollars and learn something new along the way.
This guide walks you through everything you need to know. From laptop troubleshooting basics to actual repair steps, we cover it all. You will learn what tools you need, which repairs are safe to try, and when it is smarter to hand the job to a professional. Let us get into it.
Key Takeaways
- DIY laptop repair saves money: Many common fixes cost under $50 in parts.
- Basic tools are all you need: A screwdriver set, anti-static wrist strap, and a clean workspace go a long way.
- Warranty risks exist: Opening your laptop may void the manufacturer warranty.
- Start with simple fixes: RAM upgrades and keyboard replacements are great beginner projects.
- Know your limits: Motherboard and screen repairs often need professional help.
- Online tutorials help: YouTube and forums offer step-by-step laptop repair guides for almost every model.
- Safety first: Always disconnect power and ground yourself before opening any device.
📑 Table of Contents
- Why Consider Repairing Your Laptop Yourself
- Common Laptop Problems You Can Fix
- Tools You Need for DIY Laptop Repair
- Step-by-Step Guide to Repairing Your Laptop
- When to Call a Professional Instead
- Risks of DIY Laptop Repair
- Expert Tips for Successful DIY Laptop Repair
- How Much Can You Save with DIY Repair?
- Final Thoughts on Repairing Your Laptop Yourself
Why Consider Repairing Your Laptop Yourself
Before you grab a screwdriver, it helps to understand why people choose DIY laptop repair in the first place. There are some really good reasons.
Save Money on Laptop Repair Cost
Professional repair shops often charge $100 or more for simple fixes. A laptop screen replacement at a shop can cost $200 to $400. But doing it yourself? You might pay $50 to $80 for the part and do the rest for free. That is real savings.
Even laptop keyboard repair or swapping out a dead battery is cheap when you order the part yourself. You avoid the labor fee entirely.
Learn a Valuable Skill
Fixing your own laptop teaches you how computers work. You will understand laptop hardware better than most people. Next time something goes wrong, you will not panic. You will know exactly what to check.
Many people who start with simple fixes end up handling bigger jobs over time. It builds confidence and technical knowledge that lasts a lifetime.
Fix It Faster
Waiting for a repair shop can take days or even weeks. When you do it yourself, you fix the problem in an afternoon. No appointment needed. No drop-off and pickup. You just work on it when it fits your schedule.
Common Laptop Problems You Can Fix
Not every laptop issue requires a technician. Many common problems are perfect for DIY laptop troubleshooting. Here are some of the most frequent ones.
Laptop Overheating and Fan Issues
Does your laptop sound like a jet engine? Overheating is one of the most common problems. Dust builds up inside the fan and vents over time. The fan works harder, gets louder, and your laptop runs hot.
Fixing this usually means opening the bottom panel and cleaning out the dust with compressed air. You can also replace the thermal paste on the CPU. This is a beginner-friendly laptop maintenance task that anyone can learn.
Dead or Swollen Battery
Laptop batteries wear out. They hold less charge and eventually stop working. Some batteries even swell, which is a safety concern. Replacing a laptop battery is one of the easiest repairs you can do.
Most batteries are held in by a few screws or a clip. You pull them out, put the new one in, and you are done. It takes about 10 minutes.
Broken or Cracked Screen
A cracked screen is frustrating, but it is a very common repair. You can buy replacement screens online for most laptop models. The process involves removing the bezel, disconnecting the old panel, and connecting the new one.
It is not the easiest job, but with a good laptop repair guide and some patience, most people can do it. Just be gentle with the ribbon cables.
Keyboard Replacement
Spilled coffee on your keyboard? Keys sticking or missing? Laptop keyboard repair is straightforward. Many keyboards snap out with a few screws and a ribbon cable connection. You pop the new one in and you are back in business.
Slow Performance and RAM Upgrades
If your laptop feels sluggish, adding more RAM can make a huge difference. Upgrading laptop RAM is one of the simplest upgrades you can do. Most laptops have a small access panel on the bottom. Open it, swap the old stick for a new one, and your laptop feels faster instantly.
Hard Drive or SSD Replacement
Running out of storage? Swapping in a new SSD hard drive is a great fix. It also speeds up your laptop dramatically. Old spinning hard drives are slow. New solid-state drives are fast. The swap takes about 15 minutes.
Tools You Need for DIY Laptop Repair
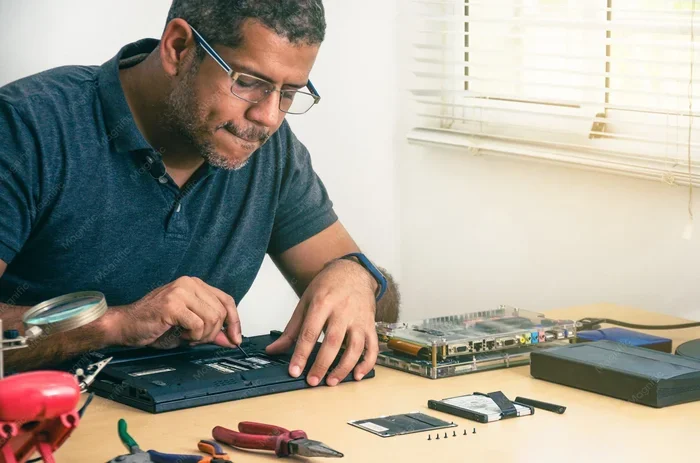
You do not need a fancy workshop. A few basic tools are all it takes to get started with laptop disassembly.
Essential Repair Toolkit
- Precision screwdriver set: Phillips and flathead in small sizes. A magnetic tip is very helpful.
- Anti-static wrist strap: This protects your laptop from static electricity damage. It costs a few dollars and is essential.
- Compressed air can: Great for blowing out dust from vents and fans.
- Plastic spudger or pry tool: Helps you open cases without scratching or cracking them.
- Small tray or mat: Keeps screws organized during laptop repair.
- Good lighting: A bright desk lamp makes a big difference when working on tiny parts.
Nice to Have Tools
- Heat gun or hairdryer: Useful for loosening stuck clips or removing old thermal paste.
- Isopropyl alcohol: Great for cleaning contacts and surfaces safely.
- Tweezers: Helpful for handling small screws and connectors.
Step-by-Step Guide to Repairing Your Laptop
Ready to try your first repair? Here is a simple process that works for almost any laptop troubleshooting or fix.
Step 1: Identify the Problem
Before you open anything, figure out what is wrong. Search for your laptop model and the symptoms online. Forums and YouTube videos often describe the exact issue and solution. This laptop diagnostic step saves you time and prevents unnecessary part purchases.
Step 2: Back Up Your Data
Always back up your files before opening the laptop. Even if you are not touching the hard drive, accidents happen. Copy important files to an external drive or cloud storage. This is the most overlooked step in laptop maintenance.
Step 3: Find Your Model-Specific Guide
Every laptop is different. Search for a disassembly guide for your exact model. Websites like iFixit offer free step-by-step computer repair guides. Print it out or have it open on a second device while you work.
Step 4: Power Down and Disconnect
Turn off the laptop. Unplug the charger. Remove the battery if possible. This is critical for safety. Never work on a powered laptop.
Step 5: Open and Repair
Follow your guide carefully. Remove screws in order. Keep them organized. Take photos at each step so you remember how things go back together. Go slow and be gentle with ribbon cables and connectors.
Step 6: Test Before Closing
Once you have made the fix, put everything back together loosely and power on. Test the repair before fully reassembling. This saves you from having to reopen the laptop if something is not right.
Step 7: Clean Up and Enjoy
Once everything works, close it up properly. Clean your workspace. Then sit back and enjoy the satisfaction of a job well done.
When to Call a Professional Instead
DIY repair is great, but it is not the right choice for every situation. Knowing when to stop and call an expert is just as important as knowing how to start.
Complex Motherboard Repairs
The laptop motherboard is the main circuit board. It has tiny, delicate components. Replacing or repairing a motherboard requires advanced skills and specialized equipment. Unless you have experience with soldering and electronics, leave this to the pros.
Liquid Damage
If you spilled water or coffee inside your laptop, the damage may be deeper than what you can see. Corrosion can eat away at internal components over time. A professional can clean and assess the damage properly.
Warranty and Insurance Concerns
This is a big one. Opening your laptop may void the manufacturer warranty. If your laptop is still under warranty, check with the manufacturer before opening it. Some brands allow user-replaceable parts like batteries and RAM without affecting the warranty. But anything beyond that can be risky.
Also, if you have laptop insurance, opening the device might affect your claim. Always read the fine print.
When the Repair Cost Exceeds the Laptop Value
If your laptop is old and worth only $200, spending $150 on a screen repair does not make sense. In cases like this, it might be better to buy a new laptop or recycle the old one responsibly.
Risks of DIY Laptop Repair
Let us be honest. There are risks involved when you fix your own laptop. Understanding them helps you make smart decisions.
- You can break something worse: One wrong move and you damage a component that was fine before.
- You might lose your warranty: As mentioned, opening the case can void coverage.
- Static electricity damage: Without proper grounding, static can fry sensitive chips.
- Time and frustration: Some repairs take longer than expected. You might feel stuck or overwhelmed.
- No guarantee: If a professional does the repair, they often guarantee their work. DIY repairs do not come with that safety net.
The key is to start small. Try easy fixes first. Build your skills and confidence before tackling complex jobs.
Expert Tips for Successful DIY Laptop Repair
Here are some tips from experienced tech users that make the process smoother.
- Watch videos first: Seeing someone else do the repair is the best preparation. YouTube is full of laptop repair tutorials for every model.
- Take your time: Rushing leads to mistakes. Set aside a full afternoon and work calmly.
- Use the right screwdriver: A stripped screw is a nightmare to deal with. Make sure your bits fit perfectly.
- Keep a repair log: Write down what you did and what parts you removed. This helps if you need to repeat the process later.
- Buy quality parts: Cheap replacement parts often fail quickly. Invest in reputable brands for laptop hardware replacements.
- Join online communities: Forums like Reddit’s r/techsupport and r/laptops are full of helpful people who can answer questions.
How Much Can You Save with DIY Repair?
Let us talk numbers because they matter. A professional laptop repair cost for a screen replacement averages $250 to $400. The same part you can buy online for $60 to $100. That is a savings of $150 to $300.
A keyboard replacement at a shop might cost $100 to $200. The part itself is often $20 to $40. A battery replacement costs about $50 to $100 at a repair shop. DIY, you pay $15 to $30 for the battery.
Over time, these savings add up fast. Even factoring in the cost of basic tools, you come out well ahead. And the skills you gain are priceless.
Final Thoughts on Repairing Your Laptop Yourself
So, can you repair your laptop yourself? Yes, you can. For many common issues like laptop overheating, battery replacement, keyboard fixes, RAM upgrades, and screen swaps, DIY repair works well. You save money, learn new skills, and gain confidence.
Start with simple repairs. Watch a few tutorials. Gather your tools. And take it one step at a time. You will be surprised how capable you are.
But always know your limits. If a repair feels too risky or your laptop is still under warranty, it is okay to call a professional. The goal is to fix your laptop safely and effectively. Whether you do it yourself or hire someone, what matters most is that your laptop works again.
DIY laptop repair is not just about saving money. It is about taking control of your technology and understanding how it works. So the next time your laptop acts up, do not panic. Grab your screwdriver and see what you can do.
Frequently Asked Questions
Is it safe to repair a laptop yourself?
Yes, it is safe for most basic repairs like battery swaps, keyboard replacements, and RAM upgrades. Just make sure you power off the laptop, disconnect all cables, and use an anti-static wrist strap to prevent damage.
Can DIY laptop repair void my warranty?
It can. Opening your laptop may void the manufacturer warranty, especially if the warranty seal is broken. Check your warranty terms before starting any repair. Some brands allow certain user-replaceable parts without affecting coverage.
What is the easiest laptop repair to do at home?
The easiest repair is usually replacing the battery. Most laptop batteries pop out with a few screws or clips. Other simple fixes include RAM upgrades, keyboard replacements, and cleaning dust from the fan and vents.
How long does a DIY laptop repair take?
Simple repairs like battery or RAM swaps take 10 to 20 minutes. More complex repairs like screen or keyboard replacements can take one to two hours depending on your experience level and the laptop model.
Where can I find free laptop repair guides?
Websites like iFixit offer free, detailed step-by-step guides for thousands of laptop models. YouTube also has countless video tutorials that walk you through repairs visually. Online forums and communities are another great resource.
What should I do if I break something during the repair?
Do not panic. First, stop working and assess the damage. If it is a small part like a screw or clip, you can often order a replacement. If you damaged a critical component, contact a professional repair shop for help. Remember, every repair attempt teaches you something for next time.