Can I Install Windows From a Bootable USB Flash Drive
Yes, you can install Windows from a bootable USB flash drive. It is one of the fastest and simplest ways to set up a fresh copy of Windows on any PC. Whether you are upgrading or doing a clean install, a bootable USB makes the process smooth and reliable. This guide walks you through every step, from creating the USB to completing the Windows setup. You will learn the tools you need, common fixes, and pro tips to avoid mistakes.
This is a comprehensive guide about Can I Install Windows From Bootable Usb.
Key Takeaways
- Installing Windows from a bootable USB is simple: You only need a USB flash drive, an ISO file, and a working PC.
- The Windows Media Creation Tool is the easiest method: It creates a bootable USB in just a few clicks.
- You must change boot order in BIOS: This tells your computer to start from the USB drive first.
- A 8GB or larger USB drive is required: Smaller drives will not hold the Windows installation files.
- Common issues like USB not booting are fixable: Formatting the drive correctly or updating BIOS usually solves the problem.
- Back up your data first: A clean install erases everything on the target drive.
[FEATURED_IMAGE_PLACEHOLDER]
Can I Install Windows From a Bootable USB Flash Drive?
The short answer is yes. You can absolutely install Windows from a bootable USB flash drive. In fact, it is the most popular method for installing Windows on modern computers. CDs and DVDs are practically outdated, and USB drives are faster, more reliable, and easier to use.
Whether you want to install Windows 10 or Windows 11, a bootable USB flash drive gets the job done. You do not need to be a tech expert either. With the right tools and a little patience, you can have a fresh copy of Windows running in under an hour.
This article covers everything you need to know. You will learn what a bootable USB is, how to create one, and how to use it to install Windows. We also address common problems and share tips that save time and frustration.
A bootable USB flash drive is simply a USB drive that contains the Windows installation files in a format your computer can read during startup. Think of it as a portable installation disc. When you plug it in and restart your PC, the computer loads the Windows setup directly from the USB drive.
What You Need Before You Start
Before you begin, gather a few things. Having everything ready makes the process much smoother. Here is what you need:
- A USB flash drive: At least 8GB. A 16GB drive gives you extra room and works well.
- A working computer: This is the PC you will use to create the bootable USB.
- A Windows ISO file: This is the installation file you download from Microsoft.
- Internet connection: Needed to download the ISO and the creation tool.
- A product key: Your Windows license key, though Windows can activate automatically in many cases.
Make sure your USB drive is empty or backed up. Creating a bootable USB will erase everything on the drive. You do not want to lose any important files by accident.
How to Create a Bootable USB Flash Drive for Windows
Creating a bootable USB is the most important step. If you get this right, the rest of the process goes smoothly. There are a few ways to do this, but one method stands out as the easiest.
Method 1: Using the Windows Media Creation Tool
The Windows Media Creation Tool is a free official tool from Microsoft. It downloads the latest Windows version and creates a bootable USB for you. Here is how it works:
- Go to the Microsoft website and download the Windows Media Creation Tool.
- Open the tool and accept the license terms.
- Choose the option to create installation media for another PC.
- Select your language, edition, and architecture (64-bit or ARM64).
- Pick the USB flash drive option when asked.
- Select your USB drive from the list and click Next.
- Wait for the tool to download and prepare the bootable USB.
This process usually takes 15 to 30 minutes depending on your internet speed. Once it finishes, you have a fully functional bootable USB flash drive ready to go.
Method 2: Using Rufus (For Advanced Users)
Rufus is a free, lightweight tool that creates bootable USB drives. It works well if you already have a Windows ISO file downloaded. Here is a quick overview:
- Download Rufus from its official website.
- Insert your USB flash drive into the working PC.
- Open Rufus and select your USB drive.
- Click the SELECT button and choose your Windows ISO file.
- Leave the default settings and click START.
- Wait for Rufus to finish writing the files to the USB drive.
Rufus is a great option if you need more control over the USB creation process. It supports older versions of Windows and gives you flexibility with partition styles and file systems.
Method 3: Using the Command Prompt (For Power Users)
You can also use the Command Prompt to create a bootable USB. This method gives you full control but requires some technical knowledge. You would use the diskpart utility to format the USB drive and then copy the ISO files manually. This method works but is not recommended for beginners because one wrong command can erase the wrong drive.
For most people, the Windows Media Creation Tool is the best choice. It is simple, official, and foolproof. You can always explore the other methods once you are comfortable.
How to Install Windows Using the Bootable USB
Now that you have your bootable USB flash drive ready, it is time to install Windows on your target PC. The target PC is the computer where you want Windows installed. Follow these steps carefully.
Step 1: Plug in the Bootable USB
Insert the bootable USB into the target PC. If you are installing Windows on a laptop, make sure it is plugged into power. You do not want the battery to die during installation.
Step 2: Restart and Enter the Boot Menu
Restart the computer. As it turns on, you need to access the boot menu or BIOS setup. The key you press depends on your PC manufacturer. Common keys include F12, F2, Esc, or Del.
Watch the screen closely during the first few seconds of the restart. You will see a message like Press F12 to enter the boot menu. Press that key quickly and repeatedly.
Step 3: Change the Boot Order
Once you are in the boot menu or BIOS, you need to set the USB drive as the first boot device. This tells your computer to load from the USB before the hard drive.
- In the boot menu: Select your USB drive and press Enter.
- In BIOS setup: Navigate to the Boot tab and move the USB drive to the top of the boot order.
Save your changes and exit. The computer will restart again, and this time it will load from the USB drive.
Step 4: Start the Windows Installation
After the PC boots from the USB, you will see the Windows Setup screen. Choose your language, time format, and keyboard layout. Click Next, then click Install Now.
You will be asked to enter your product key. If you do not have one, click I do not have a product key. Windows can activate automatically later if your PC is connected to the internet.
Step 5: Choose the Installation Type
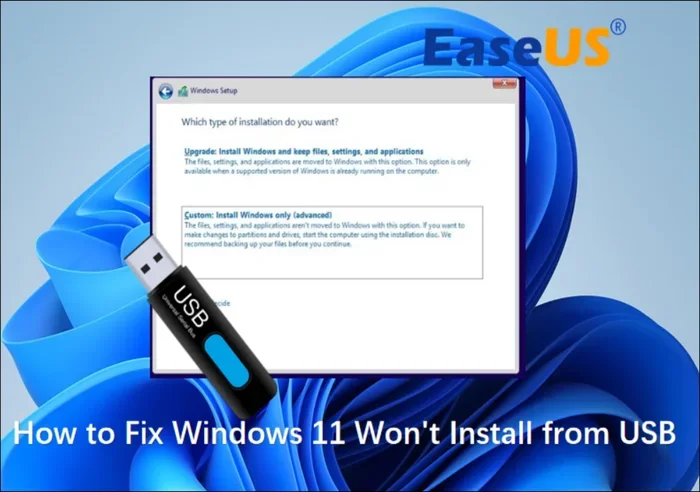
You will see two main options:
- Upgrade: This keeps your files, apps, and settings while replacing the old Windows version.
- Custom: Install Windows only: This does a clean install and erases everything on the selected drive.
For most fresh installations, choose Custom. You will then see a list of drives and partitions. Select the drive where you want Windows installed. Be very careful here. Selecting the wrong drive can erase data on another drive.
Click Next and let the installation begin. Your PC will restart several times during this process. Do not unplug the USB drive until the installation is fully complete and you see the desktop.
Step 6: Complete the Initial Setup
After the installation finishes, Windows will walk you through the initial setup. You will choose your region, create a user account, and set up privacy options. Once you reach the desktop, your new Windows installation is ready to use.
Make sure to install your drivers and run Windows Update. This ensures everything works properly and your system is secure.
Common Problems When Installing Windows From USB
Sometimes things do not go as planned. Do not worry. Most common issues have simple fixes. Here are the problems people run into most often.
The USB Drive Does Not Boot
This is the most common issue. If your PC does not recognize the USB drive during startup, try these fixes:
- Check that the USB drive is plugged into a working USB port. USB 2.0 ports are often more reliable for booting than USB 3.0 ports.
- Go back into BIOS and double-check the boot order. Make sure the USB drive is listed and set as first priority.
- Try creating the bootable USB again using a different tool or method.
- Some PCs have a Secure Boot setting that can block USB installation. Disable Secure Boot in BIOS if needed.
The USB Drive Shows as Empty or Corrupted
If the USB drive does not contain the expected files, it may not have been created correctly. Reformat the drive completely and try again. Use a fresh USB drive if possible, especially if the old one has been used a lot.
Windows Installation Freezes or Stalls
Sometimes the Windows setup freezes during installation. This can happen for several reasons:
- The USB drive may be slow or faulty. Try a different USB drive.
- Your PC may not meet the system requirements for the Windows version you are installing.
- Try disconnecting unnecessary USB devices during installation.
- If the PC restarts during setup and starts from the hard drive again, you may need to change the boot order once more.
No Operating System Found Error
This error appears when your computer cannot find a bootable device. It usually means the boot order is wrong or the USB drive was removed too early. Go back into BIOS, check the boot order, and make sure the USB drive is still plugged in.
Tips for a Smooth Windows Installation
A little preparation goes a long way. These tips help you avoid common pitfalls and make the installation process faster and easier.
Always Back Up Your Data First
If you are doing a clean install, all data on the target drive will be erased. Back up important files to an external drive or cloud storage before you start. This is the single most important step people skip.
Use a Quality USB Flash Drive
Not all USB drives are created equal. A cheap or old USB drive may fail during the installation process. Use a reliable brand and a drive that is no more than a few years old. A USB 3.0 drive also speeds up the installation significantly.
Keep Your Product Key Handy
You will need your Windows product key to activate the operating system. Write it down or keep it in a safe place before you start the installation. If you are upgrading from an older version of Windows, the activation may transfer automatically.
Connect to a Stable Internet Connection
Windows Setup downloads updates and drivers during the initial setup. A stable internet connection prevents errors and ensures you get the latest features and security patches right away.
Disable Antivirus Temporarily
Some antivirus programs interfere with the Windows installation process. Temporarily disable your antivirus before starting the installation and re-enable it once Windows is set up.
Check System Requirements Before You Begin
Make sure your PC meets the minimum requirements for Windows 10 or Windows 11. Here is a quick comparison:
| Requirement | Windows 10 | Windows 11 |
|---|---|---|
| Processor | 1 GHz or faster | 1 GHz or faster, 2+ cores |
| RAM | 2 GB (64-bit) | 4 GB minimum |
| Storage | 20 GB available | 64 GB minimum |
| TPM | Not required | TPM 2.0 required |
| Secure Boot | Not required | Required |
Checking these specs before you start saves time and prevents frustration. If your PC does not meet the requirements, you may need to stick with Windows 10 or consider hardware upgrades.
Frequently Asked Questions
Can I install Windows 11 from a bootable USB flash drive?
Yes, you can install Windows 11 from a bootable USB flash drive. The process is the same as installing Windows 10. Just make sure your PC meets the Windows 11 system requirements, including TPM 2.0 and Secure Boot support. Use the Windows Media Creation Tool to create the bootable USB with the Windows 11 ISO file.
Do I need internet access to install Windows from USB?
No, you do not need internet access to start the installation. The bootable USB contains all the core files needed to install Windows. However, you will need internet access to download updates, drivers, and to activate Windows during the initial setup. Without internet, you can still install and use Windows, but some features may be limited until you connect.
Can I use the same bootable USB to install Windows on multiple PCs?
Yes, you can use the same bootable USB flash drive to install Windows on multiple computers. The bootable USB simply provides the installation files. It does not get tied to a single PC. Just make sure each target PC meets the system requirements for the version of Windows you are installing.
What size USB flash drive do I need to install Windows?
You need at least an 8GB USB flash drive to install Windows 10 or Windows 11. A 16GB drive is recommended because it gives you extra space and avoids any potential issues with drive capacity. Make sure the USB drive is empty before you create the bootable media, as the process will erase all existing data on the drive.
Can I install Windows from a bootable USB on a Mac?
Yes, you can install Windows on a Mac using a bootable USB flash drive. Apple provides Boot Camp Assistant, which helps you partition your Mac’s hard drive and install Windows. You will still need to create a bootable USB with the Windows ISO file, and then use Boot Camp to complete the installation process on your Mac.
What happens if I remove the USB drive too early during installation?
If you remove the USB drive too early, the installation may fail and your PC could restart into the old operating system or show an error. The safest approach is to keep the USB drive plugged in until the installation is fully complete and you have reached the Windows desktop. The PC will automatically boot from the hard drive once the USB is no longer needed.
Final Thoughts
Installing Windows from a bootable USB flash drive is one of the most useful skills you can learn for your computer. It gives you control over your system, lets you do clean installs, and helps you recover from problems. The process is simpler than most people think, and with the right preparation, it goes smoothly every time.
Remember to back up your data, use a reliable USB drive, and follow each step carefully. Whether you are a beginner or someone who has done this before, the tips in this guide will help you succeed. The Windows Media Creation Tool makes creating the bootable USB almost effortless, and the installation process itself is straightforward.
Now you know the answer to the question Can I Install Windows From a Bootable USB Flash Drive. You have the knowledge and the steps to do it yourself. Grab a USB drive, download the tools, and give it a try. You will be surprised how easy it really is.
Frequently Asked Questions
What is Can I Install Windows From Bootable Usb?
Can I Install Windows From Bootable Usb is an important topic with many practical applications.