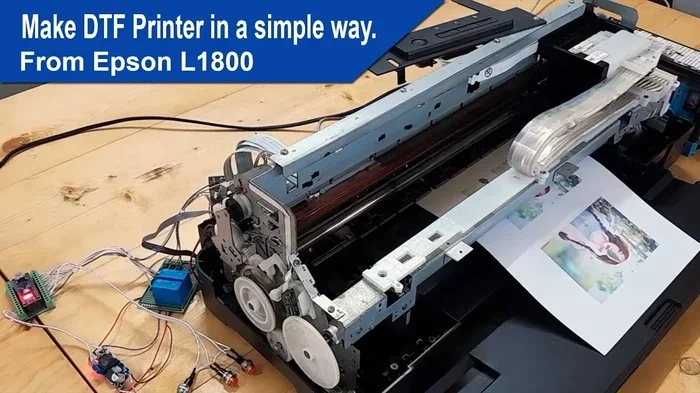
Can You Convert An Epson Printer To Dtf Printing Setup
Yes, you can convert an Epson printer to DTF printing with the right kit and basic knowledge. This process transforms your standard inkjet Epson into a direct-to-film printing machine capable of producing vibrant custom designs on textiles and other materials. Whether you are a hobbyist or starting a small business, converting your Epson printer opens up exciting new creative possibilities.
Have you been wondering whether you can convert an Epson printer to DTF printing setup? The short answer is yes. But the full answer involves a bit more detail that you will want to know before diving in.
DTF printing, which stands for direct-to-film printing, has taken the custom apparel and merchandise world by storm. It allows you to print designs onto a special film, transfer them with heat, and create stunning prints on fabrics, ceramics, and more. Meanwhile, Epson printers are some of the most popular inkjet printers out there. They are affordable, reliable, and known for excellent print quality.
So the idea of combining the two makes a lot of sense. Instead of spending thousands on a brand-new DTF printer, you might be able to use the Epson you already own. This guide walks you through everything you need to know about converting an Epson printer to DTF. We will cover compatible models, what you need, the step-by-step process, costs, and common pitfalls to avoid.
Key Takeaways
- Conversion is possible: Many Epson EcoTank and SureColor models can be converted to DTF with aftermarket kits.
- You need the right kit: A DTF conversion kit includes software, RIP software, and often a modified printhead setup.
- Cost savings are real: Converting an existing Epson is cheaper than buying a dedicated DTF printer.
- Not all models work: Compatibility depends on your Epson model, printhead type, and firmware version.
- Maintenance matters: Regular cleaning and proper ink handling keep your converted printer running smoothly.
- Quality can match commercial machines: With the right settings, converted Epson printers produce stunning DTF prints.
📑 Table of Contents
- What Is DTF Printing and Why Is It So Popular?
- Which Epson Printers Can Be Converted to DTF?
- What You Need for the Conversion
- Step-by-Step Process to Convert Your Epson Printer to DTF
- Benefits of Converting an Epson Printer to DTF
- Common Mistakes to Avoid When Converting Epson Printers to DTF
- Expert Tips for Getting the Best Results
- How Much Does It Cost to Convert an Epson Printer to DTF?
- Is Converting an Epson Printer to DTF Worth It?
- Conclusion
What Is DTF Printing and Why Is It So Popular?
Before we get into the conversion details, let us quickly cover what DTF printing actually is. Direct-to-film printing is a method where you print your design onto a special transparent film using a DTF printer. The printed film then gets covered with adhesive powder and cured using a heat press. Finally, the design transfers from the film onto your chosen material, whether that is a t-shirt, hoodie, mug, or anything else.
DTF has become hugely popular for several reasons:
- Works on many materials: Unlike sublimation, DTF works on dark fabrics, cotton, polyester blends, and even non-textile items.
- No need for pretreatment: Many DTF workflows skip the fabric pretreatment step, saving time.
- Vibrant colors: DTF prints tend to be bright, detailed, and long-lasting.
- Lower startup costs: Compared to DTG (direct-to-garment) printers, DTF setups are more affordable.
- Scalable: You can start small and grow your custom printing business at your own pace.
Given these benefits, it is easy to see why so many people want to get into DTF printing. And converting an existing Epson printer is one of the most accessible ways to start.
Which Epson Printers Can Be Converted to DTF?
Not every Epson printer can handle a DTF conversion. The key factor is the printhead. Epson uses several different printhead technologies, and only certain ones are compatible with DTF ink systems.
Compatible Epson Models
Here are some Epson printer models that are commonly used for DTF conversions:
- Epson EcoTank ET-2850 / ET-2800 series: These affordable all-in-one printers are popular choices for beginners.
- Epson EcoTank ET-4850 / ET-4800 series: Larger format and higher capacity make these great for DTF projects.
- Epson SureColor P400 / P600: These are more premium models that deliver excellent print quality for DTF work.
- Epson WorkForce WF-7210 / WF-7720: Wide-format options that handle larger prints with ease.
- Epson EcoTank ET-15000: A newer model with six ink colors, which is ideal for DTF printing.
What Makes a Printer DTF-Compatible?
For a successful Epson printer to DTF conversion, you need a printer with an Epson Micro Piezo printhead. This type of printhead handles the viscosity of DTF inks much better than thermal printheads. Also, make sure your printer supports the ink channels you need. Most DTF setups require at least four to six colors, including white ink.
If you are unsure about your model, check the Epson specifications online or contact the DTF kit manufacturer. They usually maintain a compatibility list that makes things simple.
What You Need for the Conversion
Converting an Epson printer to DTF is not just about swapping out a few parts. You need a proper DTF conversion kit and some basic tools. Here is what you will typically need:
The DTF Conversion Kit
A good DTF conversion kit usually includes the following components:
- DTF inks: CMYK plus white ink cartridges or bulk ink bottles.
- Modified printhead or damper system: This adapts your Epson printhead to work with DTF ink viscosity.
- RIP software: This is the software that translates your designs into printable formats and handles white ink underlays.
- Maintenance supplies: Cleaning solutions, flush cartridges, and lint-free wipes.
- Installation guide: Most kits come with detailed instructions or video tutorials.
Some popular DTF kit brands include InkTec, Esquel, and MIMaki-compatible options. Prices vary widely, typically ranging from $200 to $800 depending on the kit quality and included components.
Additional Equipment You Will Need
Beyond the conversion kit, you will also need a few other items:
- A heat press machine for transferring designs from film to material.
- DTF film (also called PET film or transfer film).
- Adhesive powder (also called DTF powder or hot melt adhesive).
- A shaker machine for applying adhesive powder evenly.
- A curing oven or heat press for melting the adhesive powder onto the film.
While this list looks long, many of these items are one-time purchases that you will use for every project going forward.
Step-by-Step Process to Convert Your Epson Printer to DTF
Now let us walk through the actual conversion process. Every kit is slightly different, but the general steps remain the same across most setups.
Step 1: Prepare Your Workspace
Set up a clean, well-ventilated workspace. DTF inks can be messy, and adhesive powder can get everywhere. Cover your surfaces and wear gloves when handling inks. Make sure your Epson printer is unplugged and cooled down before you begin any work.
Step 2: Remove Existing Ink Systems
Take out the existing ink cartridges or drain the EcoTank ink bottles. You will be replacing these with the DTF ink system that comes in your conversion kit. Be careful with any residual ink and dispose of it properly.
Step 3: Install the DTF Ink System
Follow your kit instructions to install the DTF ink channels, dampers, and cartridges. This usually involves:
1. Removing the old ink delivery system.
2. Connecting the new DTF dampers to the printhead.
3. Installing the white ink channel (this is the most critical part).
4. Securing all connections and checking for leaks.
Step 4: Install RIP Software
RIP software is essential for DTF printing. It handles color management, white ink underlay generation, and print positioning. Popular options include Wasatch SoftRIP, ImagePrint, and UltraPrint. Install the software on your computer and connect your printer following the software setup wizard.
Step 5: Load DTF Film and Test Print
Load your DTF film into the printer tray. Make sure the film side is correct (the matte side usually goes down). Run a test print to check alignment, color accuracy, and white ink coverage. Adjust settings in your RIP software as needed.
Step 6: Cure and Transfer
Once your test prints look good, it is time to start producing. Print your design onto the DTF film, apply adhesive powder, cure it in your oven or heat press, and then transfer the design onto your target material using a heat press. The whole process takes practice, but you will get faster and more consistent over time.
Benefits of Converting an Epson Printer to DTF
There are several compelling reasons to convert your Epson printer instead of buying a new DTF printer. Here are the biggest advantages:
- Cost savings: A brand-new DTF printer can cost $1,500 to $5,000. A conversion kit costs a fraction of that.
- Repurpose what you have: If you already own an Epson printer, you are not throwing money away.
- Flexibility: Many converted Epson printers can still be used for regular printing tasks when not doing DTF work.
- Learning opportunity: Converting your own printer teaches you a lot about DTF printing before investing in a dedicated machine.
- Scalable startup: You can start a small custom printing business without a huge upfront investment.
For those looking at other budget-friendly printing alternatives, you might also explore alternatives to dish network and directtv if you are considering home office entertainment setups alongside your printing workspace. Having a well-rounded home setup can make your creative work more enjoyable.
Common Mistakes to Avoid When Converting Epson Printers to DTF
Even with the best instructions, mistakes happen. Here are some common pitfalls that beginners face and how to avoid them.
Skipping the RIP Software
Some people try to convert their Epson printer to DTF without proper RIP software. This is a huge mistake. Regular printer drivers cannot handle white ink underlays or the color management needed for DTF. Always invest in quality RIP software.
Using the Wrong Ink
Not all inks are created equal. Using standard Epson ink or low-quality DTF inks will clog your printhead and ruin your prints. Always use inks specifically formulated for DTF printing. They have the right viscosity and pigment size for smooth flow through the printhead.
Ignoring Printhead Maintenance
DTF printing puts extra demands on your printhead. If you skip regular cleaning cycles and maintenance, you will experience clogged nozzles, banding, and poor print quality. Clean your printhead weekly, even if you are not actively printing.
Wrong Film or Powder
Using low-quality DTF film or adhesive powder leads to poor adhesion, faded prints, and wasted materials. Stick with reputable brands and buy from trusted suppliers. The savings from cheap supplies are quickly lost in ruined prints.
Rushing the Curing Process
Proper curing is essential for DTF transfers. If you do not cure the adhesive powder long enough or at the right temperature, the design will peel off or crack. Follow the recommended temperature and time settings for your specific powder and film.
Expert Tips for Getting the Best Results
Want to get professional-quality DTF prints from your converted Epson printer? Here are some expert insights that can help.
Calibrate your printer regularly. Use the calibration tools in your RIP software to ensure accurate colors and sharp details. Calibration should be done whenever you change ink brands or after a long period of inactivity.
Invest in a good heat press. Your DTF transfer quality depends heavily on your heat press. Look for a press with even pressure distribution, accurate temperature control, and a timer. A $200 to $400 heat press is a solid starting point for beginners.
Start with simple designs. Before tackling complex multi-color designs, practice with simple images. This helps you understand how white ink underlays work and how colors interact during the transfer process.
Keep your printer in a stable environment. Temperature and humidity affect ink flow and print quality. Keep your converted Epson printer in a room with consistent temperature, away from direct sunlight and drafts.
Join DTF communities online. There are many Facebook groups, forums, and YouTube channels dedicated to DTF printing. These communities are incredibly helpful for troubleshooting, sharing settings, and staying up to date on new techniques and products.
Document your settings. Keep a log of your print settings, ink brands, film types, and curing temperatures. This saves you a lot of trial and error when you switch materials or start new projects.
How Much Does It Cost to Convert an Epson Printer to DTF?
The total cost depends on your starting point and the quality of the equipment you choose. Here is a rough breakdown:
- DTF conversion kit: $200 to $800
- DTF inks (starter set): $50 to $150
- DTF film (starter pack): $30 to $80
- Adhesive powder: $20 to $50
- Heat press machine: $150 to $500
- Curing oven (optional): $100 to $300
- RIP software: $100 to $500 (one-time or subscription)
If you already own a compatible Epson printer, your total startup cost could be as low as $500 to $1,000. This is a fraction of what a dedicated DTF printer setup would cost. And remember, many of these items are reusable for years.
Is Converting an Epson Printer to DTF Worth It?
The answer depends on your goals. If you want to start a small custom printing business or create personalized gifts for friends and family, converting an Epson printer to DTF is absolutely worth it. You get professional-quality results without the high price tag of commercial DTF machines.
However, if you plan to print at a very high volume every day, a dedicated DTF printer might be a better long-term investment. Dedicated machines are built for continuous use and often have faster print speeds and larger print areas.
For most hobbyists, small business owners, and creative enthusiasts, the conversion route offers the best balance of cost, quality, and versatility. Your converted Epson printer can handle small batches of custom prints while you grow your operation.
Conclusion
So, can you convert an Epson printer to DTF? Absolutely. With the right Epson model, a quality DTF conversion kit, and a willingness to learn, you can turn your everyday inkjet printer into a powerful DTF printing machine. The process requires some patience and attention to detail, but the results are well worth the effort.
Start by checking your Epson printer model for compatibility. Invest in a reputable DTF kit and quality RIP software. Follow the step-by-step process outlined in this guide, and do not be afraid to experiment and learn from your early prints. The DTF printing world is exciting, accessible, and full of creative potential.
Whether you are printing custom t-shirts for your family, starting a side business, or exploring a new creative hobby, converting your Epson printer to DTF opens the door to endless possibilities. Grab your kit, fire up your Epson, and start creating today.
Frequently Asked Questions
Can any Epson printer be converted to DTF?
No, not every Epson printer can be converted. You need a model with an Epson Micro Piezo printhead and enough ink channels to support CMYK plus white ink. Check the compatibility list from your DTF kit manufacturer before purchasing.
How long does it take to convert an Epson printer to DTF?
The actual conversion process takes about 2 to 4 hours if you follow the instructions carefully. However, setting up your workspace, purchasing equipment, and learning the software may take a few additional days.
Is converting an Epson printer to DTF cheaper than buying a new one?
Yes, converting is significantly cheaper. A new DTF printer can cost $1,500 or more, while a conversion kit and additional supplies typically cost between $500 and $1,000 if you already own a compatible Epson printer.
Can I still use my converted Epson printer for regular printing?
Yes, most converted Epson printers can switch back to regular printing. You will need to remove the DTF inks and reinstall the original ink system. However, frequent switching may shorten the lifespan of the printhead.
What kind of DTF ink should I use with my converted Epson printer?
Always use DTF-specific inks that are formulated for your printhead type. These inks have the correct viscosity and pigment size for smooth flow and vibrant results. Avoid using standard Epson pigment inks or dye inks for DTF work.
Do I need a curing oven for DTF printing with a converted Epson?
A curing oven is highly recommended but not absolutely required. Some people use a heat press alone to cure the adhesive powder. However, a dedicated curing oven provides more consistent results and is especially helpful for higher volume printing.