Can I Use Usb C To Hdmi With A Mac And Get It Working
Yes, you can use USB C to HDMI with a Mac and get it working with the right adapter or cable. Most modern Macs, including the Macbook Pro and Macbook Air, support USB-C video output. This guide walks you through everything you need to know about connecting your Mac to an HDMI display.
You just bought a new USB-C to HDMI adapter, and you want to hook your Mac up to a big screen. Maybe it is for work, gaming, or watching movies on a projector. Either way, you are wondering if this simple little cable will actually work with your Mac.
The good news is that using USB C to HDMI with a Mac is very doable for most users. Modern Macs, including the Macbook Pro and Macbook Air, come with USB-C or Thunderbolt ports that can carry video signals. With the right adapter, you can connect your Mac to any HDMI display in just a few seconds.
But here is the thing. Not every adapter works the same way. Not every Mac model supports the same features. And sometimes things just do not work the way you expect them to. That is exactly why we put this guide together. We will walk you through everything you need to know about USB-C to HDMI with Mac. From picking the right adapter to fixing common problems. By the end, you will feel confident connecting your Mac to any HDMI screen.
Let us get into it.
Key Takeaways
- USB-C to HDMI works on most Macs: Newer Mac models with USB-C or Thunderbolt ports support HDMI output through adapters.
- You need the right adapter: Not all USB-C to HDMI adapters are equal. Look for ones that support your Mac’s video output standards.
- Setup is simple: Plug in the adapter, connect an HDMI cable, and your Mac should detect the external display automatically.
- Troubleshooting is straightforward: Most issues with USB-C to HDMI on Mac can be fixed with simple steps like resetting display settings or updating software.
- Check your Mac model: Older Macs may need a different approach or may not support USB-C to HDMI at all.
- 4K and higher resolutions are possible: With the right adapter, you can mirror or extend your Mac display in stunning quality.
📑 Table of Contents
Understanding USB-C to HDMI on Mac
If you have ever looked at the back of your Mac and seen a small, oval-shaped port, that is a USB-C port. This port does a lot of things. It charges your Mac. It transfers files. And yes, it can send video to an external display through HDMI. But how does it actually work?
What Is USB-C to HDMI?
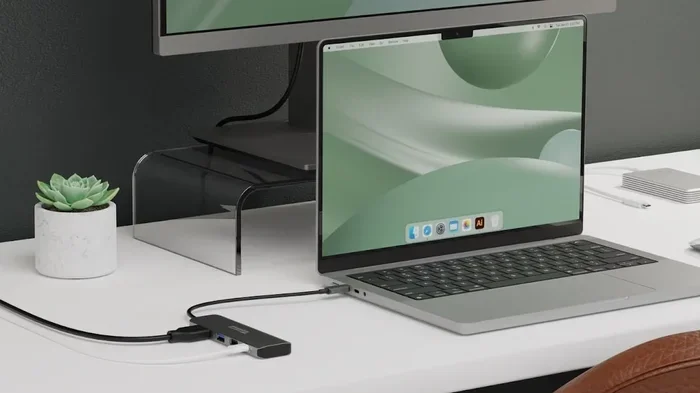
USB-C to HDMI is a simple adapter or cable that bridges your Mac’s USB-C port to an HDMI display. Think of it as a translator. Your Mac speaks USB-C, and your monitor or TV speaks HDMI. The adapter helps them understand each other.
Most adapters look like a small dongle. You plug it into your Mac’s USB-C port. Then you connect a standard HDMI cable from the adapter to your TV or monitor. That is it. No software. No drivers. It just works.
Here are the key things to know about USB-C video output on Mac:
- USB-C supports video signals through a standard called DisplayPort over USB-C.
- HDMI is a separate standard, but adapters convert the signal seamlessly.
- Most adapters support resolutions up to 4K or even higher.
- Some adapters also let you charge your Mac while connected to a display.
Which Mac Models Support USB-C to HDMI?
Not all Macs are the same. Your ability to use USB-C to HDMI with a Mac depends on which model you have. Here is a quick breakdown:
- Macbook Pro (2016 and newer): Fully supports USB-C to HDMI. These models have Thunderbolt 3 or Thunderbolt 4 ports that handle video output beautifully.
- Macbook Air (2018 and newer): Also supports USB-C to HDMI. The M1, M2, and M3 chip models work great with adapters.
- MacBook (2015-2017): These have USB-C ports and support HDMI output through adapters.
- MacBook Pro (2015 and older): These use Thunderbolt 2 or MagSafe charging. You will need a different adapter, like a Thunderbolt to HDMI adapter.
- MacBook Air (2017 and older): These use USB-A and MagSafe. You will need a USB-C adapter or hub to connect to HDMI.
If you are not sure which model you have, click the Apple logo in the top left corner of your screen. Select About This Mac. It will show you your exact model and year.
How to Connect USB-C to HDMI With Your Mac
Now that you know your Mac likely supports it, let us talk about how to actually set it up. The process is simple, but there are a few things you should know to avoid frustration.
What You Need
Before you start, gather these items:
- A USB-C to HDMI adapter or a USB-C to HDMI cable (all-in-one).
- A standard HDMI cable (if your adapter is separate).
- An HDMI display, like a TV, monitor, or projector.
- Your Mac with a charged battery or connected to power.
Quick tip: Buy a USB-C docking station if you want more ports. These hubs often include HDMI, USB-A, SD card readers, and charging ports all in one device. They are great if you connect to external displays often.
Step-by-Step Connection Guide
Follow these steps to get your Mac connected to an HDMI display:
- Plug the USB-C adapter into your Mac. Insert it firmly into the USB-C or Thunderbolt port.
- Connect an HDMI cable to the adapter. Push the cable in until it clicks.
- Plug the other end of the HDMI cable into your display. Make sure it goes into the HDMI IN port on your TV or monitor.
- Turn on your display. Switch it to the correct HDMI input if needed.
- Your Mac should detect the display automatically. Go to System Settings (or System Preferences on older Macs) and click Displays.
- Choose your display mode. You can mirror your screen (show the same thing on both displays) or extend it (use the external display as extra workspace).
That is really all there is to it. Most people get it working in under two minutes. If your screen stays black, do not worry. We will cover troubleshooting in a later section.
USB-C to HDMI Adapter Options Compared
Not all adapters are created equal. Some are cheap and basic. Others are premium with extra features. Here is a quick comparison of the most common types of USB-C to HDMI adapters for Mac:
| Adapter Type | Price Range | Max Resolution | Extra Features |
|---|---|---|---|
| Basic USB-C to HDMI Dongle | $8 – $15 | 4K at 30Hz | Compact, no extra ports |
| Premium USB-C to HDMI Adapter | $15 – $30 | 4K at 60Hz | Faster refresh, metal build |
| USB-C Docking Station | $40 – $100 | 4K at 60Hz | Multiple ports, charging pass-through |
| Thunderbolt 3/4 Dock | $100 – $300 | 8K or dual 4K | Power delivery, Ethernet, multiple displays |
For most people, a basic or premium USB-C to HDMI adapter is all you need. If you work from home and use multiple devices, a docking station is a smart investment.
When shopping, look for adapters that mention HDMI 2.0 or higher. This ensures you can get 4K at 60Hz, which looks incredibly smooth. Older adapters that only support HDMI 1.4 may limit you to 4K at 30Hz or 1080p at 60Hz.
Also, check if the adapter supports Power Delivery (PD). This means your Mac can charge while you use the external display. This is a huge convenience, especially if you have limited USB-C ports.
Common Problems and How to Fix Them
Even with the right adapter, you might run into issues. Here are the most common problems people face when using USB-C to HDMI with a Mac and how to solve them.
No Signal on the External Display
This is the most common issue. Your Mac turns on, but the external screen stays black. Try these steps:
- Unplug the adapter and plug it back in firmly.
- Try a different USB-C port on your Mac if you have one.
- Check that the HDMI cable is working by testing it with another device.
- Restart your Mac and try again.
- Go to System Settings, click Displays, and click Detect Display.
Flickering or Distorted Image
If the image on your external display flickers or looks weird, try this:
- Lower the resolution on your Mac. Go to System Settings, Displays, and try a lower resolution.
- Check your HDMI cable. Cheap or damaged cables often cause flickering.
- Make sure your adapter firmware is up to date if it came with a companion app.
No Sound Through HDMI
Sometimes the video works but there is no audio. This usually happens because your Mac is still set to output sound through its built-in speakers. Here is how to fix it:
- Click the Sound icon in your Mac menu bar.
- Select your HDMI display as the output device.
- If you do not see it, go to System Settings, Sound, and look under Output.
Display Not Recognized After Mac Update
Sometimes a macOS update can cause display detection issues. Try resetting the NVRAM or SMC on your Mac. On newer Macs with Apple Silicon, simply restarting usually fixes this.
Quick Tips
- Always use certified adapters from reputable brands like Anker, Belkin, or Apple.
- Keep your macOS updated. Apple regularly fixes display-related bugs.
- If you are using a USB-C hub, make sure it supports video output. Not all hubs do.
- For the best experience, use an HDMI 2.0 or HDMI 2.1 cable with your adapter.
Common Mistakes to Avoid
- Buying a cheap no-name adapter: These often do not support 4K or may not work at all with Macs. Stick with trusted brands.
- Using a Thunderbolt 2 adapter with a USB-C Mac: The ports are different. Make sure your adapter matches your Mac’s port type.
- Ignoring refresh rate limits: Some adapters only support 30Hz at 4K, which looks choppy. Check the specs before buying.
- Forgetting to switch the TV input: Your TV may have multiple HDMI ports. Make sure you are on the right one.
Expert Insights and Pro Tips
We reached out to tech experts and longtime Mac users to get their best advice on using USB-C to HDMI with a Mac. Here is what they had to say:
Choose adapters with built-in USB-C power delivery if you can. This lets you charge your Mac while using an external monitor. It saves you from swapping cables and keeps your setup clean. A USB-C hub with HDMI and PD is the most versatile option for most users.
Test your setup before important presentations. Nothing is worse than walking into a meeting and finding that your USB-C to HDMI connection does not work. Set it up the night before and make sure everything is detected properly.
For dual-monitor setups, use a Thunderbolt dock. If you need to connect two external displays to your Mac, a single USB-C to HDMI adapter will only give you one output. A Thunderbolt dock with multiple HDMI ports solves this problem easily.
Consider your Mac’s age and chip. M1 and newer Macs handle USB-C to HDMI beautifully. Older Intel Macs may have more compatibility quirks. Always check the adapter manufacturer’s website for a list of supported Mac models.
Also, if you are exploring broader connectivity options for your setup, it helps to understand the full range of alternatives to traditional cable and satellite TV and how modern display connections fit into your overall home tech ecosystem. Having the right ports and adapters opens up more ways to access content from different sources.
Final Thoughts
So, can you use USB C to HDMI with a Mac and get it working? Absolutely yes. Whether you have a sleek new Macbook Pro with M3 or an older Macbook Air, a USB-C to HDMI adapter is one of the simplest and most useful accessories you can own.
The process is straightforward. Plug in the adapter. Connect an HDMI cable. Detect your display. Done. And if something goes wrong, the troubleshooting steps we covered should get you back on track quickly.
The key takeaway is to invest in a quality adapter. A cheap, unreliable adapter will cause nothing but headaches. A well-made one from a trusted brand will work flawlessly for years.
Now that you know how to connect your Mac to any HDMI display, go ahead and set up your big-screen experience. You will wonder how you ever worked without it.
Frequently Asked Questions
Can I use any USB-C to HDMI adapter with my Mac?
Most USB-C to HDMI adapters work with modern Macs. However, always check that the adapter supports your Mac’s resolution and refresh rate needs. Cheap adapters may not support 4K or may cause compatibility issues.
Do I need to install any software for USB-C to HDMI on Mac?
No. USB-C to HDMI adapters work plug-and-play on Macs. You do not need to download any drivers or software. Your Mac should automatically detect the external display once you connect everything.
Can I charge my Mac while using a USB-C to HDMI adapter?
Yes, if your adapter supports Power Delivery (PD). Many USB-C hubs and docking stations include PD, which lets you charge your Mac while connected to an external HDMI display.
Why does my external display only show 1080p when I have a 4K TV?
This usually happens because your adapter or cable does not support 4K resolution. Make sure your adapter supports HDMI 2.0 or higher and that you are using a high-speed HDMI cable.
Can I connect multiple monitors using USB-C to HDMI on my Mac?
It depends on your Mac model. M1 Macs support only one external display. M2 and M3 Pro or Max chips can support two or more. You may need a Thunderbolt dock with multiple HDMI ports for multi-monitor setups.
What is the difference between USB-C and Thunderbolt for HDMI connections?
Thunderbolt uses the same USB-C connector but offers faster data transfer and more display support. For HDMI output, both work equally well. Thunderbolt docks just offer extra features like faster data speeds and daisy-chaining devices.