Can I Scan Using A Usb Cable Everything You Need To Know
Yes, you can scan using a USB cable and it is one of the most reliable ways to digitize your documents. A USB scanner connection offers stable transfers, fast scan speeds, and consistent quality. This guide walks you through setup, troubleshooting, and expert tips for scanning with a USB cable like a pro.
Have you ever wondered can I scan using a USB cable? The short answer is yes. Whether you are digitizing old photos, scanning important documents, or converting paperwork into digital files, a USB cable offers a simple and dependable way to get the job done. USB scanning is one of the most common methods people use at home and in the office. It is fast, reliable, and does not require a Wi-Fi connection. In this guide, we will walk you through everything you need to know about scanning with a USB cable. From setup to troubleshooting, we have you covered.
Many people assume that scanning requires complicated equipment or a wireless setup. But the truth is, a USB cable scanner connection is often the easiest path to great results. You plug in the cable, install the software, and start scanning. No passwords, no network settings, no frustrating lag. Whether you are a student, a small business owner, or someone organizing old family photos, understanding how USB scanning works will save you time and headaches. Let us dive in.
Key Takeaways
- USB scanning works with most scanners: Nearly all flatbed and document scanners support USB connections for direct scanning to your computer.
- Setup is simple and fast: You only need a USB cable, compatible scanner, and the right driver software to get started.
- Wired connections are more stable: USB scanning avoids the interference and dropouts that can affect wireless scanning methods.
- Troubleshooting is straightforward: Most USB scanning issues relate to drivers, cable quality, or port problems and are easy to fix.
- USB scanning delivers high quality: You get excellent scan resolution and color accuracy with a direct wired connection.
- Speed matters: USB 3.0 and USB-C connections offer faster scan transfer speeds than older USB 2.0 ports.
- Compatibility is broad: USB scanning works with Windows, Mac, and even some Linux systems with the right drivers.
📑 Table of Contents
- What Is USB Scanning and How Does It Work?
- How to Set Up USB Scanning Step by Step
- Benefits of Scanning with a USB Cable
- Common Problems and How to Fix Them
- USB Scanning vs Wireless Scanning: Which Is Better?
- Best Practices for USB Scanning
- Which Scanners Work Best with USB Connections?
- How to Choose the Right USB Cable for Your Scanner
- Can I Use a USB Cable to Scan with a Phone or Tablet?
- Final Thoughts
What Is USB Scanning and How Does It Work?
USB scanning means connecting your scanner directly to your computer using a USB cable. The cable transfers scan data from the scanner to your device in real time. This wired connection eliminates the need for Wi-Fi or Bluetooth. Most modern scanners come with a USB cable in the box. You simply plug one end into the scanner and the other into your computer’s USB port.
The process is straightforward. Your computer recognizes the scanner as an external device. You install the scanner drivers and scan software that came with your device. Once everything is set up, you place your document or photo on the scanner glass, open the software, and click scan. The file transfers directly through the USB cable to your computer. From there, you can save, edit, or share it.
Types of USB Cables Used for Scanning
Not all USB cables are the same. The type of cable you use can affect your USB scanning speed and performance. Here are the most common types:
- USB-A to USB-B: This is the most common cable for traditional desktop scanners. The USB-A end plugs into your computer, and the USB-B end connects to the scanner.
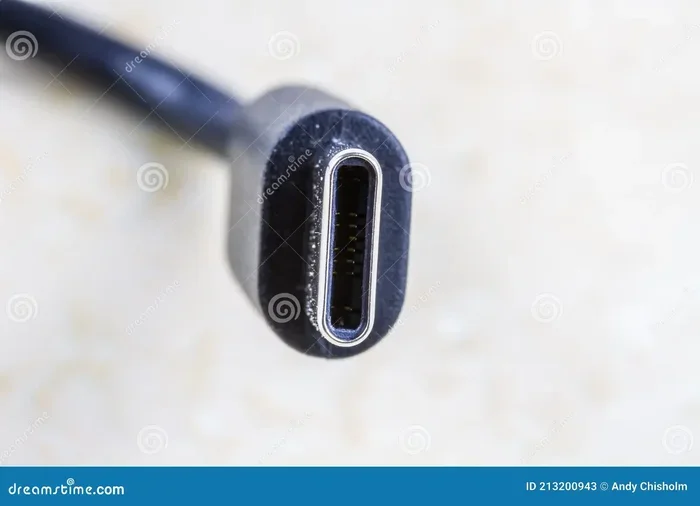
- USB-C: Many newer scanners and laptops use USB-C. It is smaller, reversible, and supports faster data transfer.
- USB 2.0: This is the older standard. It works fine for basic scanning but is slower than newer versions.
- USB 3.0: This offers much faster data transfer. If you scan large batches of documents, USB 3.0 makes a noticeable difference.
Always check your scanner manual to confirm which cable type it needs. Using the wrong cable can cause connection problems or slow transfer speeds.
How to Set Up USB Scanning Step by Step
Setting up USB scanning is easier than most people think. You do not need to be tech-savvy. Follow these steps and you will be scanning in minutes.
Step 1: Unbox and Inspect Your Scanner
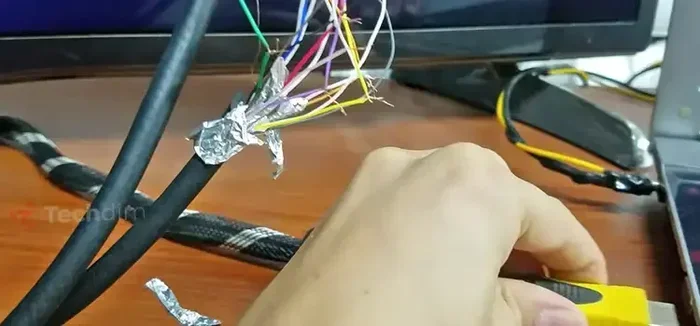
Open the packaging and check that everything is included. Most scanners come with a USB cable, a power cord, and a quick-start guide. Make sure the USB cable is not damaged. A frayed or bent cable can cause connection issues later on.
Step 2: Connect the Scanner to Your Computer
Plug the USB cable into the scanner first. Then connect the other end to an available USB port on your computer. Avoid using USB hubs or extension cables if possible. A direct connection gives you the best signal and power supply.
Step 3: Install the Scanner Drivers
Your computer may not recognize the scanner right away. You need to install the scanner drivers. Most scanners come with a driver CD. If you do not have one, visit the manufacturer’s website and download the latest driver for your model. Install the software and restart your computer if prompted.
Step 4: Test the Connection
Open your scanning software. Most scanners come with their own application. Place a document on the scanner glass and click the scan button. If the image appears on your screen, your USB scanner setup is complete.
Step 5: Adjust Your Scan Settings
Before scanning important documents, adjust your settings. Choose the right resolution, color mode, and file format. For text documents, 300 DPI is usually enough. For photos, use 600 DPI or higher. Save your files as PDF for documents or JPEG for images.
Benefits of Scanning with a USB Cable
There are many reasons to choose scanning with a USB cable over other methods. Here are the biggest advantages:
- Reliable connection: USB cables provide a stable, consistent connection. You do not have to worry about signal drops or interference.
- Fast transfer speeds: Especially with USB 3.0 and USB-C, large scan files transfer quickly to your computer.
- No network needed: You can scan anywhere as long as you have your computer and scanner. No Wi-Fi router required.
- Better scan quality: Wired connections tend to produce more consistent results than wireless options.
- Simple setup: Plug in, install drivers, and scan. No complex network configuration needed.
- Lower latency: There is no delay between scanning and receiving the file on your computer.
- Secure transfers: Data stays between your devices. No risk of wireless interception.
For many users, these benefits make USB scanning the preferred choice. It is especially useful in office environments where speed and reliability matter.
Common Problems and How to Fix Them
Even with a simple setup, you might run into issues. Here are the most common USB scanning problems and how to solve them.
Scanner Not Recognized by Computer
This is the most common issue. If your computer does not detect the scanner, try these fixes:
- Try a different USB port on your computer.
- Use a different USB cable. The cable might be faulty.
- Reinstall the scanner drivers from the manufacturer’s website.
- Restart your computer and the scanner.
- Check if your operating system is compatible with the scanner.
Slow Scan Transfer Speeds
If scanning feels sluggish, the problem might be your USB port or cable. USB 2.0 ports are slower than USB 3.0. Try connecting to a USB 3.0 port if your computer has one. Also, make sure you are using a high-quality cable. Cheap or damaged cables can slow down data transfer significantly.
Poor Scan Quality
Sometimes the issue is not the cable but the settings. Make sure you have selected the correct resolution and color mode. Clean the scanner glass before scanning. Dust and smudges on the glass can cause blurry or spotty scans. Also, check that your scan software is up to date.
Driver Conflicts
Driver conflicts happen when multiple devices share the same driver or when old drivers are not fully removed. To fix this:
- Uninstall the old driver completely from your system.
- Download the latest driver from the scanner manufacturer’s website.
- Use a driver cleanup tool if needed.
- Install the new driver and restart your computer.
USB Port Power Issues
Some scanners draw a lot of power. If your scanner keeps disconnecting, the USB port might not be supplying enough power. Try plugging the scanner directly into a port on the back of your computer. Avoid front-panel USB ports on desktops, as they sometimes provide less power.
USB Scanning vs Wireless Scanning: Which Is Better?
Many people wonder whether they should use a wired scanner connection or go wireless. Both methods have their pros and cons. Let us compare them side by side.
| Feature | USB Cable Scanning | Wireless Scanning |
|---|---|---|
| Connection Stability | Very stable, no interference | Can be affected by Wi-Fi signal strength |
| Transfer Speed | Fast, especially USB 3.0 | Depends on network speed |
| Setup Complexity | Simple, plug and play | Requires network configuration |
| Mobility | Limited by cable length | Can scan from anywhere in range |
| Scan Quality | Consistent and reliable | Generally the same quality |
| Security | Data stays local | Potential wireless security risks |
| Cost | Usually included with scanner | Requires Wi-Fi enabled scanner |
For most home users and office workers, USB scanning is the better choice. It is simpler, faster, and more reliable. Wireless scanning makes sense if you need to scan from multiple devices or from across a room. But for consistent, high-quality results, nothing beats a direct USB connection.
Best Practices for USB Scanning
Follow these tips to get the best results from your USB scanner setup:
- Keep your cables clean and organized. Dust and dirt on USB connectors can cause intermittent connection problems. Wipe them with a dry cloth regularly.
- Use the cable that came with your scanner. Third-party cables may not support the data transfer speeds your scanner needs.
- Update your scan software regularly. Manufacturers release updates that improve performance and fix bugs.
- Clean the scanner glass before every scan. Even a small smudge can ruin an otherwise perfect scan.
- Scan to the right file format. Use PDF for text documents and JPEG for photos. This keeps your files organized and easy to share.
- Do not overload the USB port. If you have multiple devices on the same USB hub, the scanner might not get enough power.
- Store your scanner properly. Cover it when not in use to prevent dust buildup on the glass and internal components.
Expert Insight on USB Scanning
According to scanning experts, the biggest mistake people make is skipping driver updates. Outdated drivers cause more scanning problems than any other factor. Make it a habit to check for driver updates every few months. This simple step can prevent most USB scanning troubleshooting issues before they start.
Another expert tip is to calibrate your scanner regularly. Most scanning software includes a calibration tool. Running this tool once a month ensures your scans maintain accurate colors and sharp detail over time. It only takes a few minutes but makes a big difference in scan quality.
Which Scanners Work Best with USB Connections?
Most scanners on the market support USB connections. However, some are better than others. Here are a few popular options:
- Epson Perfection V39: A budget-friendly flatbed scanner with excellent USB scanning performance. Great for photos and documents.
- Canon CanoScan LiDE 400: Lightweight and portable. Uses a single USB cable for both power and data transfer.
- Brother ADS-1250W: A document scanner that supports both USB and wireless. Ideal for offices that handle high volumes.
- HP ScanJet Pro 3000: A reliable sheet-fed scanner with fast USB 3.0 connectivity. Perfect for scanning stacks of documents.
When choosing a scanner, look for USB 3.0 or USB-C support. These offer the fastest scan transfer speeds and the most reliable connections. Also check that the scanner is compatible with your operating system before you buy.
How to Choose the Right USB Cable for Your Scanner
Not all cables are created equal. Choosing the right cable for your USB cable scanner setup matters. Here is what to look for:
- Cable length: A 6-foot cable gives you flexibility without creating clutter. Longer cables can sometimes cause signal loss.
- Cable standard: Look for USB 3.0 or USB 3.1 for the fastest speeds. USB 2.0 is fine for basic scanning but will be slower.
- Connector type: Make sure the connectors match both your scanner and your computer. USB-A and USB-C are the most common.
- Build quality: Choose a cable with a braided jacket and gold-plated connectors. These last longer and provide better signal quality.
Investing in a good cable is one of the easiest ways to improve your USB scanning experience. A quality cable costs around $10 to $15 and can last for years.
Can I Use a USB Cable to Scan with a Phone or Tablet?
Some people ask whether they can connect a scanner to a phone or tablet using a USB cable. The answer is yes, but with limitations. Most Android devices support USB On-The-Go (OTG), which allows you to connect external devices like scanners. However, you need the right adapter and compatible scanning app.
Apple devices are more restrictive. iPhones and iPads do not support external scanners through USB in most cases. You are better off using wireless scanning apps or connecting through a computer. For mobile document scanning, dedicated scanning apps that use your phone camera are often the most practical solution.
If you do decide to connect a scanner to a mobile device via USB, make sure your device supports OTG. Check your phone or tablet manufacturer’s specifications. Also, be prepared for some compatibility issues. Not all scanner models work with mobile devices, even with the right adapter.
Final Thoughts
Can I scan using a USB cable? Absolutely. It is one of the simplest, most reliable ways to digitize your documents and photos. A USB cable scanner connection gives you fast transfer speeds, stable performance, and excellent scan quality. Whether you are setting up a home office or managing paperwork for a small business, USB scanning gets the job done right.
Remember to keep your drivers updated, use a quality cable, and clean your scanner regularly. These small habits go a long way in keeping your setup running smoothly. If you run into problems, the troubleshooting tips in this guide should help you get back on track quickly.
Now that you know how easy and effective scanning with a USB cable can be, there is no reason not to give it a try. Plug in your scanner, fire up the software, and start digitizing. You will wonder why you did not do it sooner.
Frequently Asked Questions
Can I scan documents using a USB cable without Wi-Fi?
Yes, absolutely. USB scanning does not require a Wi-Fi connection at all. You simply connect your scanner to your computer with a USB cable and scan directly. This makes USB scanning ideal for locations without reliable internet access or for users who prefer a wired setup.
What type of USB cable do I need for my scanner?
Most scanners use a USB-A to USB-B cable. However, newer scanners may use USB-C. Check your scanner manual or the manufacturer’s website to confirm the correct cable type for your specific model. Using the wrong cable will prevent proper connection.
Why is my computer not recognizing my scanner when I connect it via USB?
The most common reason is missing or outdated drivers. Try uninstalling the current driver and downloading the latest version from the scanner manufacturer’s website. Also make sure you are using a working USB port and an undamaged cable. Restarting both your computer and scanner can also resolve the issue.
Is USB scanning faster than wireless scanning?
Yes, in most cases USB scanning is faster. A direct wired connection, especially USB 3.0 or USB-C, transfers scan data much faster than a wireless connection over Wi-Fi. For large batches of documents or high-resolution photos, the speed difference is very noticeable.
Can I use a USB hub to connect my scanner?
You can, but it is not recommended. USB hubs can reduce power and data transfer speeds. For the best performance and most reliable connection, plug your scanner directly into a USB port on your computer. If you must use a hub, choose a powered USB hub with its own power supply.
Do I need special software to scan using a USB cable?
Yes, you need scanning software. Most scanners come bundled with their own application. You can also use third-party scanning software like NAPS2, VueScan, or Adobe Acrobat. The software sends scan commands to the scanner and receives the digital files through the USB connection.
=== CONCLUSION ===
Scanning with a USB cable is simple, reliable, and effective. It remains one of the best ways to convert physical documents and photos into digital files. From setup to troubleshooting, this guide has covered everything you need to know about USB scanning. Keep your drivers updated, use quality cables, and follow the best practices outlined above. With the right setup, you will enjoy fast, high-quality scans every single time.