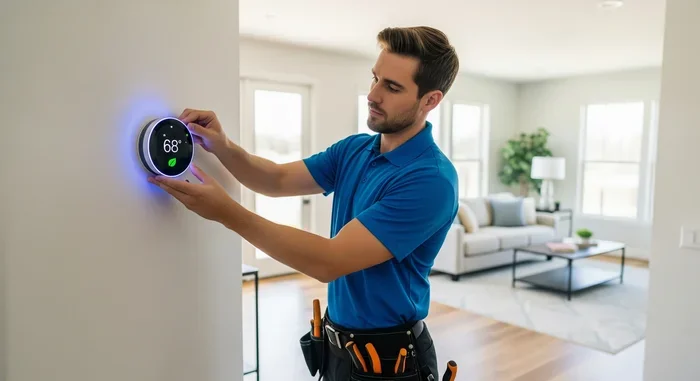
Do I Need An Electrician To Install A Smart Thermostat
You often do not need an electrician to install a smart thermostat. Most homeowners can handle a smart thermostat install themselves with basic tools and a little patience. However, if your HVAC system has unusual wiring or lacks a C-wire, calling an HVAC professional saves time and prevents damage.
Installing a smart thermostat is one of the easiest ways to make your home smarter and more energy-efficient. But the question that keeps coming up is simple: do you need an electrician for this job? The short answer is usually no. Most people can handle a thermostat installation on their own. But the longer answer depends on your wiring, your HVAC system, and how confident you feel working with basic electrical connections.
This guide walks you through everything you need to know. We will cover when you can go the DIY route, when you should call a professional, and what pitfalls to avoid. By the end, you will know exactly what to do for your situation. Let us get into it.
Key Takeaways
- DIY installation is possible: Most smart thermostats come with clear instructions and compatible wiring for standard systems.
- Check your wiring first: You need a C-wire or a compatible thermostat wiring setup to power most smart models.
- Call an electrician when unsure: Complex wiring, older HVAC systems, or missing wires are valid reasons to hire a pro.
- Smart home integration matters: Thermostats that work with Alexa or Google Home add convenience but may need extra setup steps.
- Energy savings justify the effort: A properly installed Wi-Fi thermostat can lower heating and cooling bills significantly.
- Wrong wiring causes problems: Mistakes during thermostat replacement can damage your HVAC system or void warranties.
📑 Table of Contents
- What Is A Smart Thermostat And Why Install One?
- Can You Install A Smart Thermostat Yourself?
- When Do You Actually Need An Electrician?
- Step-By-Step: How To Install A Smart Thermostat Yourself
- Common Wiring Challenges And How To Fix Them
- Pros And Cons Of Hiring An Electrician vs DIY
- How To Choose The Right Smart Thermostat
- Final Thoughts On Smart Thermostat Installation
What Is A Smart Thermostat And Why Install One?
A smart thermostat is a Wi-Fi-connected device that lets you control your home temperature from your phone. You can set schedules, adjust settings remotely, and even let the device learn your habits over time. Popular brands like Nest and Ecobee have made thermostat replacement simple and affordable for most households.
Here is why people love them:
- Energy savings: Smart thermostats cut heating and cooling costs by learning your schedule and adjusting automatically.
- Remote control: Change the temperature from anywhere using your phone.
- Smart home integration: Many models work with voice assistants like Alexa, Google Assistant, and Siri.
- Detailed reports: You get usage reports that show your energy patterns and savings over time.
- Comfort: Your home is always at the right temperature when you arrive.
Installing one yourself is part of the appeal. Unlike many smart home devices, a thermostat does not require mounting a heavy screen or running new cables. It replaces your existing thermostat unit directly on the wall. But the simplicity of the hardware does not mean the wiring is always straightforward.
Can You Install A Smart Thermostat Yourself?
For most standard homes, the answer is yes. If you have ever swapped out a regular thermostat, a smart thermostat install is very similar. The process usually takes about 30 minutes to an hour. You will need a screwdriver, a drill (sometimes), and your phone with the manufacturer’s app.
The Basic DIY Installation Steps
Here is what the typical process looks like:
- Turn off your HVAC system. Switch off the power at the breaker to avoid any electrical issues.
- Remove your old thermostat. Take off the faceplate and note which wire goes where. Take a photo before disconnecting anything.
- Check your wiring. Look for a C-wire (common wire). This provides constant power to your smart thermostat.
- Mount the new base plate. Most smart thermostats come with a template. Mark the holes, drill if needed, and attach the plate.
- Connect the wires. Match each wire to its labeled terminal on the base plate. Push them in firmly.
- Attach the display unit. Snap the thermostat screen onto the base plate.
- Restore power and set up the app. Turn the breaker back on, connect to Wi-Fi, and follow the on-screen setup.
That is it for most systems. Brands like Nest and Ecobee provide step-by-step guides and even compatibility checkers on their websites. If your system is standard and you have a C-wire, you are in great shape for a DIY thermostat installation.
When DIY Is Not Enough
Not every home has a simple setup. Some HVAC systems use older wiring that does not include a C-wire. Others have multiple stages of heating and cooling, or they use proprietary systems that need special adapters. In these cases, you might want to consider hiring someone.
Also, if you are uncomfortable working near your home’s electrical panel or handling small wires, there is no shame in calling a professional. A thermostat wiring mistake can cause system malfunctions, and you do not want to risk damaging your equipment.
When Do You Actually Need An Electrician?
This is the big question. You do not always need an HVAC professional to install a smart thermostat. But there are clear situations where calling one makes sense. Let us break down the scenarios where hiring an electrician is the smart move.
Your System Lacks a C-Wire
The C-wire, or common wire, provides continuous power to your thermostat. Many older homes do not have one. Without it, your smart thermostat may keep shutting off or not power on at all. Some smart thermostats come with power-stealing adapters that draw small amounts of power from the HVAC system. But these do not work reliably with all setups.
An electrician can install a C-wire for you. This involves running a new wire from your furnace or air handler to the thermostat location. It is a relatively simple job for a licensed professional, and it opens the door to any smart thermostat you want.
You Have a Multi-Stage or Heat Pump System
Standard single-stage systems are the easiest to work with. But if your home has a multi-stage heating and cooling system, a heat pump, or a radiant heating setup, the wiring gets more complex. These systems often have additional wires and terminals that require careful handling.
A professional who understands thermostat wiring diagrams will make sure every connection is correct. Getting this wrong can lead to poor system performance or even equipment damage.
You Are Dealing With Older Wiring
Homes built decades ago may have outdated wiring that does not support modern smart thermostats. The wires may be brittle, improperly labeled, or connected to a system that is no longer standard. In these cases, an electrician can assess the situation and recommend the best path forward.
You Want to Integrate With Other Smart Home Devices
If you are building a broader smart home setup, you might want your thermostat to work alongside other devices. For example, if you use voice assistants like Alexa, you may want to pair your thermostat with other smart home devices for automated routines. While the thermostat itself connects to Wi-Fi, having a professional handle the integration ensures everything works smoothly together.
Think of it this way. Just as you might check Do Wi Fi Passwords Transfer To New Android Phone when setting up a new device on your network, you want to make sure your smart thermostat connects properly to your home network and other devices without issues.
You Rent or Have an HOA That Requires Professional Installation
Some rental agreements and homeowners associations require professional installation for any electrical work, no matter how minor. If you fall into this category, budget for an electrician from the start. It will save you headaches with your landlord or HOA board.
Step-By-Step: How To Install A Smart Thermostat Yourself
If you have decided to go the DIY route, here is a more detailed walkthrough. This applies to most standard systems with a C-wire and single-stage heating and cooling.
Gather Your Tools
- Screwdriver set (Phillips and flathead)
- Drill with wall anchors (if needed)
- Wire stripper (sometimes included with the thermostat)
- Your smartphone with the manufacturer’s app
- A camera or phone to photograph your current wiring
- Masking tape and a marker for labeling wires
Label and Photograph Everything
Before you disconnect your old thermostat, take clear photos of every wire and its terminal. Use masking tape to label each wire with its terminal letter (R, W, Y, G, C, etc.). This step is the most important part of the process. Skipping it leads to confusion and frustration later.
Remove and Replace
Disconnect the wires from the old thermostat, then carefully remove the base plate from the wall. Thread the wires through the new base plate, attach it to the wall, and connect each wire to its matching terminal. Push firmly until you feel the wire catch. Then attach the display unit and restore power.
Follow the app instructions to connect to your Wi-Fi network and set up your schedule. Most apps walk you through this step by step.
Quick Tips For A Smooth Install
- Never let exposed wires touch each other while the system is powered on.
- Make sure the C-wire is firmly connected if your system has one.
- If a wire does not fit a terminal, do not force it. Check the label and try again.
- Keep the wire bundle neat and organized inside the wall. Loose wires can get pulled out during future maintenance.
Common Wiring Challenges And How To Fix Them
Even with a DIY approach, you might run into some common issues. Here is how to handle them.
No C-Wire
Many homes built before the 2000s do not have a C-wire. You have a few options:
- Use a smart thermostat that does not need a C-wire (some models have power-stealing technology).
- Install a C-wire yourself or hire an electrician to add one.
- Use a wiring adapter that fits into the existing thermostat slot and provides the necessary power.
Wires Too Short
If the wires in your wall are too short to reach the new base plate, do not try to stretch them. You can use a wire extender or have an electrician replace the wiring run. Stretching wires can cause breaks and intermittent connections.
Unlabeled or Unknown Wires
If the previous thermostat had unlabeled wires, use a multimeter to test which wire is the C-wire and which is the power wire. If you are not comfortable with this, an electrician can sort it out quickly.
Compatibility Issues
Not every smart thermostat works with every HVAC system. Before purchasing, use the manufacturer’s compatibility checker. Enter your system details and the tool will tell you if the thermostat is a match. This saves you from buying the wrong unit and dealing with returns.
Pros And Cons Of Hiring An Electrician vs DIY
Let us compare the two approaches side by side so you can make an informed decision.
| Factor | DIY Installation | Hiring An Electrician |
|---|---|---|
| Cost | Just the price of the thermostat ($100-$300) | Thermostat cost plus labor ($150-$400 total) |
| Time | 30-60 minutes | 1-2 hours including travel |
| Skill Level | Basic comfort with tools and wiring | None required |
| Risk | Higher if you make wiring mistakes | Low, professional handles everything |
| Warranty | May void if installation causes damage | Usually includes installation warranty |
| Complex Systems | Not recommended for complex setups | Recommended for multi-stage, heat pump, or older systems |
| Learning Experience | You learn how your system works | No hands-on knowledge gained |
For most standard homes, DIY is the clear winner on cost and convenience. But if your system is complex or you are unsure about any step, spending a little extra on professional installation is well worth the peace of mind.
Also, keep in mind that your smart home devices are only as good as their setup. Just as you would not want to skip important steps when setting up a new device, take your time with thermostat installation. If you are curious about how other smart devices integrate into a home setup, you might enjoy reading about how devices like Can I Use Alexa As A Bluetooth Speaker For My Tv for a broader look at smart home compatibility.
How To Choose The Right Smart Thermostat
Not all smart thermostats are created equal. Before you buy, consider these factors.
- Compatibility: Check that the thermostat works with your HVAC system. Most brands list compatible systems on their packaging or website.
- Wi-Fi Connectivity: Make sure it connects to your home network. A Wi-Fi thermostat gives you full remote control.
- Voice Assistant Support: If you use Alexa or Google Home, pick a thermostat that integrates with your preferred assistant.
- Energy Reports: Some models provide detailed energy usage data. This helps you track savings over time.
- Learning Features: Thermostats like the Nest Learning Thermostat adapt to your schedule automatically.
- Design: Choose a display that fits your style. Some are sleek and minimal, while others offer color displays.
Once you pick your model, make sure you understand the setup requirements. Read the manual before you start. If the setup mentions network configuration or app integration, make sure your home Wi-Fi is strong in the thermostat location. A weak signal leads to connectivity issues and a frustrating experience.
Setting up your smart home network is similar to managing other connected devices. Just as you might look up Do Wi Fi Passwords Transfer To New Android Phone when getting a new device on your network, you want to make sure your thermostat connects smoothly to your home Wi-Fi without interruptions.
Final Thoughts On Smart Thermostat Installation
The bottom line is this: most homeowners do not need an electrician to install a smart thermostat. If your system is standard and you have a C-wire, you can confidently handle the job yourself. It is a rewarding DIY project that saves money and adds real value to your home.
But if your wiring is complex, your system is older, or you simply do not feel comfortable working with electrical connections, hiring a professional is the right call. There is no shame in it. A properly installed thermostat works better, lasts longer, and keeps your warranty intact.
Whatever route you choose, the goal is the same: a smart temperature control system that makes your home more comfortable and your energy bills lower. Take your time, follow the instructions, and enjoy the benefits of your new smart thermostat.
Remember that smart home technology works best when everything is set up correctly. Whether you are installing a thermostat, setting up a new device, or troubleshooting connectivity, taking a methodical approach pays off. And if you ever need to reboot or reset your smart devices, the process is usually straightforward and well-documented by the manufacturer.
Frequently Asked Questions
Can I install a smart thermostat if I have no wiring experience?
If your system has standard wiring and a C-wire, you can install a smart thermostat with no prior experience. The key is to label every wire before disconnecting it and follow the manufacturer’s instructions step by step. If you feel unsure at any point, it is perfectly fine to hire a professional.
How much does it cost to hire an electrician to install a smart thermostat?
Electricians typically charge between $100 and $250 for a thermostat installation, depending on your location and the complexity of the wiring. This is in addition to the cost of the thermostat itself, which usually ranges from $100 to $300 for most smart models.
Do all smart thermostats need a C-wire?
Not all smart thermostats require a C-wire. Some models use power-stealing technology that draws power from the HVAC system without a dedicated C-wire. However, a C-wire ensures stable and reliable power, so it is always the better option if available.
What happens if I wire my smart thermostat incorrectly?
Incorrect wiring can cause your HVAC system to malfunction, short cycle, or not turn on at all. In rare cases, it can damage the system’s control board. Always double-check your wiring against the thermostat manual and the labels you created during removal.
Can I use my smart thermostat without Wi-Fi?
Yes, most smart thermostats will still function as a regular thermostat without Wi-Fi. You can set schedules and adjust temperatures manually on the device. However, you lose remote control, energy reports, and smart features that require an internet connection.
Is it better to hire a professional or install it myself?
For standard systems with straightforward wiring, DIY installation saves money and is straightforward. For complex setups, older systems, or if you are unsure about any wiring, hiring a professional is the safer choice. Both approaches work well when done correctly.