Can You Spray Paint a Projection Screen for Home Use
Yes, you can spray paint a projection screen for home use, but choosing the right paint and surface makes all the difference. Whether you want a budget-friendly alternative to a store-bought screen or a custom look for your home theater, spray painting opens up creative possibilities. This guide covers the best paints, step-by-step instructions, and common mistakes to avoid.
So, you want to build a home theater setup but don’t want to spend a fortune on a fancy projector screen. Maybe you’ve seen those expensive screens online and thought, “I can do that myself.” And you’re right. You absolutely can. But the big question is, can you spray paint a projection screen and get good results? The short answer is yes. The longer answer involves knowing what paint to use, how to prep your surface, and a few tricks that separate a mediocre screen from a cinematic experience.
Let’s be real. Not everyone has the budget for a premium projector screen. And honestly, some of those store-bought options don’t look great anyway. A DIY projector screen gives you full control over the size, shape, and finish. Plus, it’s a fun weekend project that can transform any room into a movie theater. Whether you’re setting up a backyard cinema or a dedicated home theater room, painting your own screen is a game-changer.
In this guide, I’ll walk you through everything you need to know. From choosing the right projector screen paint to applying it like a pro, you’ll find practical advice you can use right away. Let’s dive in.
Key Takeaways
- DIY Projection Screen Painting Is Possible: You can create a custom projector screen using spray paint on a smooth surface for a professional-looking result.
- Choose the Right Paint Type: Flat white or specialized screen paint delivers the best image quality and color accuracy for projection.
- Surface Preparation Matters: A clean, smooth wall or board ensures an even finish and prevents image distortion.
- Multiple Thin Coats Beat One Thick Coat: Applying thin, even layers prevents drips and creates a professional-grade projection surface.
- Avoid Common Mistakes: Skipping primer, using glossy paint, or rushing the drying process can ruin your screen quality.
- Consider Alternatives: Painted screens work great, but sheets and blackout curtains also serve as viable options for different setups.
📑 Table of Contents
Why Spray Paint a Projection Screen?
Before we get into the how-to, let’s talk about why this idea even makes sense. A painted projection screen offers several advantages over traditional pull-down screens or sheet alternatives. Understanding these benefits helps you make an informed decision.
Cost Savings
A quality projector screen can cost anywhere from $50 to $500 or more. A can of spray paint costs around $10 to $15. You do the math. When you paint a projector screen on a wall or board, you spend a fraction of the cost and often get better results. The savings are real, and they add up fast.
Custom Size and Shape
Store-bought screens come in fixed sizes. What if you need a wider image or a taller one? With a painted screen, you’re limited only by your wall space. You can go as big as you want. You can even create curved edges or a specific aspect ratio that matches your projector’s native resolution.
Clean, Seamless Look
One of the biggest complaints about using a sheet as a projector screen is the visible seams and wrinkles. A painted surface eliminates this problem entirely. You get a smooth, seamless finish that looks professional and displays images without distractions.
Best Paints for a Projection Screen
Not all paints are created equal when it comes to projection. The wrong paint can make your image look washed out, blurry, or overly reflective. Choosing the right projector screen material and paint type is the single most important step in this entire process.
Flat White Spray Paint
Flat white spray paint is the go-to choice for most DIY enthusiasts. It provides a matte finish that absorbs light evenly and reduces glare. Look for a high-quality brand that offers good coverage and a smooth texture. Brands like Rust-Oleum and Krylon offer flat white options that work surprisingly well for this purpose.
Specialized Screen Paint
If you want the best possible results, consider a specialized projection screen paint. Products like Screen Goo are designed specifically for this purpose. They create an ultra-smooth surface that enhances color accuracy and brightness. These paints cost more than regular spray paint, but they deliver a noticeable difference in image quality.
Gray Paint for Ambient Light
If your viewing room has a lot of ambient light, a gray projector screen paint might be a better option. Gray screens absorb more light and improve contrast ratios. This makes dark scenes look deeper and more detailed. However, gray paint works best in rooms where you can control the lighting somewhat.
What to Avoid
Stay away from glossy or semi-gloss paints. These create reflections that distort the projected image. Avoid textured paints too, as they create an uneven surface that scatters light unevenly. And never use outdoor paint meant for concrete or wood, as these finishes are too rough for projection.
| Paint Type | Best For | Image Quality | Cost |
|---|---|---|---|
| Flat White Spray Paint | Budget DIY screens | Good | $10-$15 |
| Specialized Screen Paint | Premium home theater | Excellent | $30-$50 |
| Gray Projector Paint | Rooms with ambient light | Very Good | $15-$25 |
| Glossy or Textured Paint | Do Not Use | Poor | N/A |
Step-by-Step Guide to Painting Your Projection Screen
Now for the fun part. Actually painting your screen. Follow these steps carefully, and you’ll end up with a surface that rivals anything you’d buy in a store.
Step 1: Choose Your Surface
You can paint directly on a wall, but a dedicated board often gives better results. A smooth plywood panel or MDF board works great. Make sure the surface is flat and free of bumps. If you’re painting on a wall, ensure it’s clean and free of texture. A projector on wall setup works well with painted surfaces, but the smoother the better.
Step 2: Sand and Clean
Lightly sand your surface with fine-grit sandpaper (220 grit works well). This creates a slightly rough texture that helps the paint adhere. Wipe away all dust with a damp cloth. A clean surface is essential for an even finish.
Step 3: Apply Primer
Do not skip this step. A coat of white primer creates a uniform base and helps the final paint color look true. Apply one thin coat and let it dry completely. This usually takes about an hour, but check your primer’s instructions.
Step 4: Spray the Paint
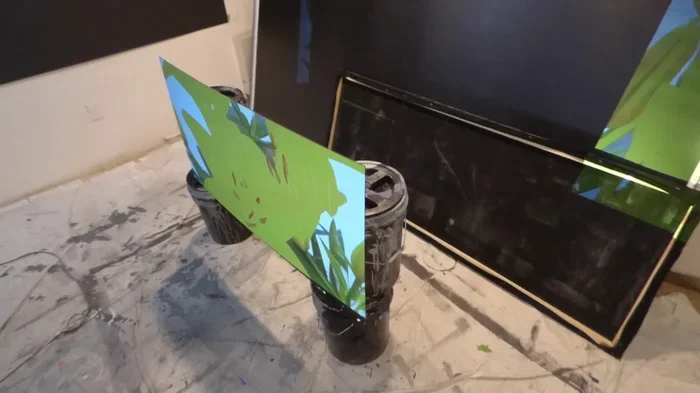
Hold the spray can about 12 inches from the surface. Apply thin, even coats in a sweeping motion. Don’t hold the can in one spot, or you’ll get drips and uneven coverage. Allow each coat to dry before applying the next. You’ll typically need 3 to 5 thin coats for a smooth, opaque finish.
Step 5: Let It Cure
Patience is key here. Let your painted screen cure for at least 48 hours before projecting on it. This allows the paint to fully harden and off-gas any fumes. Projecting too early can damage the finish and affect image quality.
Step 6: Test and Adjust
Once the screen is fully cured, set up your projector and test the image. Adjust the focus and position until you get a sharp, bright picture. If the image looks uneven, you may need to apply another light coat of paint and let it cure again.
Common Mistakes to Avoid
Even with the best intentions, mistakes happen. Here are the most common errors people make when painting a projector screen and how to avoid them.
- Skipping the Primer: Primer creates a uniform base. Without it, your paint may look blotchy and uneven. Always apply primer first.
- Using Too Much Paint: Thick coats cause drips and an uneven surface. Multiple thin coats always produce better results than one thick coat.
- Ignoring Surface Texture: Even small bumps or imperfections show up on a projection screen. Spend extra time sanding and smoothing your surface.
- Painting in a Dusty Environment: Dust particles get trapped in wet paint and create tiny bumps. Work in a clean, enclosed space if possible.
- Projecting Before the Paint Cures: The heat from the projector can damage uncured paint. Always wait the full curing time before testing.
- Choosing the Wrong Paint Finish: Glossy and satin finishes create hot spots and reflections. Stick with flat or matte finishes for the best results.
Comparing Painted Screens to Other Options
A painted screen isn’t your only option. Let’s compare it to some popular alternatives so you can decide what works best for your setup.
Painted Screen vs. Sheet Screen
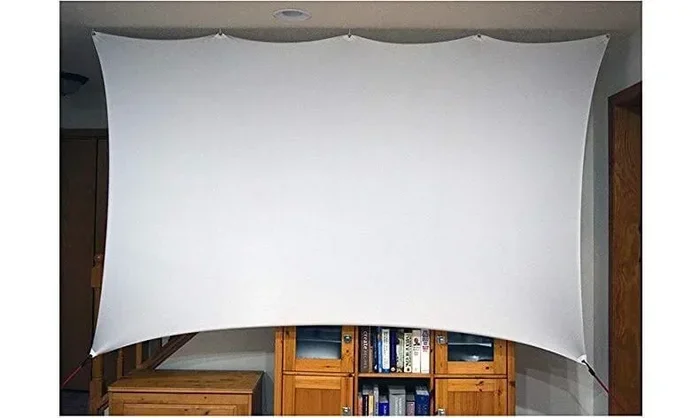
A sheet as a projector screen is the simplest and cheapest option. You just hang a white sheet on the wall and project onto it. The problem is sheets wrinkle, show seams, and often have a slight sheen that reduces image quality. A painted screen looks far more professional and delivers a cleaner image.
Painted Screen vs. Blackout Curtain Screen
Using blackout curtains as a projector screen is another popular DIY approach. Blackout curtains are already white on one side and provide a decent projection surface. However, they can be bulky and may not give you the exact size you need. A painted screen offers a permanent, custom-sized solution that looks much cleaner.
Painted Screen vs. Commercial Screen
A commercial projector screen offers the best image quality and convenience. They come with built-in tensioning systems and specialized coatings. However, they’re expensive and limited in size. A well-painted screen can come surprisingly close in quality while costing a fraction of the price.
Expert Tips for the Best Results
Here are some insider tips that will help you get the most out of your painted projection screen.
- Use a paint roller for large surfaces. A roller gives a smoother finish than spray paint for big walls. Apply the paint in thin, even strokes for the best results.
- Add a coat of clear matte sealer. After your final paint coat, a clear matte sealer protects the surface and makes it easier to clean. It also adds a subtle sheen that can improve brightness slightly.
- Paint in a dust-free room. Close windows, turn off fans, and wait for a low-humidity day. Dust is the enemy of a smooth projection surface.
- Test different white shades. Not all whites are the same. Some have a slight blue or yellow tint that affects color accuracy. Test a small area first and view it with your projector before committing to the whole surface.
- Consider the paint finish carefully. A flat finish works best for most setups. If you need a slight boost in brightness, a satin finish can help, but it may introduce minor glare in bright rooms.
These tips come from experience and can save you a lot of frustration. Take your time, and don’t rush the process. A quality painted screen is worth the effort.
Can You Use a Painted Screen With Any Projector?
The short answer is yes, with some caveats. Most modern projectors work well on a painted surface. However, the type of projector matters. LCD projectors tend to work great on white painted surfaces. DLP projectors also perform well but may show slightly more contrast on a gray surface. If you’re using an any projector for window setup or projecting in a bright room, a gray painted screen can help maintain contrast and reduce washout.
For those wondering about specific setups, a project Netflix from laptop to projector works perfectly on a painted screen. Similarly, gaming consoles, streaming devices, and Blu-ray players all deliver excellent results. The key is matching your paint choice to your viewing environment.
If you’re considering a more permanent installation, you might also explore using a projector on wall setup with a painted surface. This creates a sleek, integrated look that blends seamlessly with your room decor. Just make sure the wall surface is smooth and properly prepped for the best results.
Conclusion
Can you spray paint a projection screen for home use? Absolutely. With the right paint, proper preparation, and a little patience, you can create a stunning DIY screen that rivals commercial options. The process is straightforward, the cost is minimal, and the results are impressive. Whether you’re building a backyard theater or a dedicated home cinema room, a painted projection screen gives you exactly what you need.
Remember to choose the right type of paint, prep your surface thoroughly, and apply thin, even coats. Avoid the common mistakes, follow the steps in this guide, and you’ll be enjoying movies on your own custom screen in no time. If you want even more ideas for DIY setups, check out how to make your own projector screen using different materials and techniques.
The best part? Once your screen is painted and cured, you’re ready to enjoy countless movie nights, gaming sessions, and presentations with a setup you built yourself. Happy projecting.
Frequently Asked Questions
Can I use any spray paint for a projection screen?
No, not all spray paints work well. You need a flat or matte white paint for the best results. Glossy or textured paints will distort your projected image and reduce quality. Stick with paints specifically designed for a smooth, even finish.
How many coats of paint do I need for a good projection screen?
Most setups require 3 to 5 thin coats of spray paint. Each coat should be dry before applying the next. Thinner coats prevent drips and create a smoother surface. If the wall still shows through after 3 coats, add more until the surface is fully opaque.
Can I paint a projection screen directly on my wall?
Yes, you can paint directly on a wall, but the wall must be smooth and clean. Textured or uneven walls will create a bumpy projection surface. For the best results, consider mounting a smooth board or plywood panel and painting that instead.
Is a painted screen better than using a white sheet?
In most cases, yes. A painted screen provides a smoother, more even surface that eliminates wrinkles and seams. Sheets can work in a pinch, but they often show imperfections and have a slight sheen that reduces image quality. A properly painted screen delivers a much cleaner picture.
What color paint gives the best projection results?
Flat white paint gives the best results for most rooms. It provides good brightness and color accuracy. Gray paint works better in rooms with lots of ambient light because it improves contrast. Avoid any other colors, as they will tint your projected image.
Can I use a painted projection screen outdoors?
You can, but you’ll need to use a weather-resistant paint and a protected surface. Outdoor projection is tricky because of sunlight and moisture. For the best outdoor experience, consider using a blackout curtain as a projector screen stretched over a frame, which is easier to set up and take down.