How Do I Show Elevation On A Google Earth Map In Seconds
Finding elevation data on Google Earth is easier than you think. Whether you use the desktop app or the mobile version, you can quickly show elevation on a Google Earth map in just a few clicks. This guide walks you through every method so you can see terrain details, altitude readings, and contour lines with confidence.
Have you ever looked at a map and wondered how high the ground actually is? Maybe you are planning a hike, scouting a location, or just curious about the landscape. Showing elevation on a Google Earth map is a skill that opens up a whole new way to explore the world. You do not need to be a tech expert either. With just a few clicks, you can turn a flat satellite image into a rich, three-dimensional view of the terrain below. In this guide, we walk you through every step. You will learn how to do this on both desktop and mobile devices. We also share tips, tricks, and common mistakes to avoid. By the end, you will be able to show elevation on a Google Earth map in seconds.
Google Earth is one of the most powerful free tools available for exploring our planet. It combines satellite imagery with detailed elevation data to give you a realistic view of almost anywhere on Earth. The elevation feature lets you see hills, valleys, mountains, and even the ocean floor. This is incredibly useful for outdoor enthusiasts, real estate professionals, students, and curious explorers alike. The best part? You do not need any special software or paid subscriptions. The tools are built right into the free Google Earth app and desktop program. So let us dive in and show you exactly how it works.
Key Takeaways
- Enable 3D View: Turning on the terrain layer instantly reveals elevation changes across any map area.
- Use the Elevation Profile Tool: Draw a path to see precise altitude data along any route in Google Earth.
- Works on Desktop and Mobile: Both platforms offer elevation features, though desktop provides more detailed options.
- Contour Lines Help: Understanding topographic lines makes it much easier to read elevation on your map.
- Google Earth Pro is Free: The desktop version gives you access to advanced elevation measurement tools at no cost.
- Avoid Common Mistakes: Switching to satellite view and enabling terrain are the two most important steps.
📑 Table of Contents
- What Is Elevation on Google Earth?
- How to Show Elevation in Google Earth on Desktop
- How to Show Elevation on Google Earth Mobile
- Understanding Elevation Profiles and Contour Lines
- Expert Tips for Better Elevation Viewing
- Common Mistakes to Avoid When Viewing Elevation
- How Elevation Data Is Used in Real Life
- Conclusion
What Is Elevation on Google Earth?
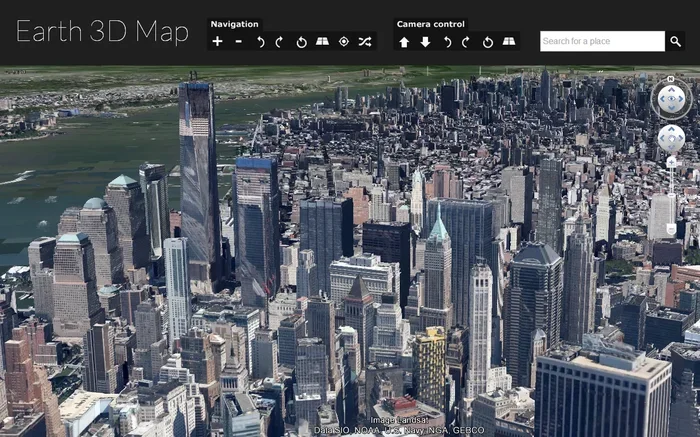
Before you learn how to show elevation, it helps to understand what elevation actually means in this context. Elevation refers to the height of a point on the Earth’s surface compared to sea level. On Google Earth, this data is used to create a realistic 3D view of the landscape. Without elevation data, everything looks flat, even from satellite images. When you turn on terrain viewing, Google Earth uses digital elevation models to add hills, valleys, and slopes to the map. This makes mountains look mountainous and valleys look deep. The result is a much more accurate and useful representation of the real world.
Google Earth pulls its elevation data from a variety of sources. These include satellite measurements, aerial surveys, and radar mapping missions. The resolution of this data varies by location. Some areas have very detailed elevation information, while others may be less precise. But for most purposes, the data is more than good enough to give you a clear picture of the terrain. Whether you are looking at the flat plains of Kansas or the steep peaks of the Rockies, Google Earth has you covered.
How to Show Elevation in Google Earth on Desktop
The desktop version of Google Earth offers the most powerful elevation tools. It is available for Windows, Mac, and Linux computers. And it is completely free to download and use. Here is how you can get started.
Step 1: Download and Open Google Earth Pro
First, go to the Google Earth website and download the free desktop application. Google Earth Pro is the full-featured version that includes all the elevation tools you need. Once downloaded, install the app and open it. You will see a spinning globe that loads satellite imagery of the Earth. From here, you can search for any location by typing in an address or coordinates.
Step 2: Enable the Terrain Layer
To see elevation, you need to turn on the terrain layer. Look at the top menu bar and click on “View.” From the dropdown menu, hover over “Historical Imagery” and then select “Terrain.” Alternatively, you can press the shortcut key “Ctrl+Alt+T” on Windows or “Cmd+Option+T” on Mac. As soon as you click this, the flat map transforms. Hills and valleys appear, and the landscape gains depth and shape. This is the single most important step in showing elevation on a Google Earth map.
Step 3: Use the Ruler Tool to Measure Elevation
Google Earth Pro includes a ruler tool that can measure elevation at specific points. To access it, go to the menu and click on “Tools,” then “Ruler.” A small window opens where you can select “Line” or “Path.” Click on the map to set points, and the tool will display the elevation at each point along with the distance. This is incredibly useful for planning hikes, construction projects, or any activity where you need precise altitude measurements. You can also save these measurements for later reference.
Step 4: Explore the Elevation Profile
The elevation profile tool lets you see a cross-section of the terrain along any path you draw. To use it, draw a path using the ruler tool, then look at the elevation graph that appears. This graph shows you how the terrain elevation changes from one point to another. You can see where the ground rises and falls, how steep a slope is, and what the highest and lowest points are along your route. This feature is a game-changer for hikers, cyclists, and anyone who needs to understand the lay of the land.
How to Show Elevation on Google Earth Mobile
Not everyone uses a desktop computer. Fortunately, Google Earth is also available on mobile devices. The mobile app lets you explore elevation on the go. While it has fewer features than the desktop version, it still gives you everything you need for most tasks.
Using the Google Earth App on iOS and Android
Download the Google Earth app from the App Store or Google Play Store. Open the app and search for your desired location. To enable terrain view, tap the “Layers” button, which looks like a stack of sheets. In the layers menu, toggle on “Terrain.” The map will immediately update to show a 3D view of the landscape with elevation data visible. You can pinch and zoom to get a closer look at the terrain. The app also lets you tilt and rotate the view, so you can examine hills and valleys from different angles.
Measuring Elevation on Mobile
Measuring specific elevation points on mobile is a bit more limited than on desktop. However, you can still get useful information. Tap and hold on any point on the map to drop a pin. The elevation at that point will appear in a card at the bottom of the screen. This gives you a quick readout of the altitude at any location. For more detailed analysis, you may want to use the desktop version or a companion app. But for quick checks and general exploration, the mobile app works great.
Understanding Elevation Profiles and Contour Lines
Once you know how to show elevation, the next step is understanding what you are seeing. Two key concepts help you read elevation data more effectively: elevation profiles and contour lines.
What Is an Elevation Profile?
An elevation profile is a side-view graph of the terrain along a specific path. Imagine slicing through a mountain and looking at the cross-section. That is essentially what an elevation profile shows you. It displays the changes in topographic elevation from one point to another. The horizontal axis represents distance, and the vertical axis represents height. Steep lines on the graph mean steep slopes. Flat lines mean level ground. This tool is invaluable for anyone who needs to understand the physical challenges of a route or area.
How to Read Contour Lines
Contour lines are the brown lines you see on topographic maps. Each line connects points of equal elevation. When contour lines are close together, the slope is steep. When they are far apart, the terrain is flat or gentle. Google Earth does not always show traditional contour lines, but the terrain layer gives you a visual equivalent. The 3D shapes of the landscape tell you the same story. Learning to read these shapes is a valuable skill for elevation analysis. With practice, you will be able to look at a Google Earth view and immediately understand the terrain.
Expert Tips for Better Elevation Viewing
Now that you know the basics, here are some expert tips that will help you get even more out of Google Earth’s elevation features.
Use the 3D Viewer for the Best Experience
Make sure the 3D viewer is enabled for the most realistic elevation display. Go to the “View” menu and ensure “3D View” is checked. This setting allows Google Earth to render terrain with proper lighting and shading, making elevation differences much easier to see. Without 3D view, the map can look flat even with terrain turned on.
Adjust the Sun Angle for Better Visibility
The sun angle affects how shadows fall on the terrain, which in turn affects how well you can see elevation changes. In the “View” menu, you can adjust the sun’s position. Shadows help highlight hills, valleys, and ridges. By changing the sun angle, you can reveal elevation details that might be hidden otherwise. This is a trick that many users overlook, but it makes a big difference.
Save Your Elevation Data for Later
If you are working on a project that requires elevation mapping, save your work. Google Earth Pro lets you save placemarks, paths, and measurements as KML or KMZ files. These files can be opened later, shared with others, or imported into other mapping software. This is especially useful for professionals who need to document geographic elevation data for reports or presentations.
Compare Elevation Across Different Locations
One of the most fun things you can do is compare elevation between different places. Search for a beach town and then search for a mountain town. Switch to terrain view and see the dramatic difference. This is a great way to build your understanding of terrain elevation and how it varies across the globe. You can also compare the same location at different times if historical imagery is available.
Common Mistakes to Avoid When Viewing Elevation
Even with a great tool like Google Earth, it is easy to make mistakes that prevent you from seeing elevation properly. Here are the most common ones and how to fix them.
Forgetting to Enable Terrain Mode
The most common mistake is simply forgetting to turn on terrain. Without it, Google Earth shows a flat satellite or map view. You will not see any elevation at all. Always check that terrain is enabled before you start exploring. It is a quick toggle, but it makes all the difference.
Using the Wrong Version of Google Earth
Not all versions of Google Earth have the same features. The basic web version has limited elevation tools. For the full experience, use Google Earth Pro on your desktop or the dedicated mobile app. The web version is convenient, but it lacks the ruler tool and some advanced elevation features. If you need precise elevation measurement, make sure you are using the right version.
Ignoring Data Accuracy Limitations
Google Earth elevation data is not perfect. In some areas, the resolution is very high, while in others it may be less accurate. Always keep this in mind when using elevation data for important decisions. For critical applications like construction or engineering, you may want to verify the data with other sources. But for general exploration and planning, the data is reliable enough.
Not Tilting the View
A flat, top-down view can hide a lot of elevation detail. Tilt the view by using the shift key or the 3D navigation controls. Looking at the terrain at an angle reveals slopes, ridges, and valleys much more clearly. Make it a habit to tilt and rotate your view whenever you are exploring elevation.
How Elevation Data Is Used in Real Life
Understanding how to show elevation on a Google Earth map is not just a fun trick. It has real-world applications across many fields. Let us look at a few examples.
Hiking and Outdoor Recreation: Hikers use elevation data to plan routes, estimate difficulty, and prepare for altitude changes. An elevation profile helps you know what to expect before you hit the trail.
Real Estate and Construction: Builders and developers check elevation to understand drainage, foundation requirements, and flood risk. Terrain analysis is a critical step in site selection.
Education and Research: Geography students and researchers use Google Earth to study landforms, erosion patterns, and climate zones. Topographic visualization makes these concepts easier to understand.
Travel and Exploration: Curious travelers use elevation features to learn about the landscapes of places they plan to visit. It adds a whole new dimension to virtual exploration.
Emergency Planning: First responders and disaster planners use elevation data to understand flood zones, landslide risks, and evacuation routes. Geographic elevation information can be lifesaving in emergencies.
Conclusion
Showing elevation on a Google Earth map is a simple but powerful skill that anyone can learn. Whether you are on a desktop or mobile device, the tools are free and easy to use. Just remember to enable terrain mode, use the ruler tool for measurements, and explore elevation profiles for a deeper understanding of the landscape. With the tips and tricks in this guide, you can show elevation on a Google Earth map in seconds. So go ahead, open Google Earth, and start exploring the world in three dimensions. You will be amazed at what you discover when you can see the terrain the way it really is.
The next time you are curious about how high a mountain is or how deep a valley runs, you know exactly what to do. With Google Earth, the answer is always just a few clicks away. Happy exploring!
Frequently Asked Questions
Can I show elevation on Google Earth for free?
Yes, absolutely. Google Earth Pro for desktop and the Google Earth mobile app are both free to download and use. All the elevation tools described in this guide are available at no cost. You do not need a subscription or any special permissions to access terrain and elevation data.
What is the difference between Google Earth and Google Earth Pro?
Google Earth Pro is the desktop version that includes advanced features like the ruler tool, elevation profile, and the ability to import and export KML files. The basic web version and mobile app have terrain viewing but lack some of the detailed measurement tools. For serious elevation analysis, Google Earth Pro is the better choice.
How accurate is the elevation data in Google Earth?
Google Earth uses digital elevation models from sources like satellite measurements and aerial surveys. The accuracy varies by location, with some areas having very high resolution and others being less precise. For general exploration and planning, the data is reliable. For critical engineering or construction projects, it is wise to verify with specialized surveying tools.
Can I measure the elevation of a specific point on Google Earth?
Yes. In Google Earth Pro, use the ruler tool to place a point on the map. The elevation at that exact location will be displayed. On the mobile app, tap and hold to drop a pin, and the elevation card will show the altitude. This makes it easy to get altitude measurements for any spot on Earth.
Why can’t I see terrain on Google Earth?
The most common reason is that the terrain layer is not enabled. On desktop, go to View and select Terrain, or use the keyboard shortcut. On mobile, tap the Layers button and toggle on Terrain. Also make sure you are using Google Earth Pro or the dedicated app, as the basic web version has limited terrain features.
Can I use Google Earth elevation data for professional projects?
Google Earth elevation data is great for general planning, education, and exploration. However, for professional engineering, construction, or scientific research, you should verify the data with authoritative sources. The resolution and accuracy may not meet the standards required for critical applications. Always check the data quality for your specific use case.