How Can I Extend My Wi Fi About 300 Feet Outside Home
Extending your Wi-Fi about 300 feet outside your home is achievable with the right equipment and setup. You can use Wi-Fi range extenders, mesh systems, or outdoor access points to cover your yard, patio, or garage. This guide walks you through every method so you can pick the best solution for your home.
Have you ever wanted to stream music on your patio, check your security cameras in the yard, or browse the web by the pool? If your Wi-Fi signal stops at your back door, you know the frustration of a Wi-Fi dead zone just steps from your home. The good news is that you can extend your wireless network well beyond your walls. With the right tools and a little planning, you can enjoy outdoor Wi-Fi coverage that reaches your garden, driveway, or even your neighbor’s fence line.
Many homeowners face the same problem. Your router sits inside your house, surrounded by walls, furniture, and appliances that weaken the signal. By the time it reaches your backyard, the connection is weak or gone entirely. But extending your home network setup to cover 300 feet outside is not as hard as it sounds. You do not need to be a tech expert. You just need to know which options work and how to set them up correctly.
In this guide, we will walk you through every method that can help you extend Wi-Fi about 300 feet outside your home. We will cover equipment choices, placement tips, and common mistakes to avoid. Whether you want coverage for a small patio or a large backyard, you will find a solution that fits your needs and budget.
Key Takeaways
- Outdoor Wi-Fi is possible: Multiple methods can push your signal 300 feet or more beyond your home.
- Mesh systems work best: A mesh network provides seamless coverage across large outdoor areas.
- 2.4 GHz travels farther: This frequency band penetrates walls and outdoor obstacles better than 5 GHz.
- External antennas help: Upgrading your router antenna can significantly boost outdoor range.
- Placement matters: Positioning your router or extender near a window or exterior wall improves signal reach.
- Weatherproof equipment is key: Outdoor access points are built to handle rain, heat, and cold.
📑 Table of Contents
- Why You Need Wi-Fi Outside Your Home
- Understanding Wi-Fi Range and Signal Strength
- Best Methods to Extend Wi-Fi 300 Feet Outside
- Choosing the Right Equipment for Outdoor Coverage
- Step-by-Step Setup Guide
- Common Mistakes to Avoid When Extending Wi-Fi Outdoors
- Expert Tips for Maximizing Outdoor Wi-Fi Range
- Final Thoughts
Why You Need Wi-Fi Outside Your Home
Indoor Wi-Fi was never designed to reach far beyond your walls. Most home routers broadcast a signal that covers about 100 to 150 feet indoors. Outside, that number drops fast because there are no walls to bounce the signal off of. Instead, the signal spreads out and weakens over distance. This is why you need a dedicated outdoor Wi-Fi solution.
Here are some common reasons homeowners want Wi-Fi outside:
- Streaming and entertainment: Watch movies or listen to music on outdoor speakers or tablets by the pool.
- Security cameras: Monitor your property with wireless cameras placed in the yard or near the gate.
- Smart home devices: Control outdoor lights, sprinklers, or a garage door opener from your phone.
- Remote work: Take calls or work on your laptop on the patio or in a backyard office.
- Guest convenience: Give visitors Wi-Fi access on your porch or deck without them stepping inside.
No matter your reason, the goal is the same. You want a strong, reliable connection that reaches at least 300 feet from your router. The methods below will show you how to make that happen.
Understanding Wi-Fi Range and Signal Strength
Before you buy any equipment, it helps to understand how Wi-Fi signals work. Your router sends out a radio signal on specific frequency bands. The two most common bands are 2.4 GHz and 5 GHz. Each behaves differently when it comes to range and obstacle penetration.
2.4 GHz vs. 5 GHz for Outdoor Coverage
The 2.4 GHz band travels farther and passes through walls, trees, and other obstacles more easily. It is the better choice for outdoor coverage. A 2.4 GHz signal can reach 300 feet or more in open air. However, it has slower speeds compared to 5 GHz.
The 5 GHz band offers faster speeds but has a shorter range. It struggles to pass through walls and loses strength quickly outdoors. If your main goal is to cover a long distance, stick with 2.4 GHz. Many modern routers are dual-band, meaning they broadcast on both frequencies at the same time.
What Weakens Your Wi-Fi Signal Outdoors
Several factors can reduce your outdoor Wi-Fi range:
- Trees and foliage: Leaves and branches absorb and scatter Wi-Fi signals.
- Walls and fences: Brick, concrete, and metal fences block or weaken signals.
- Weather conditions: Rain and heavy humidity can slightly reduce signal strength.
- Distance: Signal strength drops as you move farther from the router.
- Interference: Microwaves, baby monitors, and other electronics on the same frequency can cause interference.
Knowing these challenges helps you choose the right equipment and placement. For example, if you have a lot of trees in your yard, you may need a stronger signal booster or an outdoor access point placed closer to the tree line.
Best Methods to Extend Wi-Fi 300 Feet Outside
Now let us look at the actual methods you can use to extend your Wi-Fi to about 300 feet outside. Each method has its pros and cons, so you can pick the one that fits your home and budget best.
Method 1: Use a Wi-Fi Range Extender
A Wi-Fi range extender is the simplest and most affordable option. This device picks up your existing Wi-Fi signal and rebroadcasts it farther away. You place the extender halfway between your router and the area you want to cover.
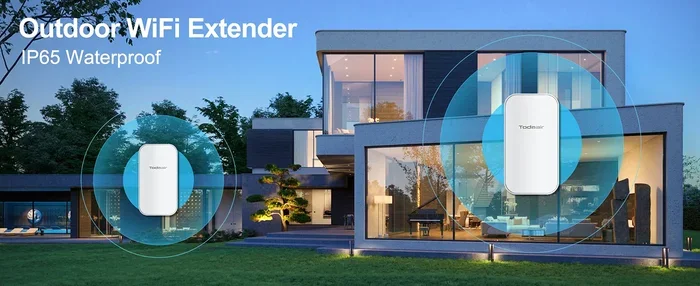
For 300 feet of outdoor coverage, place the extender near a window or exterior wall that faces your yard. This gives the signal a clear path outside. Some extenders are weatherproof and can be mounted outdoors, which gives you even better results.
Keep in mind that extenders cut your bandwidth in half because they use the same radio to receive and send data. For basic browsing and email, this is fine. For heavy streaming or video calls, you may notice a slowdown.
Method 2: Set Up a Mesh Wi-Fi System
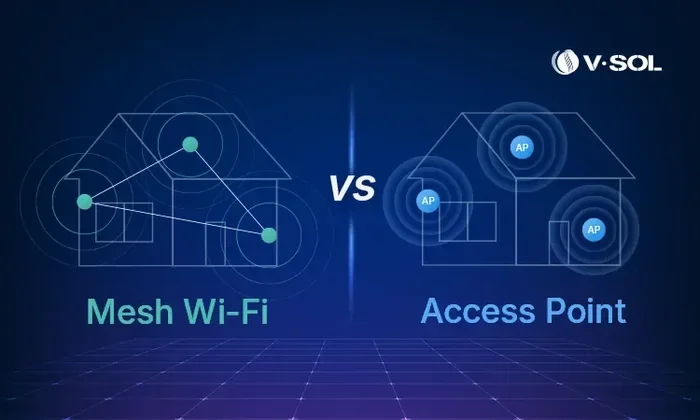
A mesh Wi-Fi system is the best option for whole-home and outdoor coverage. Instead of one router, you get a main unit and one or more satellite nodes. These nodes work together to create a single, seamless network that covers a large area.
You can place one mesh node outside near your patio or yard. The signal travels from the main router to the outdoor node and then to your devices. Many mesh systems also support long-range Wi-Fi and work well through walls and obstacles.
If you already have a router and want to add mesh capability, you can look into systems that let you connect Deco mesh Wi-Fi to an existing router. This gives you the flexibility to expand your coverage without replacing your current equipment.
Method 3: Install an Outdoor Access Point
An outdoor access point is a weatherproof device designed specifically for outdoor use. It connects to your router via an Ethernet cable and broadcasts a strong Wi-Fi signal in your yard or patio.
Outdoor access points are the most durable and reliable option. They are built to handle rain, extreme heat, and cold temperatures. You can mount them under your eaves, on a wall, or on a pole. For 300 feet of coverage, a single outdoor access point is usually enough.
The main downside is that you need to run an Ethernet cable from your router to the access point. This requires a bit more effort during setup, but the results are worth it. You get a strong, dedicated connection with no speed loss.
Method 4: Add an External Antenna to Your Router
If your router has detachable antennas, you can upgrade to a high-gain external antenna. These antennas focus the Wi-Fi signal in a specific direction, which helps it reach farther outside.
You can add an external antenna to your router without buying a whole new system. Just make sure the antenna is compatible with your router model. A directional antenna pointed toward your yard can push the signal well beyond 300 feet in that direction.
This method works best when you need coverage in one specific direction, like toward a backyard or side yard. It is not ideal if you need coverage all around your home.
Method 5: Use a Wireless Bridge or Point-to-Point Link
A wireless bridge connects two locations using a dedicated wireless link. You place one unit near your router and the other unit at the far end of your yard. The bridge creates a direct wireless connection between the two points.
This method is great for covering long distances with minimal signal loss. It is often used for connecting outbuildings, workshops, or detached garages. Some wireless bridges can handle distances of 500 feet or more in open air.
Choosing the Right Equipment for Outdoor Coverage
Not all Wi-Fi equipment is built for outdoor use. Choosing the right gear makes a big difference in your results. Here is what to look for when shopping for outdoor Wi-Fi equipment.
What to Look for in Outdoor Wi-Fi Equipment
- Weatherproof rating (IP65 or higher): This ensures the device can handle rain, dust, and temperature changes.
- 2.4 GHz support: Look for equipment that operates on the 2.4 GHz band for longer range.
- High-gain antenna: A built-in high-gain antenna focuses the signal and pushes it farther.
- PoE support (Power over Ethernet): This lets you power the device using the same cable that carries data, which simplifies installation.
- Easy setup: Choose equipment with a simple app-based setup process if you are not a networking expert.
Budget vs. Premium Options
| Category | Price Range | Best For |
|---|---|---|
| Wi-Fi Range Extender | $20 – $60 | Small patios and basic coverage |
| Mesh Wi-Fi System | $100 – $400 | Whole-home and large yard coverage |
| Outdoor Access Point | $50 – $200 | Dedicated outdoor coverage |
| External Antenna | $15 – $50 | Boosting signal in one direction |
| Wireless Bridge | $80 – $250 | Long-distance point-to-point links |
Your choice depends on your budget, the size of your outdoor area, and how many devices you need to connect. For most homeowners looking to cover about 300 feet, a mesh system or an outdoor access point gives the best balance of cost and performance.
Step-by-Step Setup Guide
Once you have your equipment, follow these steps to set up your outdoor Wi-Fi extension.
- Plan your placement: Walk your property and identify where you need coverage. Note any obstacles like walls, fences, or large trees.
- Position your router near an exterior wall: If your router is in the center of your home, the signal has to pass through many walls before reaching outside. Moving it closer to an exterior wall that faces your yard can improve outdoor signal strength.
- Set up your extender, mesh node, or access point: Follow the manufacturer’s instructions to install the device. Place it halfway between your router and the area you want to cover.
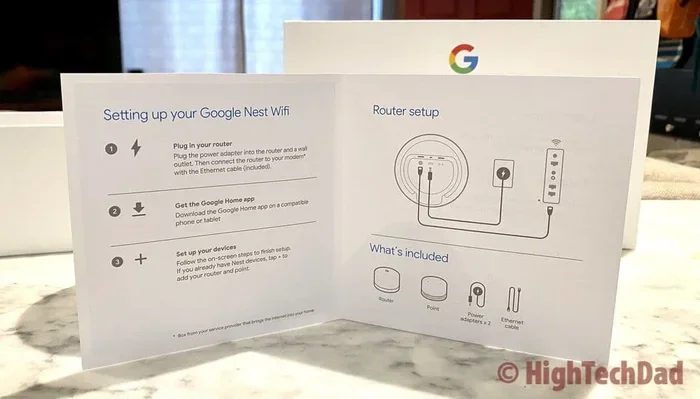
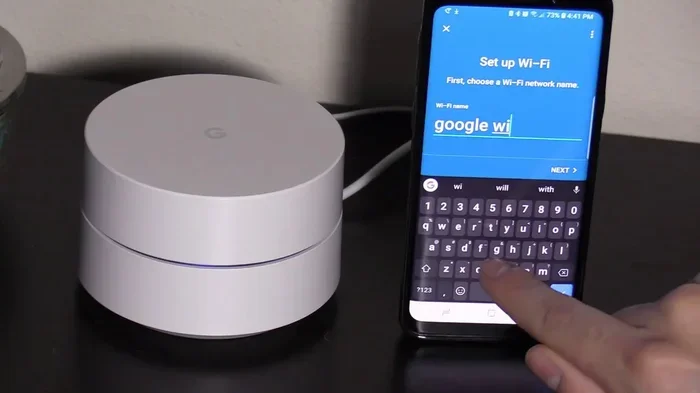
- Connect the device to your network: Use your phone or computer to connect the new device to your existing Wi-Fi network. Most modern equipment has a simple app that walks you through this process.
- Test the signal: Walk to the farthest point you want to cover and check your Wi-Fi signal strength. Use a Wi-Fi analyzer app on your phone to see the signal level.
- Adjust placement if needed: If the signal is weak, move the device slightly and test again. Small changes in position can make a big difference.
For the best results, consider upgrading your router placement or adding a second device if one is not enough. Sometimes two smaller extenders work better than one large one, especially if your yard has multiple areas you want to cover.
Common Mistakes to Avoid When Extending Wi-Fi Outdoors
Even with the right equipment, mistakes during setup can limit your results. Here are the most common errors homeowners make and how to avoid them.
Placing the Extender Too Far from the Router
A range extender needs a strong signal from your router to rebroadcast effectively. If you place it too far away, it will pick up a weak signal and extend that weak signal. The result is slow speeds and dropped connections. Place your extender where it still gets a strong signal from the router.
Ignoring the 2.4 GHz Band
Many people default to the 5 GHz band because of its faster speeds. But for outdoor coverage, 2.4 GHz is your friend. It travels farther and handles obstacles better. Make sure your outdoor devices connect to the 2.4 GHz network for the best range.
Using Indoor Equipment Outdoors
Indoor range extenders and routers are not built to handle weather. Placing an indoor device outside will damage it quickly. Always use weatherproof equipment rated for outdoor use. If you must use indoor gear temporarily, protect it in a weatherproof enclosure.
Not Securing Your Outdoor Network
Your outdoor Wi-Fi signal reaches beyond your property line. If you do not secure your network with a strong password, neighbors or passersby could access it. Always use WPA3 or WPA2 encryption and a strong, unique password.
Overlooking Interference Sources
Bluetooth devices, baby monitors, and even microwaves can interfere with your 2.4 GHz Wi-Fi signal. If you notice slow speeds or dropped connections, check for nearby interference sources and move your equipment away from them if possible.
Expert Tips for Maximizing Outdoor Wi-Fi Range
Want to get the most out of your outdoor setup? Here are some expert tips that can push your signal even farther.
- Elevate your equipment: Mount your router, extender, or access point up high. Signals travel better when they are not blocked by furniture, plants, or other objects at ground level.
- Use a Wi-Fi analyzer app: These free apps show you which channels are least crowded. Switching to a less congested channel can improve your signal quality and range.
- Update your router firmware: Manufacturers often release updates that improve performance and range. Check for updates regularly.
- Consider a directional antenna: A directional antenna focuses the signal in one direction instead of spreading it in all directions. This is perfect for covering a specific area like a backyard or driveway.
- Keep your devices updated: Older devices may not support the latest Wi-Fi standards. Updating your devices ensures they can take full advantage of your network.
You can also explore options to boost your Wi-Fi signal outside using additional signal amplifiers or repeaters. These small additions can make a noticeable difference in coverage and speed.
Final Thoughts
Extending your Wi-Fi about 300 feet outside your home is entirely doable with the right approach. Whether you choose a range extender, a mesh system, an outdoor access point, or an external antenna, the key is to plan your setup carefully and place your equipment in the right spots. Focus on using the 2.4 GHz band for distance, avoid common setup mistakes, and invest in weatherproof gear for long-lasting performance.
Take some time to assess your property, test different placements, and enjoy the freedom of reliable outdoor Wi-Fi. Once you have it set up, you will wonder how you ever lived without it. Happy streaming, working, and relaxing in your outdoor space.
Frequently Asked Questions
Can I extend my Wi-Fi to 300 feet using just my existing router?
It is unlikely that your standard indoor router will reach 300 feet outside on its own. Walls, trees, and distance weaken the signal significantly. You will need additional equipment like a range extender, mesh node, or outdoor access point to achieve that distance reliably.
What is the cheapest way to extend Wi-Fi outside?
A Wi-Fi range extender is the most affordable option. You can find one for $20 to $60 that will boost your signal to a nearby patio or yard. Just place it near a window facing your outdoor area for the best results.
Do I need special equipment for outdoor Wi-Fi?
Yes, for long-term outdoor use you should use weatherproof equipment rated for outdoor conditions. Indoor extenders can work temporarily but will not hold up to rain, sun, or temperature changes. Look for devices with an IP65 rating or higher.
Will my neighbors see my outdoor Wi-Fi network?
Yes, your outdoor Wi-Fi signal can reach beyond your property line. Always secure your network with WPA3 or WPA2 encryption and a strong password. This keeps your network private and prevents unauthorized access from neighbors or passersby.
Can I use a mesh system to cover my backyard?
Absolutely. Mesh systems are one of the best options for outdoor coverage. You can place a mesh satellite node outside near your patio or yard, and it will create a seamless network with your indoor router. Just make sure the node is weatherproof or placed in a sheltered location.
Why does my outdoor Wi-Fi slow down at night?
Nighttime slowdowns often happen because more devices connect to the network when everyone is home. Additionally, neighboring Wi-Fi networks can cause interference during peak hours. Switching to a less crowded channel or upgrading to a mesh system can help reduce nighttime congestion.