Can You Do Projection Mapping With A Normal Projector
Yes, you can do projection mapping with a normal projector. You do not need expensive specialized gear to create dazzling visual displays on walls, buildings, or objects. With the right projector setup, mapping software, and a bit of creativity, a standard home or office projector can deliver impressive immersive visuals. This guide shows you exactly how to pull it off, what gear helps, and common mistakes to avoid.
Key Takeaways
- Normal projectors work: You can achieve projection mapping with a standard projector you already own.
- Software is the real key: Programs like MadMapper and TouchDesigner handle the complex math for you.
- Brightness matters: A brighter projector gives better results, especially in rooms with ambient light.
- Prepare your surface: A clean, flat, light-colored surface produces the sharpest and most vivid projections.
- Content creation is half the work: Designing the right visuals makes or breaks your projection mapping project.
- Avoid common setup mistakes: Misalignment, poor keystone correction, and wrong throw distance ruin the effect.
- Start small and scale up: Practice on a tabletop first before tackling walls or outdoor surfaces.
📑 Table of Contents
- Can You Really Do Projection Mapping With A Normal Projector?
- How Does Projection Mapping Work With A Regular Projector?
- What Equipment Do You Actually Need?
- Best Software For Projection Mapping With A Standard Projector
- Step By Step: Setting Up Projection Mapping With A Normal Projector
- Common Mistakes To Avoid
- Creative Uses For Projection Mapping At Home
- Expert Tips For Better Results
- Key Takeaways
- Conclusion
Can You Really Do Projection Mapping With A Normal Projector?
Here is the short answer. Yes, you absolutely can do projection mapping with a normal projector. You do not need a $10,000 professional installation setup to create jaw-dropping visuals. A standard home projector, the kind you might already have in your living room, can produce stunning projection mapping effects. The secret lies in the right software, a little patience, and smart planning.
Projection mapping used to feel like magic reserved for big brands and concert stages. Now, anyone with a standard projector and a laptop can try it. Whether you want to project onto a building facade, a simple wall, or a weird-shaped object, a regular projector setup gets the job done. This article walks you through everything you need to know.
We will cover how it works, what equipment you actually need, which software to use, and how to avoid the mistakes that trip up most beginners. By the end, you will feel confident enough to start your own projection mapping project at home or for your next event.
What Exactly Is Projection Mapping?
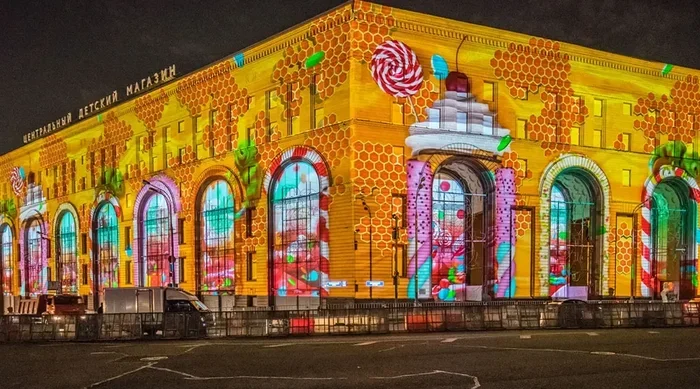
Projection mapping is a technique where you project images or video onto a physical surface instead of a plain white screen. The surface might be a building wall, a car, a sculpture, or even a human face. The projected content wraps around the shape of the object and makes it look like the surface is alive.
This technology is also called video mapping or spatial augmented reality. It blends digital content with the real world. When done well, it creates immersive visuals that look absolutely magical. You see it at music festivals, in advertising campaigns, and increasingly in homes and schools.
The key difference between projection mapping and a normal slide show is the surface alignment. Instead of projecting onto a flat rectangle, the images adjust to match the contours and angles of the target surface. This is where the software and setup come in.
How Does Projection Mapping Work With A Regular Projector?
A normal projector sends light through an image source and displays it on a surface. In standard use, that surface is a flat screen. In projection mapping, the surface is irregular or three-dimensional. The projector still works the same way. The difference is in how the projection software processes the image before it reaches the lens.
Software tools use a process called surface calibration. They map each pixel from the source to a specific point on the target surface. This is called warping or mesh distortion. The software stretches, bends, and adjusts the image so it fits perfectly onto the object. Your projector just displays what the software tells it to show.
The projector itself does not need any special features. Any standard home projector with a decent resolution and brightness can handle the task. What matters more is the throw ratio, the brightness measured in lumens, and the resolution of the image you are projecting.
The Role Of Keystone Correction
Most projectors come with a feature called keystone correction. This adjusts the image shape when the projector is tilted up or down. In basic projection mapping, keystone correction alone can handle simple alignments. However, it reduces image quality because it crops and stretches pixels.
For more advanced surface projection, dedicated mapping software does the work instead. The software adjusts the image digitally before it reaches the projector. This preserves full resolution and gives you much more control over how the image fits the surface.
What Equipment Do You Actually Need?
One of the best things about projection mapping with a normal projector is that the gear list is surprisingly short. You do not need specialized hardware to get started. Here is what you need.
The Projector
Your standard projector is the centerpiece. Look for these three specs when choosing or using one:
- Brightness: At least 2,000 lumens for indoor use. 3,000 lumens or more if you are working in a room with windows or ambient light.
- Resolution: 1080p is the sweet spot for most projection mapping projects. 4K is better but not required.
- Throw distance: Check the throw ratio. A short-throw projector lets you project large images from a shorter distance, which is great for tight spaces.
You do not need a laser projector or an ultra-high-end model. Even a budget home theater projector can deliver impressive results for indoor projection mapping.
The Computer
You need a laptop or desktop to run the mapping software. The computer handles all the image processing and sends the output to the projector through an HDMI cable. A modern computer with a dedicated graphics card will run smoothly. But even a basic laptop can handle simple projection mapping projects.
The Cables And Connections
You need an HDMI cable to connect the computer to the projector. Use a good quality cable to avoid signal loss. If your projector is far away, consider a longer HDMI extension cable or a wireless HDMI transmitter. Stable connections prevent flickering and dropped frames during your visual display.
Optional But Helpful Gear
These items are not strictly necessary, but they make a big difference:
- A tripod or projector mount: Keeps the projector steady and at the exact angle you need.
- Dark curtains or blinds: Reduce ambient light and boost the perceived brightness of your projected content.
- A white or light-colored surface: Lighter surfaces reflect more light and produce brighter, more vivid images.
- A spare HDMI adapter: Different computers use different ports. Having the right adapter saves headaches.
Best Software For Projection Mapping With A Standard Projector
The software is the engine of any projection mapping setup. It takes your raw video content and warps it to fit your target surface. Here are some of the best options for beginners and intermediate users.
MadMapper
MadMapper is one of the most popular tools for projection mapping. It works with both Mac and Windows. You can map onto simple flat surfaces or complex 3D objects. The interface is visual and intuitive, which makes it a great starting point for beginners. MadMapper handles edge blending and multi-projector setups too.
TouchDesigner
TouchDesigner is a more powerful and flexible tool. It lets you create interactive projection mapping experiences with real-time controls. The learning curve is steeper, but the results can be incredible. Many professional immersive visual artists use TouchDesigner for large-scale events.
Resolume Arena
Resolume Arena is primarily a visualizer and VJ software, but it includes projection mapping features. It is great for live performances and events. If you want to mix music with visual content, Resolume is a strong choice.
MapMap
MapMap is a free, open-source projection mapping tool. It is a fantastic option if you are on a tight budget. The interface is simple enough for beginners. While it lacks some advanced features, it handles basic surface projection very well.
Step By Step: Setting Up Projection Mapping With A Normal Projector
Now let us walk through the actual process. Follow these steps and you will have a working projection mapping setup in under an hour.
Step 1: Choose Your Surface
Pick a surface that works well for projection mapping. Ideally, it should be: light-colored, flat or gently curved, and free of shadows. A white wall is the perfect starting surface. Avoid dark or textured walls because they absorb light and make the image look dull.
Step 2: Position Your Projector
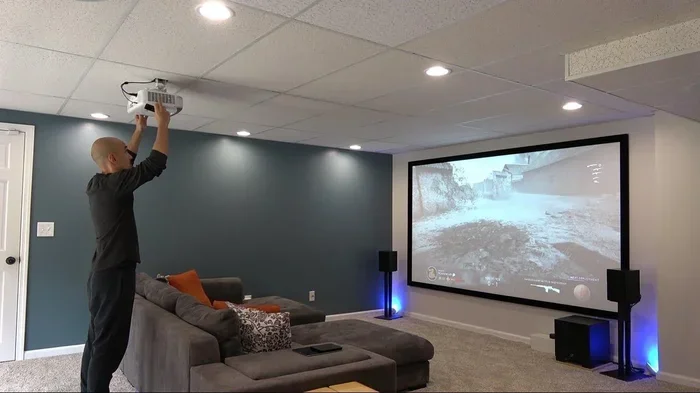
Place the projector on a stable surface or mount. Make sure it is level and aimed directly at the target area. The closer and more centered you are, the easier the calibration process will be. Use a tripod if you do not have a ceiling mount.
Step 3: Connect Your Computer
Run an HDMI cable from your computer to the projector. Make sure the projector is set to the correct input source. Your computer should recognize the projector as a second display.
Step 4: Open Your Mapping Software
Launch your chosen projection mapping software. Import your video or image content. Most software will show a live preview of what the projector is displaying. This makes calibration much easier.
Step 5: Calibrate The Image
This is the most important step. In the software, create a mesh or warp map that matches the shape of your target surface. Adjust the points of the mesh so the image wraps perfectly around the edges. Take your time with this step. A good calibration makes all the difference.
Step 6: Play And Refine
Play your content and watch how it looks on the surface. Make small adjustments to the mesh as needed. Check the image from the audience perspective, not just from the projector position. Small tweaks can dramatically improve the final result.
Common Mistakes To Avoid
Even with a great setup, mistakes can ruin your projection mapping experience. Here are the most common ones and how to avoid them.
Using A Projector That Is Too Dim
If your projector brightness is too low, the image will look washed out. This is especially true in rooms with any ambient light. Always check the lumens rating before you start. For indoor use, 2,000 lumens is the minimum for a convincing result.
Ignoring The Throw Distance
Every projector has a specific throw ratio. If you place the projector too close or too far, the image will be blurry or too small. Check your projector manual for the recommended throw distance for your desired image size.
Skipping Calibration
Some people skip the calibration step and expect the image to look right on its own. It will not. Surface calibration is what makes projection mapping work. Without it, the image looks distorted and misaligned.
Using The Wrong Content
Not all videos and images work well for projection mapping. Content designed for a flat screen often looks wrong when warped onto a 3D surface. Design or choose content that accounts for the shape of your target surface. High-contrast visuals with bold colors tend to perform best.
Forgetting About Ambient Light
Even a bright standard projector struggles in a room flooded with sunlight. Close the blinds, turn off unnecessary lights, or schedule your visual display for nighttime. Controlling the light in your room is one of the simplest ways to improve the result.
Creative Uses For Projection Mapping At Home
Projection mapping is not just for large events. You can use it in creative ways at home. Here are some ideas to get you inspired.
Home Theater Upgrades
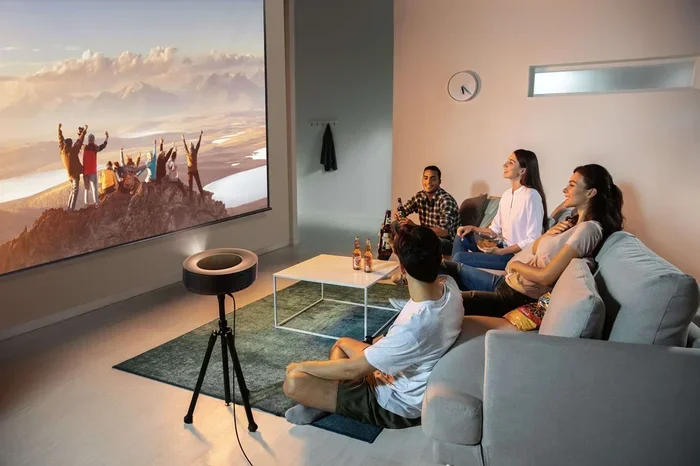
Use projection mapping to turn a plain wall into an immersive backdrop. Project moving landscapes, stars, or abstract art that responds to your movie or music. This takes your home theater experience to the next level.
Party And Event Decor
Want to impress your guests at a birthday party or wedding? Use a standard projector to project patterns, logos, or animations onto the venue walls. Event projection creates a memorable atmosphere without renting expensive equipment.
Art Projects And School Presentations
Projection mapping is a fantastic tool for art projects and school presentations. Students can project reports onto 3D models. Artists can turn everyday objects into canvases for interactive projection art. The possibilities are limited only by your imagination.
Outdoor Fun And Seasonal Decor
During the holidays, use a projector setup to project snowflakes, ghosts, or festive patterns onto your house. Outdoor projection mapping is a fun and affordable way to decorate for Halloween, Christmas, or any celebration. Just make sure your projector is rated for outdoor use or has adequate weather protection.
Expert Tips For Better Results
Here are some insider tips from experienced projection mapping creators. These small adjustments can make a huge difference in your final result.
- Use a dark room: The less ambient light, the sharper and more vivid your projected content will look.
- Test your content on the actual surface: What looks good on a computer screen may look different when projected. Always test on-site.
- Start with simple shapes: Practice on a flat wall or a simple box before tackling complex 3D objects.
- Use high-resolution content: Low-resolution images look blurry when stretched across a large surface.
- Keep the projector cool: Projectors can overheat during long sessions. Make sure the vents are not blocked.
- Save your calibration settings: Once you get the mesh right, save it. You will need it again next time.
Key Takeaways
- Normal projectors work: You can achieve projection mapping with a standard projector you already own.
- Software is the real key: Programs like MadMapper and TouchDesigner handle the complex math for you.
- Brightness matters: A brighter projector gives better results, especially in rooms with ambient light.
- Prepare your surface: A clean, flat, light-colored surface produces the sharpest and most vivid projections.
- Content creation is half the work: Designing the right visuals makes or breaks your projection mapping project.
- Avoid common setup mistakes: Misalignment, poor keystone correction, and wrong throw distance ruin the effect.
- Start small and scale up: Practice on a tabletop first before tackling walls or outdoor surfaces.
Conclusion
So, can you do projection mapping with a normal projector? Absolutely. You do not need a fancy setup or a massive budget. A standard projector, a laptop, the right mapping software, and a willingness to experiment are all you need. The technology has become accessible enough that anyone can create breathtaking visual displays at home or for events.
Start with a simple flat wall. Practice your calibration. Experiment with different projected content and surface shapes. As you gain confidence, you can tackle more complex 3D projection mapping projects. The learning curve is gentle, and the results are rewarding.
Projection mapping is one of the most creative and exciting ways to use a projector. It turns ordinary surfaces into extraordinary canvases. Grab your standard projector, download some free software, and start creating your own immersive visuals today. You will be amazed at what a regular projector setup can do in the right hands.
Frequently Asked Questions
Can any projector be used for projection mapping?
Yes, most standard projectors can be used for projection mapping. The key requirements are decent brightness, a good resolution, and an HDMI output to connect to a computer. Even a budget home projector can deliver impressive surface projection results when paired with the right software.
Do I need special software to do projection mapping?
You do need projection mapping software to warp and align the image to your target surface. Fortunately, there are many affordable and even free options available. Programs like MapMap are free, while tools like MadMapper offer more advanced features for a reasonable price.
Is projection mapping only for indoor use?
Projection mapping works both indoors and outdoors. However, outdoor use requires a brighter projector, ideally 3,000 lumens or more, to overcome ambient light. You should also protect the projector from moisture and dust. Indoor projection mapping is easier to set up and produces more vibrant results in most cases.
What kind of surface works best for projection mapping?
A light-colored, flat surface works best for projection mapping. White or light gray walls reflect the most light and produce the sharpest images. Textured or dark surfaces absorb light and reduce image quality. You can project onto curved or 3D surfaces too, but the calibration process becomes more complex.
How much does a projection mapping setup cost?
A basic projection mapping setup can cost as little as $300 to $500. This includes a budget standard projector, a laptop you likely already own, and free or low-cost mapping software. High-end setups with multiple projectors and advanced gear can cost several thousand dollars, but they are not necessary for most projects.
Can I use projection mapping for live events?
Yes, projection mapping is very popular for live events like weddings, concerts, and corporate presentations. A standard projector setup can create stunning backdrops and immersive visuals in real time. The key is to plan your content and calibration in advance so everything runs smoothly during the event.