Can I Use My Wall As A Projector Screen For Movies
Yes, you can use your wall as a projector screen for movies, and it is easier than you think. A plain white wall works in a pinch, but the right preparation makes a huge difference in picture quality. Using your wall as a projector screen saves money and creates a cinematic feel in any room. With the right paint, wall prep, and projector placement, your home theater wall can rival store-bought screens. Let us walk you through everything you need to know.
Have you ever thought about turning your wall into a movie theater? The idea of using your wall as a projector screen is tempting. It costs almost nothing, and it feels magical when you finally switch on the projector and watch a film light up your room. But the truth is, not every wall works the same way. Some walls give you a crisp, bright picture. Others leave you squinting at a dull, blurry image. This guide covers everything you need to know about using a wall as a projector screen for movies. We will look at wall types, paint options, projector placement, and simple tricks that make a big difference.
Whether you are a movie lover on a budget or someone who wants a quick setup for movie night, this article has you covered. You do not need expensive equipment to enjoy a big screen experience. Sometimes, the best projector screen is already right in front of you. Let us dive in and explore how to make your wall work hard for your home theater dreams.
Key Takeaways
- White walls work for basic projection: A clean, flat white wall can display a decent image without any extra cost.
- Projector screen paint upgrades your wall: Specialized paint boosts brightness, color accuracy, and overall image quality significantly.
- Wall texture matters a lot: Smooth, wrinkle-free surfaces produce the sharpest picture for your projector on wall setups.
- Ambient light affects performance: Darker rooms and lighter wall colors give you the best results when using a wall as a projector screen.
- Alternatives exist if your wall is not ideal: Portable screens, roller screens, and DIY options offer flexibility for any room.
- Proper projector placement is key: Correct distance and angle ensure a focused, evenly lit image on your home cinema wall.
📑 Table of Contents
- Can You Really Use Your Wall As A Projector Screen?
- How to Prepare Your Wall for the Best Image Quality
- Projector Placement: Getting the Perfect Image on Your Wall
- Wall Projector Screen Paint vs. Regular Paint
- Alternatives to Using Your Wall as a Projector Screen
- Common Mistakes to Avoid When Using Your Wall as a Projector Screen
- Key Takeaways
- Conclusion
Can You Really Use Your Wall As A Projector Screen?
The short answer is yes. You can absolutely use your wall as a projector screen. People have been doing it for decades. Before specialized screens became popular, families projected movies directly onto their living room walls. The technology has not changed much. Your projector still throws light onto a surface, and that surface becomes your movie theater.
But here is the catch. The quality of your image depends heavily on the wall you use. A bare brick wall will not give you the same results as a smooth, white painted surface. Projector screen wall quality affects brightness, sharpness, and color accuracy. So while you can use almost any wall, some walls are much better than others.
What Makes a Wall Good for Projection?
Not all walls are created equal when it comes to white wall projection. Here are the key factors that determine how well your wall will work:
- Color: White or light gray walls reflect the most light back to your eyes. Dark colors absorb light and make the image faint.
- Texture: Smooth walls produce sharper images. Textured walls like popcorn or stucco create uneven surfaces that distort the picture.
- Flatness: Any bumps, cracks, or wrinkles scatter light and reduce image clarity.
- Size: A larger wall gives you a bigger image. But make sure the wall is wide enough for your projector’s throw distance.
- Cleanliness: Dust and dirt on the wall can dim the image and create visible spots on the screen.
If your wall checks most of these boxes, you are already in great shape. Even if it does not, do not worry. We will cover fixes and alternatives soon.
How to Prepare Your Wall for the Best Image Quality
Preparing your wall properly is the single best thing you can do for projector on wall performance. A little effort upfront saves you from frustration later. Here is how to get your wall ready.
Step 1: Clean the Wall Thoroughly
Start by wiping down the entire wall with a damp cloth. Remove dust, dirt, and any cobwebs. Pay special attention to corners and edges where grime builds up. A clean wall reflects light more evenly and reduces spots in your projected image.
Step 2: Fill and Sand Any Imperfections
Check for cracks, holes, or bumps. Use spackle or filler to smooth out any imperfections. Let it dry completely, then sand the area flat. This step is especially important if you want a wrinkle-free wall surface for your wall projector setup.
Step 3: Prime and Paint
If your wall is a dark color, consider painting it white or light gray. A coat of white primer works well for basic use. For even better results, look into projector screen paint. This special paint is designed to enhance image brightness and color accuracy. Brands like Screen Goo and Wagner are popular choices among home theater fans.
Projector screen paint creates a surface that reflects light more efficiently than regular wall paint. The result is a brighter, more vibrant image. You can apply it with a roller for a smooth finish. Let it dry fully before you test your setup.
Quick Tips for Wall Preparation
- Use a matte finish paint to avoid glare and hot spots.
- Avoid satin or gloss finishes — they create unwanted reflections.
- Test a small area first to see how the paint interacts with your projector.
- Consider a wall color for projector that is light gray if your room has a lot of ambient light.
Projector Placement: Getting the Perfect Image on Your Wall
Once your wall is ready, the next step is placing your projector correctly. Projector placement makes a huge difference in image quality. A poorly placed projector can turn a great wall into a blurry mess.
Finding the Right Distance
The distance between your projector and the wall determines the image size. Most projectors come with a throw ratio chart in the manual. This chart tells you how far the projector needs to be for a specific screen size. As a general rule:
- A short-throw projector works well in small rooms and can produce a large image from just a few feet away.
- A standard-throw projector needs more distance, usually 8 to 12 feet for a 100-inch image.
- A long-throw projector works best in larger rooms or basements.
Mounting the Projector
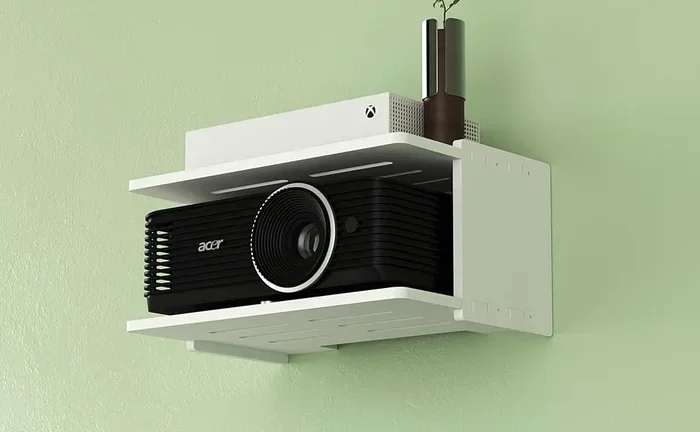
You have a few options for wall mounting projector setups:
- Ceiling mount: This is the most common option. It keeps the projector out of the way and projects downward onto the wall.
- Table mount: Place the projector on a sturdy table or shelf. This works well for smaller rooms or temporary setups.
- Wall mount (side): Mount the projector on a side wall if ceiling mounting is not possible. Make sure the angle is correct to avoid distortion.
Always use a level when mounting your projector. Even a slight tilt can create a keystone effect, which distorts the image. Many modern projectors have digital keystone correction, but it is always better to get the angle right from the start.
Dealing with Ambient Light
Ambient light is the enemy of any home theater wall setup. Sunlight, lamps, and overhead lights can wash out your projected image. Here are some ways to fight back:
- Close curtains or blinds during movie time.
- Turn off unnecessary lights in the room.
- Use a projector with higher brightness (measured in lumens) for rooms with more light.
- Consider ambient light rejection screen paint, which is designed to handle some light interference.
The darker your room, the better your image will look. This is why basements and home theaters with blackout curtains are so popular for movie night wall setups.
Wall Projector Screen Paint vs. Regular Paint
Not all paint is the same when it comes to projection. Let us compare regular wall paint with specialized projector screen paint so you can decide what is right for you.
| Feature | Regular White Paint | Projector Screen Paint |
|---|---|---|
| Brightness | Good | Excellent |
| Color Accuracy | Average | Very Good |
| Ambient Light Handling | Poor | Good to Excellent |
| Cost per Gallon | $15 – $30 | $50 – $150 |
| Ease of Application | Very Easy | Easy |
| Durability | Standard | High |
| Best For | Budget setups, casual viewing | Dedicated home theater rooms |
Regular white paint works fine for casual movie watching. If you only project once in a while, save your money and stick with standard paint. But if you are building a dedicated home cinema wall or watching movies frequently, projector screen paint is worth the investment.
What Is Screen Gain?
You might hear the term screen gain when shopping for projector screen paint or materials. Screen gain measures how much light a surface reflects back compared to a standard white surface. A gain of 1.0 is standard white. A gain above 1.0 means the surface reflects more light, making the image brighter. Higher gain can also narrow the viewing angle, meaning the best image is seen straight on.
For most wall projector setup situations, a screen gain between 1.0 and 1.3 works well. It gives you a bright image without too much narrowing of the viewing area.
Alternatives to Using Your Wall as a Projector Screen
Sometimes your wall just is not the right choice. Maybe it is too textured, too dark, or you rent and cannot paint it. The good news is there are plenty of projector screen alternatives that work just as well.
Portable Projector Screens
Portable screens are the easiest option. You can set them up in minutes and fold them away when you are done. They come in various sizes and are great for people who move frequently or want flexibility. Look for screens with a matte white surface for the best image quality wall projection.
Retractable Projector Screens
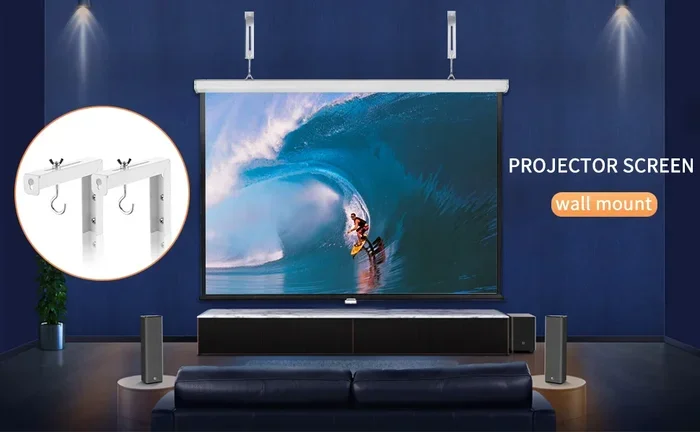
A retractable projector screen rolls up and down like a window shade. You can mount it on the wall or ceiling. When you want to watch a movie, pull it down. When you are done, roll it back up and the room looks normal again. These screens offer a clean, professional look and work well in home theater wall setups.
DIY White Sheet or Canvas
Hanging a white sheet or canvas on the wall is a classic budget option. It works in a pinch, but the results are not always great. Sheets can wrinkle, creating an uneven surface. If you go this route, iron or steam the fabric as flat as possible before projecting. It is not the best solution for projector screen material quality, but it gets the job done for casual viewing.
Inflatable Screens
Inflatable screens are fun and easy to set up. They are perfect for backyard movie nights or casual gatherings. They are not ideal for indoor wall projector setup situations, but they are a great option when you want a big screen without permanent installation.
Common Mistakes to Avoid When Using Your Wall as a Projector Screen
Even with the best preparation, mistakes can happen. Here are common errors people make with their projector screen wall setups and how to avoid them.
- Skipping wall prep: Never project onto a dirty or damaged wall. It ruins the image and makes your setup look unprofessional.
- Using the wrong wall color: Dark walls absorb light and make the image almost invisible. Always go with white or light gray.
- Ignoring room lighting: Projecting in a bright room washes out the image. Control ambient light for the best results.
- Placing the projector at the wrong angle: This causes keystone distortion. Take time to align the projector properly.
- Choosing the wrong projector brightness: A low-lumen projector struggles on large wall projections. Match your projector brightness to your wall size and room conditions.
- Forgetting about ventilation: Projectors generate heat. Make sure your projector has enough airflow, especially if it is mounted in a tight space.
Expert Insight
Home theater experts agree that wall preparation is the most overlooked step in projector setup. A simple trip to the hardware store for primer and projector screen paint can transform an ordinary wall into a stunning movie canvas. The difference between a bare wall and a properly prepared wall is like night and day.
Key Takeaways
- Yes, your wall works as a projector screen: A clean, white, smooth wall can deliver a surprisingly good movie-watching experience.
- Wall preparation is essential: Clean, fill, prime, and paint your wall for the best possible image quality.
- Projector screen paint makes a real difference: It boosts brightness, color, and contrast compared to regular paint.
- Projector placement matters: Get the distance and angle right to avoid distortion and blur.
- Control ambient light: Darker rooms produce sharper, more vivid images on any projector screen wall.
- Alternatives exist: Portable screens, retractable screens, and DIY options work when a wall is not ideal.
- Avoid common mistakes: Skip the dark walls, skip the dirty surfaces, and always test your setup before movie night.
Conclusion
The answer to can I use my wall as a projector screen for movies is a resounding yes. With the right preparation and a little effort, your wall can become the centerpiece of an amazing home theater. You do not need to spend a fortune on expensive screens or complicated equipment. Start with a clean, white wall. Add projector screen paint if you want to take your setup to the next level. Place your projector at the right distance and angle. Control the light in your room. And most importantly, enjoy the experience.
Using your wall as a projector screen is one of the simplest and most affordable ways to bring the cinema into your home. Whether you are watching a blockbuster on a Friday night or hosting a backyard movie party, the right setup makes all the difference. Now that you know what works and what does not, it is time to grab your projector, prep your wall, and start watching.
Your wall is ready. Your projector is ready. All that is left is the movie. Happy watching.
Frequently Asked Questions
Can any wall be used as a projector screen?
Most walls can work, but smooth, white, or light-colored walls give the best results. Textured, dark, or damaged walls will reduce image quality. You can always use projector screen paint to improve any wall surface for better white wall projection.
Do I need special paint to use my wall as a projector screen?
No, regular white paint works for basic use. However, specialized projector screen paint significantly improves brightness, color accuracy, and contrast. It is a great upgrade if you plan to use your home theater wall regularly.
What is the best wall color for projector screen use?
White or light gray is best for projector on wall setups. These colors reflect the most light and produce the brightest, clearest image. Avoid dark colors, as they absorb light and make the picture faint.
How do I make my wall wrinkle-free for projection?
Fill any cracks or holes with spackle, sand smooth, and apply a smooth coat of paint. Use a roller for an even finish. A wrinkle-free wall surface ensures the projected image stays sharp and distortion-free across the entire screen.
Can I use a projector on a textured wall?
You can, but the image quality will suffer. Textured walls create uneven surfaces that scatter light and cause blurry spots. If you only have a textured wall, consider using a portable projector screen or applying projector screen paint over the texture to smooth it out.
What projector brightness do I need for wall projection?
For a standard room with some ambient light, aim for at least 2,000 to 3,000 lumens. For darker rooms, 1,500 lumens may be enough. The right projector brightness ensures a vivid, clear image on your projector screen wall no matter the conditions.
=== QUICK SUMMARY ===
Yes, you can use your wall as a projector screen for movies, and it is easier than you think. A plain white wall works in a pinch, but the right preparation makes a huge difference in picture quality. Using your wall as a projector screen saves money and creates a cinematic feel in any room. With the right paint, wall prep, and projector placement, your home theater wall can rival store-bought screens. Let us walk you through everything you need to know.