Does Projector Screen Paint Really Work for Home Theater
Does projector screen paint really work? Yes, it can deliver a smooth, permanent projection surface that rivals traditional pull-down screens when applied correctly. Projector screen paint offers a DIY-friendly alternative for home theater enthusiasts who want a seamless wall finish without bulky equipment. This guide covers the top brands, application methods, and whether screen paint is worth the investment for your setup.
You have a projector. You have a blank wall. And you have a dream of building a home theater that looks like a cinema. So you start Googling “does projector screen paint really work” and suddenly you are buried in forums, product reviews, and conflicting opinions.
The short answer is yes. Projector screen paint really does work — but it is not magic. The results depend heavily on the type of paint you choose, how you prep your wall, and the projector you are using. In this guide, we walk through everything you need to know to decide whether painting your wall is the right move for your home theater.
Whether you are a movie buff, a gamer, or someone who just wants a big picture on the wall, this article covers the science, the products, the application process, and the honest pros and cons. Let us dive in.
Key Takeaways
- Projector screen paint works well for creating a flat, permanent projection surface in your home theater.
- Specialized screen paints like Screen Goo and Elite Screens Aeon offer superior gain and color accuracy.
- DIY application is straightforward but requires proper wall prep and multiple coats for best results.
- Screen paint has limitations in rooms with high ambient light compared to dedicated ALR screens.
- Cost savings are real — quality screen paint is often cheaper than a comparable pull-down or motorised screen.
- Painting your wall is permanent, so consider whether a removable option like a sheet might be better for renters.
- Surface texture matters hugely — even slight imperfections show up dramatically on a projection surface.
📑 Table of Contents
- What Is Projector Screen Paint?
- How Does Projector Screen Paint Work?
- Types of Projector Screen Paint
- Pros and Cons of Using Projector Screen Paint
- How to Apply Projector Screen Paint
- Projector Screen Paint vs Traditional Screens
- Common Mistakes to Avoid
- Expert Tips for the Best Results
- Is Projector Screen Paint Worth It?
What Is Projector Screen Paint?
Projector screen paint is a specially formulated paint that creates a reflective surface designed to work with a projector. Unlike regular wall paint, which absorbs light and looks washed out on a big image, screen paint is engineered to reflect light back toward the viewer with high brightness and accurate color.
Think of it this way. A normal white wall scatters light in every direction. Screen paint directs more light back to the seating area, making the image sharper and more vivid. Some formulations even include microscopic glass beads or special pigments that boost what is called “gain.”
You can apply screen paint directly to a wall, a piece of plywood, or even a canvas. This makes it a popular choice for people who want a permanent, seamless projection surface without buying a traditional screen. The result looks clean and integrated into your room.
But not all screen paints are created equal. Some are designed for dark rooms with controlled lighting. Others include ambient light rejection (ALR) properties that help the image survive even in a bright living room. We will get into the types in a moment.
How Does Projector Screen Paint Work?
The science behind projector screen paint is simpler than you might think. When your projector shines an image onto a surface, that surface has to bounce the light back to your eyes. The quality of that bounce determines how good the picture looks.
Regular white paint has a matte finish. It scatters light everywhere. This means parts of the image appear dimmer depending on where you sit. Screen paint, on the other hand, uses reflective particles that bounce light more uniformly back toward the center of the viewing area.
Here is a quick breakdown of how it works:
- Reflective particles in the paint (like glass microspheres) redirect light back to the viewer.
- Higher gain ratings mean more light is reflected, resulting in a brighter image.
- Color accuracy is improved because quality screen paints are designed to maintain the color spectrum the projector outputs.
- Smooth application eliminates the texture issues that a regular wall creates, which can distort the image.
The gain of a screen paint typically ranges from 1.0 to 1.3. A gain of 1.0 means the paint reflects light similarly to a standard white wall. A gain above 1.2 means the paint concentrates more light toward the viewing area, giving you a noticeably brighter picture.
One thing to keep in mind: higher gain can narrow your viewing angle. If you sit far to the side, the image may look dimmer. For a dedicated home theater where everyone sits facing forward, this is usually not a problem.
Types of Projector Screen Paint
Not all screen paints are the same. Different formulations serve different needs. Here is a look at the main types available on the market right now.
Standard White Screen Paint
This is the most basic type. It works well in rooms where you can control the lighting — think blackout curtains and no windows facing the screen. Standard white screen paint offers a gain around 1.0 to 1.1 and delivers solid color accuracy for the price.
Popular brands in this category include Screen Goo and some offerings from Rust-Oleum. These paints are affordable and easy to find. They work great for casual movie nights and gaming setups.
Ambient Light Rejecting (ALR) Paint
If you cannot darken your room completely, ALR paint is the way to go. This type of projector screen paint is designed to reject ambient light from windows, ceiling lights, and lamps while still reflecting the projector’s image clearly.
ALR paints are more expensive, but they are a game-changer for living rooms and media rooms where total darkness is not realistic. Brands like Elite Screens Aeon and some specialized ceramic paints fall into this category.
Gray Screen Paint
Gray screen paint absorbs more light than white paint. This helps improve contrast in the image, making dark scenes look deeper and more detailed. It is a great option for rooms with some ambient light but where you still want rich blacks.
The trade-off is that gray paint can reduce overall brightness. You need a projector with decent lumens to compensate. If your projector is on the weaker side, gray paint might make the image too dark.
DIY and Budget Alternatives
Some people experiment with regular white semi-gloss paint mixed with additives. While this can work in a pinch, it rarely matches the performance of a purpose-built screen paint. If you are on a tight budget, you might also consider using a white bedsheet as a projector screen — it is a quick and removable option that costs almost nothing.
For those who want something more permanent but not painted, you can also explore making your own projector screen with a PVC pipe frame and a projector screen fabric. These DIY options give you flexibility without the commitment of painting a wall.
Pros and Cons of Using Projector Screen Paint
Like any solution, projector screen paint has its strengths and weaknesses. Here is an honest look at both sides.
The Pros
- Seamless look. There are no seams, borders, or visible edges. The entire wall becomes your screen.
- Cost effective. A can of quality screen paint costs significantly less than a medium-sized pull-down screen.
- Permanent and low maintenance. Once painted, you do not have to roll up, store, or clean a separate screen.
- Custom size. You can paint any wall or surface to any size you want.
- Great for home theater purists. A painted wall looks clean and professional in a dedicated viewing room.
The Cons
- It is permanent. Once painted, you cannot easily undo it. This matters if you rent or plan to change your wall color later.
- Surface imperfections show. Any bumps, cracks, or uneven patches on the wall will distort the projected image.
- Ambient light can be an issue. Standard screen paint struggles in bright rooms unless you invest in ALR formulations.
- Limited viewing angle. Higher-gain paints narrow the sweet spot for optimal viewing.
- Color shift risk. Some cheaper paints can add a yellow or blue tint to the image.
How to Apply Projector Screen Paint
Applying projector screen paint is not hard, but it does require patience and preparation. Here is a step-by-step guide to get the best results.
Step 1: Prep the Wall
Start by cleaning the wall thoroughly. Remove any dust, dirt, or grease. Fill in any holes or cracks with spackle and sand them smooth once dry. The smoother the wall, the better the final image will look.
If your wall has texture — like popcorn or knockdown — you should either skim-coat it with joint compound or build a smooth surface using drywall compound. Texture is the enemy of a clean projected image.
Step 2: Prime the Wall
Apply a coat of primer designed for smooth surfaces. A high-build primer helps fill in minor imperfections and creates an even base for the screen paint. Let it dry completely before moving on.
Step 3: Apply the Screen Paint
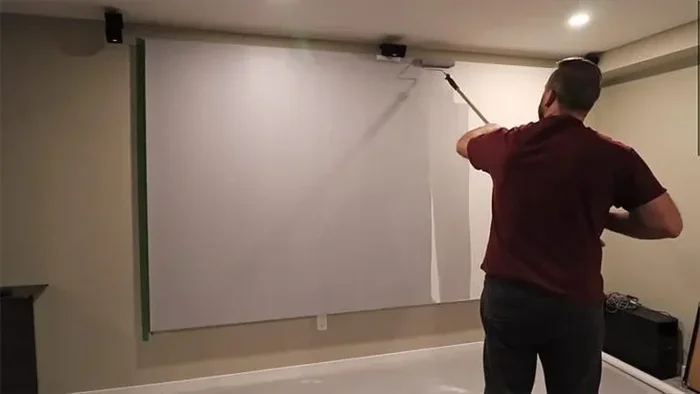
Use a high-quality roller with a short nap — about 3/8 inch — for the smoothest finish. Apply the first thin coat evenly. Do not go too thick, as drips and uneven layers will create visible distortions.
Let the first coat dry fully, then apply a second coat. Most quality screen paints require two to three coats for optimal performance. Follow the manufacturer’s instructions for drying times between coats.
Step 4: Test and Adjust
Once the final coat is dry, test the surface with your projector. Check for hot spots, color accuracy, and brightness from your main seating position. If the image looks uneven, you may need an additional coat or to address any remaining wall imperfections.
Pro tip: If you are unsure about committing to a full wall, you can paint a small test patch first. This lets you evaluate the results before dedicating an entire wall.
Projector Screen Paint vs Traditional Screens
So how does a painted wall compare to a traditional pull-down or motorised projector screen? Let us break it down in a few key areas.
| Feature | Projector Screen Paint | Traditional Pull-Down Screen |
|---|---|---|
| Cost | $50–$150 per can | $100–$500+ |
| Seamless Look | Yes | No (visible borders) |
| Permanent | Yes | No (removable) |
| Portability | No | Yes (most models) |
| Surface Smoothness | Depends on wall prep | Factory-smooth |
| Ambient Light Handling | Varies by paint type | Varies by screen material |
| Setup Time | Several hours to days | Minutes |
A traditional screen offers a guaranteed smooth surface and easy setup. But a painted wall delivers a sleek, integrated look that many home theater enthusiasts prefer. If you are building a permanent media room, the paint route is hard to beat.
On the other hand, if you are renting or want flexibility, a traditional screen — or even a simple white sheet stretched on a frame — makes more sense. You can always use a sheet as a projector screen and swap it out whenever you want.
Common Mistakes to Avoid
Even with the best paint, mistakes during application can ruin the results. Here are the most common pitfalls and how to avoid them.
- Skipping wall prep. This is the number one mistake. An unprepared wall will show every imperfection in your projected image.
- Using the wrong roller. A thick-nap roller leaves texture. Use a short-nap or microfiber roller for the smoothest finish.
- Applying too thick a coat. Thick coats drip and dry unevenly. Multiple thin coats always outperform one thick coat.
- Ignoring room lighting. Even the best screen paint cannot fully overcome harsh ambient light. Consider adding blackout curtains to your setup.
- Choosing the wrong paint color. Not every white paint works as a screen paint. You need a formulation specifically designed for projection.
- Not testing before committing. Always do a small test area first to check color, gain, and overall image quality.
Expert Tips for the Best Results
Want to get the most out of your projector screen paint? Here are some expert-backed tips that make a real difference.
Paint in a dust-free room. Close windows and turn off fans while painting. Dust particles that land on wet paint create tiny bumps that show up on the projected image.
Use a paint extender. Adding a paint extender to your screen paint slows drying time, which allows the paint to level out and reduce roller marks. This is a trick professional painters use for ultra-smooth finishes.
Consider the wall color behind the paint. If you are painting over a dark-colored wall, the dark base will absorb some of the projected light and reduce brightness. Prime the wall white first to maximize reflectivity.
Pair your screen paint with a quality projector. Even the best paint cannot fix a weak projector. Make sure your projector has enough lumens for your room size. If you are projecting through a window, look into whether any projector works for a window setup or if you need a specific model.
Think about acoustics too. A painted wall can affect sound reflection in the room. If you are building a serious home theater, consider adding acoustic panels alongside your screen wall for the best overall experience.
Explore hybrid options. Some people combine a painted wall with a retractable screen for flexibility. You get the seamless look for movie nights and the convenience of a pull-down screen when you need it.
Is Projector Screen Paint Worth It?
After all of this, the big question remains: is it worth it? The answer depends on your situation.
If you are building a permanent home theater in a room you control, projector screen paint is an excellent choice. It delivers a clean, seamless, and affordable projection surface that looks professional and performs well in the right conditions.
If you rent, move frequently, or need a room that serves multiple purposes, a painted wall might not be the best fit. In those cases, a removable screen or even a well-mounted sheet gives you flexibility without commitment.
Either way, projector screen paint really does work — and for many home theater builders, it is the best option available. Just make sure you choose the right paint, prep your surface properly, and set realistic expectations based on your room’s lighting conditions.
The bottom line is simple. With the right preparation and the right product, you can transform any blank wall into a stunning projection surface. Your home theater dreams are closer than you think.
Frequently Asked Questions
Can I use regular white paint instead of projector screen paint?
Regular white paint can work in a pinch, but it will not deliver the same brightness, color accuracy, or gain as a purpose-built screen paint. Regular matte paint scatters light unevenly, which can make your projected image look dull and washed out. For the best results, always use a paint specifically formulated for projection surfaces.
How many coats of projector screen paint do I need?
Most manufacturers recommend two to three thin coats for optimal performance. Each coat should be allowed to dry completely before applying the next. More coats generally mean better reflectivity, but going too thick can cause drips and uneven texture. Stick to the manufacturer’s guidelines for the best outcome.
Can I paint over an existing projector screen?
It is not recommended to paint over an existing pull-down or motorised screen. The surface material of most screens is not designed to accept paint, and doing so can damage the screen and ruin its performance. It is better to paint a clean, smooth wall surface or a dedicated board instead.
Does projector screen paint work in a bright room?
Standard white screen paint struggles in bright rooms because it does not reject ambient light effectively. However, ambient light rejecting (ALR) screen paints are specifically designed to handle rooms with windows and overhead lighting. If your room is bright, invest in an ALR formulation for the best results.
How long does projector screen paint last?
Quality projector screen paint can last for many years without peeling or degrading, as long as the wall is properly prepared and the paint is applied correctly. The surface may accumulate dust over time, which can be gently cleaned with a soft, dry cloth. Avoid using water or cleaning chemicals directly on the painted surface.
Is projector screen paint better than a white wall?
Yes, projector screen paint is significantly better than a regular white wall for projection. Regular wall paint absorbs more light and scatters it unevenly, reducing brightness and color accuracy. Screen paint reflects more light back toward the viewer, producing a sharper, more vibrant image that looks much closer to a dedicated projection screen.
=== CONCLUSION ===
Does projector screen paint really work? The evidence is clear — yes, it does. When you choose the right type of paint, prep your wall properly, and apply it with care, you get a projection surface that looks smooth, bright, and professional. It is one of the most cost-effective ways to build a home theater that truly impresses.
Projector screen paint is not a one-size-fits-all solution. The best choice depends on your room, your projector, and your viewing habits. But for the right setup, a painted wall can deliver an experience that rivals a commercial cinema — all without the price tag of a high-end screen.
So if you have been wondering whether to take the plunge, the answer is yes. Pick your paint, prep your wall, and start building the home theater you have always wanted.