How Do I Backup My Iphone To My Computer Step By Step
Backing up your iPhone to your computer is one of the smartest things you can do to protect your photos, messages, and apps. Whether you use a Mac or a Windows PC, this step-by-step guide walks you through every method, including iTunes, Finder, iCloud, and third-party tools. You will learn how to create a full iPhone backup to PC or backup iPhone to Mac in minutes, troubleshoot common issues, and keep your data safe without stress.
Your iPhone holds some of the most important things in your life. Photos, contacts, messages, notes, and app data all live on that small device. Losing it or dropping it in water could mean losing years of memories and critical information. That is exactly why knowing how do I backup my iphone to my computer is so important.
A local backup stored on your computer gives you peace of mind. It is fast, reliable, and does not depend on Wi-Fi or cloud storage limits. In this guide, we will walk you through every step clearly and simply. You will learn how to back up using iTunes, Finder, iCloud, and even on a Windows PC. By the end, you will feel confident backing up your iPhone like a pro.
Key Takeaways
- iTunes and Finder are the fastest ways to create a local backup on your computer.
- iCloud offers a wireless backup option that does not require a cable or computer nearby.
- Windows users can back up their iPhone using iTunes or the Apple Devices app on Windows 11.
- Encrypting your backup protects sensitive data like passwords and health information.
- Regular backups prevent permanent data loss from accidents, drops, or device failures.
- You can choose between a full backup and a selective backup depending on your storage needs.
- Troubleshooting common backup errors is simple with the right steps and a little patience.
📑 Table of Contents
- Why Backing Up Your iPhone Matters
- How Do I Backup My Iphone To My Computer Using iTunes
- How Do I Backup My Iphone To My Computer Using Finder (Mac Users)
- How Do I Backup My Iphone To My Computer on Windows
- iCloud Backup vs Local Backup: Which Is Better?
- What Gets Included in an iPhone Backup
- How to Restore Your iPhone From a Backup
- Common Backup Problems and How to Fix Them
- Best Practices for iPhone Backup Management
- Can I Back Up My iPhone Without a Computer
- How to Free Up Space Before Backing Up
- How to Check How Much Space Your Backup Uses
- Expert Insights on iPhone Backup
- Final Thoughts
Why Backing Up Your iPhone Matters
Many people put off backing up their iPhone until something goes wrong. Do not wait for that moment. A backup is your safety net. It ensures that even if your phone breaks, gets stolen, or is lost, your data survives.
Here are some real reasons why a local iPhone backup is essential:
- Accidental deletion: You might delete a photo or message by mistake. A backup lets you restore it instantly.
- Device damage: Water damage, cracked screens, or dropped phones happen every day. A backup means your data is safe.
- Phone upgrade: When you get a new iPhone, a backup makes transferring everything seamless and easy.
- Security: Ransomware or malware can lock you out of your device. A local backup keeps your data accessible.
- Peace of mind: Knowing your data is safe reduces stress and lets you use your phone freely.
Apple gives you two main ways to back up. You can use iCloud backup to store your data wirelessly in the cloud. Or you can create a local backup directly on your computer using iTunes or Finder. Both methods work well, but a local backup gives you more control and does not count against your iCloud storage limit.
How Do I Backup My Iphone To My Computer Using iTunes
If you use a Mac running macOS Mojave or older, or a Windows PC, iTunes is your go-to tool for iPhone backup to PC or backup iPhone to Mac. iTunes is free to download from Apple’s website and works with most iPhone models. Let us walk through the process step by step.
Step 1: Download and Install iTunes
First, make sure iTunes is installed on your computer. On Windows, you can download it from Apple’s official website. On older Macs, iTunes comes pre-installed. Open iTunes and check for updates to make sure you have the latest version.
Step 2: Connect Your iPhone with a USB Cable
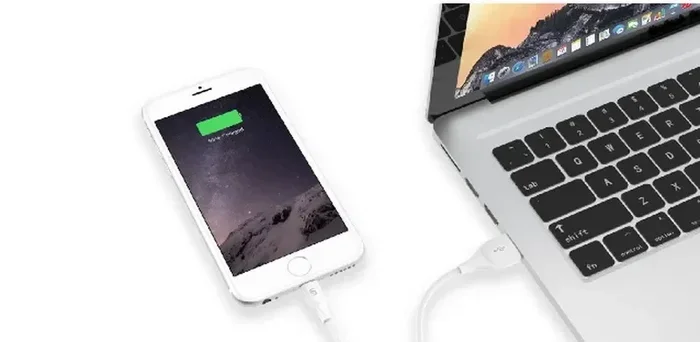
Use your original Apple USB cable or a certified MFi cable to connect your iPhone to your computer. Wait for your iPhone to appear on the screen. You may need to tap “Trust This Computer” on your iPhone and enter your passcode.
Step 3: Select Your iPhone in iTunes
Once connected, click the iPhone icon in the top-left corner of iTunes. This opens your device summary page. Here you will see options for backup, restore, and sync.
Step 4: Choose Backup Options
Under the “Backups” section, you will see two choices:
- This Computer: Saves your backup locally on your hard drive.
- iCloud: Stores your backup in the cloud (not what we want right now).
Select “This Computer.” Then check the box that says “Encrypt local backup.” This is important because an encrypted backup saves your passwords, health data, and Keychain information. Without encryption, those items will not be included.
Create a password you will remember. Write it down and store it somewhere safe. You will need this password every time you restore from this backup.
Step 5: Click Back Up Now
Hit the “Back Up Now” button and wait. The time it takes depends on how much data you have. A first backup might take 30 minutes or more. Subsequent backups are faster because iTunes only backs up changed data.
When the process finishes, you will see a confirmation message with the date and time of your last backup. That is your signal that everything went well.
Quick Tip: Always back up your iPhone before installing a major iOS update. This protects your data in case something goes wrong during the update process.
How Do I Backup My Iphone To My Computer Using Finder (Mac Users)
If you have a Mac running macOS Catalina or newer, you do not need iTunes. Apple replaced iTunes with the Finder for device management. The process is very similar but uses a slightly different interface.
Connecting Your iPhone to a Mac
Plug your iPhone into your Mac using a USB cable. Unlock your phone and tap “Trust” if prompted. Open Finder on your Mac and look for your iPhone in the sidebar under “Locations.”
Creating a Backup in Finder
Click on your iPhone name in the Finder sidebar. You will see tabs for General, Info, Apps, and more. Click on the “General” tab.
Under the “Backups” section, choose “Back up all of the data on your iPhone to this Mac.” Check the box for “Encrypt local backup” if you want to save sensitive data. Then click “Back Up Now.”
Finder will show you a progress bar. Once complete, you can verify the backup by checking the backup details section below the button.
Quick Tip: Finder also lets you back up your iPhone to an external hard drive. Simply select your external drive as the backup location to save space on your main Mac storage.
How Do I Backup My Iphone To My Computer on Windows
Windows users have a couple of great options for backup iPhone to Windows PC. The method you choose depends on your Windows version and personal preference.
Using iTunes on Windows
The most common way to back up an iPhone on Windows is through iTunes. Here is how:
- Download and install iTunes from the Microsoft Store or Apple’s website.
- Connect your iPhone to your PC using a USB cable.
- Open iTunes and click the iPhone icon in the top menu.
- Select “Summary” from the left sidebar.
- Choose “This Computer” under Backups.
- Check “Encrypt local backup” if you want to save passwords and health data.
- Click “Back Up Now” and wait for the process to complete.
Using the Apple Devices App on Windows 11
Windows 11 users can also use the new Apple Devices app from the Microsoft Store. This app offers a clean, simple interface for backing up your iPhone without needing the full iTunes app.
The steps are similar:
- Install the Apple Devices app from the Microsoft Store.
- Connect your iPhone via USB cable.
- Open the app and select your device.
- Navigate to the backup section.
- Choose your backup settings and click “Back Up.”
Both methods work well. iTunes has more features and options, while the Apple Devices app is simpler and more streamlined.
Quick Tip: If your Windows PC does not recognize your iPhone, try using a different USB port or a different cable. Sometimes the cable that came with a cheap charger is not designed for data transfer.
iCloud Backup vs Local Backup: Which Is Better?
Many people wonder whether they should use iCloud backup or a local computer backup. Both have strengths, and the best approach is often using both together.
| Feature | iCloud Backup | Local Computer Backup |
|---|---|---|
| Requires Internet | Yes | No |
| Storage Limit | 5 GB free (paid plans available) | Limited only by your hard drive |
| Speed | Depends on Wi-Fi speed | Fast via USB connection |
| Security | Encrypted in transit and at rest | Encrypted if you choose that option |
| Convenience | Automatic and wireless | Requires manual connection |
| Cost | Free for 5 GB, then paid | Free (uses your own storage) |
A local backup is faster and gives you full control over your data. An iCloud backup is convenient because it happens automatically in the background. For the best protection, use both methods. Keep a local backup on your computer and let iCloud handle daily backups.
What Gets Included in an iPhone Backup
Understanding what your backup contains helps you plan your storage and backup strategy. Here is a list of what gets saved when you back up your iPhone to your computer:
- Photos and videos (except those already stored in iCloud)
- Messages and iMessage history
- App data and app layouts
- Call history
- Device settings and preferences
- Voice memos
- WhatsApp and other app messages
- Health data (only if encrypted backup is selected)
- Passwords and Keychain data (only if encrypted backup is selected)
One thing that does not get backed up is content that is already stored in iCloud, like iCloud Photos or iCloud Mail. Those items are synced separately and do not take up space in your local backup.
How to Restore Your iPhone From a Backup
Knowing how to back up is only half the equation. You also need to know how to restore your data when the time comes. Whether you are setting up a new iPhone or recovering from a lost device, the restore process is straightforward.
Restoring from a Computer Backup
Connect your iPhone to your computer and open iTunes or Finder. Select your device and choose “Restore Backup.” Pick the backup you want to restore from and click “Restore.” Your iPhone will restart and load all your data from the backup.
Restoring from an iCloud Backup
During the iPhone setup process, you will be asked to choose a backup source. Select “Restore from iCloud Backup,” sign in with your Apple ID, and choose the most recent backup. Your iPhone will download and restore all your data over Wi-Fi.
Quick Tip: Always make sure your iPhone is fully charged or plugged in before starting a restore. A restore can take 30 minutes to several hours depending on the size of your backup and your internet speed.
Common Backup Problems and How to Fix Them
Even with the best setup, backup issues can happen. Here are some common problems and their solutions.
iPhone Not Showing Up in iTunes or Finder
If your computer does not recognize your iPhone, try these steps:
- Unplug and replug the USB cable.
- Try a different USB port on your computer.
- Update iTunes or Finder to the latest version.
- Restart both your iPhone and your computer.
- Install the latest Apple device drivers on Windows.
Backup Stuck or Taking Too Long
A stuck backup can be frustrating. First, check that you have enough free space on your computer. Then try disconnecting and reconnecting your iPhone. If the problem persists, restart both devices and try again.
Backup Fails with an Error Message
Error messages during backup often relate to software conflicts. Make sure your operating system and iTunes are up to date. Disable any antivirus software temporarily and try again. If you still get errors, try resetting your iPhone’s network settings or using a different cable.
Best Practices for iPhone Backup Management
To get the most out of your backup routine, follow these best practices:
- Back up regularly. Set a weekly or biweekly schedule for local backups.
- Use encrypted backups. This protects your most sensitive data and ensures nothing gets left out.
- Store backups on an external drive. This protects your data even if your computer fails.
- Delete old backups you no longer need. This frees up valuable storage space.
- Verify your backups. After each backup, check that it completed successfully and shows the correct date and time.
- Keep your software updated. iOS updates and iTunes updates can fix bugs that cause backup problems.
Can I Back Up My iPhone Without a Computer
Yes, you can. iCloud backup is the most popular way to back up your iPhone without a computer. Simply go to Settings, tap your name, select iCloud, and turn on iCloud Backup. Your iPhone will automatically back up daily when connected to Wi-Fi and power.
You can also use third-party apps and services like Google Drive, Dropbox, or dedicated backup apps to store your data in the cloud. However, these methods may not capture everything that a full iTunes or Finder backup includes.
For the most complete protection, combine a local computer backup with an iCloud backup. This way, you have a local copy and a cloud copy. If one fails, the other has you covered.
How to Free Up Space Before Backing Up
If your iPhone or computer is running low on storage, backing up can become a challenge. Here are some quick ways to free up space:
- Delete old messages and conversations you no longer need.
- Offload unused apps (this removes the app but keeps your data).
- Clear your Safari cache and browser data.
- Delete duplicate or blurry photos.
- Move large videos and files to an external drive or cloud storage.
- Empty the Recently Deleted folder on your iPhone.
Freeing up space before a backup ensures the process runs smoothly and completes without errors.
How to Check How Much Space Your Backup Uses
On a Mac, you can find your iPhone backup size by going to Finder, clicking on your iPhone, and looking at the backup section. On Windows, open iTunes, go to Preferences, then Devices. You will see a list of backups with their sizes and dates.
Knowing your backup size helps you plan your storage and decide whether you need to move old backups to an external drive.
Expert Insights on iPhone Backup
Apple experts recommend the 3-2-1 backup rule. Keep three copies of your data, on two different types of storage, with one copy stored offsite. For iPhone users, this means having a local computer backup, an iCloud backup, and ideally a backup on an external hard drive.
Another expert tip is to back up your iPhone before any major iOS update. Updates can sometimes cause unexpected issues, and having a recent backup means you can always roll back to a previous state if needed.
Finally, do not rely solely on iCloud. While iCloud is convenient, it has a 5 GB free limit and can be affected by server outages. A local backup gives you independence from internet connectivity and cloud service reliability.
Final Thoughts
Learning how do I backup my iphone to my computer is one of the most valuable skills you can develop as an iPhone user. It takes only a few minutes and protects everything you care about. Whether you use iTunes, Finder, iCloud, or a combination of all three, the key is to make backups a regular habit.
Start today. Connect your iPhone to your computer, follow the steps in this guide, and create your first local backup. You will feel a sense of relief knowing your photos, messages, and memories are safely stored. Set a reminder to back up weekly, and you will never have to worry about losing your data again.
Your iPhone is a powerful tool, but it is also fragile. A backup is your insurance policy. Take a few minutes now to protect your digital life. Your future self will thank you.
Frequently Asked Questions
How long does it take to backup my iPhone to my computer?
The first backup usually takes between 30 minutes and 2 hours, depending on how much data you have and your USB connection speed. Subsequent backups are much faster because they only back up new or changed data. A typical incremental backup can take just 5 to 15 minutes.
Can I use my iPhone while it is backing up to my computer?
It is best to keep your iPhone untouched during a backup. Using your phone while backing up can slow the process or cause errors. Let the backup run uninterrupted for the best results and fastest completion time.
Do I need iTunes to backup my iPhone to a Windows PC?
Yes, on most Windows versions, you need iTunes to back up your iPhone. However, Windows 11 users can also use the Apple Devices app, which is a simpler alternative. Both tools work well and provide full backup functionality.
Is an encrypted backup better than a regular backup?
Yes, an encrypted backup is better because it saves your passwords, health data, and Keychain information that a regular backup skips. Always choose the encrypted option if you want a complete copy of your iPhone data on your computer.
Where are iPhone backups stored on my computer?
On a Mac, backups are stored in ~/Library/Application Support/MobileSync/Backup/. On Windows, they are located in %AppData%\Apple Computer\MobileSync\Backup\. You can navigate to these folders to view or manage your backup files directly.
How often should I backup my iPhone to my computer?
Experts recommend backing up your iPhone at least once a week. If you take lots of photos or make frequent changes to your device, consider backing up every few days. Regular backups minimize the amount of data you could lose if something goes wrong.
=== CONCLUSION ===
Backing up your iPhone to your computer is simple, fast, and absolutely essential. Whether you use iTunes, Finder, iCloud, or the Apple Devices app on Windows, the steps are straightforward and easy to follow. A local backup gives you full control over your data and provides a reliable safety net for your most precious memories and information.
Start implementing the steps from this guide today. Make iPhone backup to PC or backup iPhone to Mac a regular part of your routine. Your future self will be grateful you did. Take action now, protect your data, and enjoy the peace of mind that comes with knowing your iPhone is always safe.