Can I Make A Bootable Macos Usb On Windows Right Now
Yes, you can make a bootable macOS USB on Windows right now. With the right tools and a few simple steps, you can create a bootable USB drive on any Windows PC. This guide walks you through every method, tool, and tip you need to get started today.
Key Takeaways
- You can do it: Making a bootable macOS USB on Windows is absolutely possible with the right approach.
- Multiple tools work: You have several free and paid options to choose from.
- It takes minutes: The whole process can be done in under 30 minutes.
- Check your USB: Use a flash drive with at least 16GB of space.
- Compatibility matters: Different methods work for Intel Macs and Apple Silicon Macs.
- Avoid common mistakes: Skip the errors most beginners make by following our tips.
📑 Table of Contents
- Can I Make A Bootable Macos Usb On Windows Right Now?
- What Is A Bootable Macos USB?
- Why Create A Bootable Macos USB On Windows?
- What You Need Before You Start
- Step-By-Step Guide To Create Bootable Macos USB On Windows
- Best Tools For Making Bootable Macos USB On Windows
- Common Mistakes And Expert Tips
Can I Make A Bootable Macos Usb On Windows Right Now?
The short answer is yes. You can make a bootable macOS USB on Windows right now, and it is easier than you might think. Whether you need to install macOS on a new Mac, repair an existing system, or just want a spare install drive, creating a bootable USB drive on a Windows PC is totally doable. In this guide, we will walk you through every step, every tool, and every tip you need to succeed.
Many people think you need a Mac to create a macOS installer. That is not true. You can use your Windows laptop or desktop to prepare a bootable macOS USB in just a few simple steps. The process has gotten much better over the years, and there are now several reliable methods to choose from. Let us dive right in.
By the end of this article, you will know exactly how to make a bootable macOS USB on Windows, which tool works best for your situation, and how to avoid the mistakes that trip up most beginners. So grab a USB drive, and let us get started.
What Is A Bootable Macos USB?
A bootable macOS USB is a flash drive that contains a full copy of the macOS installer. When you plug it into a Mac and start the computer, it bypasses the normal hard drive and boots straight into the macOS installation environment. Think of it like a rescue disk or a setup disk all in one.
How A Bootable Drive Works
When you turn on a Mac, it looks for a startup disk. Normally, it uses the internal drive. But if you hold down a specific key during startup, the Mac will check connected USB drives first. A bootable USB drive is formatted in a special way that tells the Mac, “Hey, use this as your startup disk.”
The USB contains the macOS installer files, recovery tools, and sometimes even additional drivers. This makes it incredibly useful for fresh installs, system repairs, and even installing macOS on a new hard drive.
Why It Matters
Having a bootable macOS USB gives you freedom. You are not stuck waiting for a download every time you need to reinstall macOS. You can carry your installer in your bag, use it on multiple computers, and set up a Mac even when you do not have internet access. For IT professionals and tech enthusiasts, this is an essential tool.
Why Create A Bootable Macos USB On Windows?
You might be wondering why you would need to create a bootable macOS USB on a Windows machine. There are several great reasons, and they all make a lot of sense.
Cross-Platform Flexibility
Not everyone owns a Mac. If you work in a mixed environment with both Windows and Mac computers, being able to create a bootable macOS USB on Windows saves you time and hassle. You do not need to borrow a Mac or ask a friend for help. Your Windows PC can do the job just fine.
This is especially useful for small businesses, freelancers, and students who work across different platforms. A cross-platform solution like this gives you a huge advantage.
Save Time And Money
Buying a second Mac just to create an installer is expensive and unnecessary. Using your existing Windows PC to make a bootable macOS USB saves you money and effort. The tools are mostly free, and the process takes less than 30 minutes once you know what you are doing.
Also, if your Mac is down and you only have a Windows PC available, you can still prepare a recovery drive. That alone is worth learning how to do.
What You Need Before You Start
Before you begin creating a bootable macOS USB on Windows, you need to gather a few things. It is a quick checklist, but each item is important.
Hardware Requirements
- A USB flash drive: You need at least 16GB. A 32GB drive is even better because it gives you room to spare. Make sure the drive is empty because the process will erase everything on it.
- A Windows PC: Any modern Windows 10 or Windows 11 computer will work. You do not need a powerful machine for this task.
- A reliable internet connection: You will need to download the macOS installer files. A fast connection makes this much quicker.
Software You Will Need
You have a few options here. Some people prefer free tools, while others want polished paid software. Here is what you might need:
- A third-party tool: Apps like BalenaEtcher, TransMac, or Win32 Disk Imager make the process easy.
- The macOS installer file: You can download this from the Mac App Store on another Mac or find it online.
- An ISO or DMG file: This is the actual disk image that contains the macOS files.
Having all of these ready before you start will make the process smooth and stress-free.
Step-By-Step Guide To Create Bootable Macos USB On Windows
Now for the part you have been waiting for. Here is how to actually make a bootable macOS USB on Windows. We will cover two main methods, so you can pick the one that works best for you.
Method One Using A Third-Party Tool
This is the easiest method and perfect for beginners. Here is what to do:
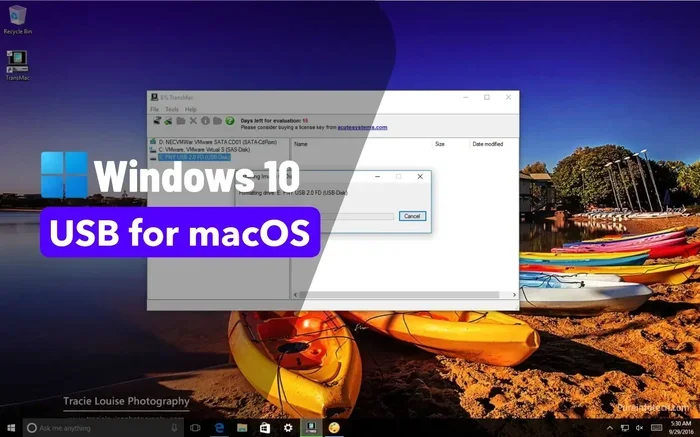
- Download and install a third-party tool like TransMac or BalenaEtcher on your Windows PC.
- Insert your USB flash drive into the Windows computer.
- Open the tool and select your USB drive from the list.
- Choose the macOS installer file (ISO or DMG) that you downloaded.
- Click the button to start writing the image to the USB drive.
- Wait for the process to finish. This usually takes 10 to 20 minutes.
- Eject the USB drive safely and you are done.
That is it. You now have a bootable macOS USB ready to use. Method one is fast, simple, and does not require any technical knowledge.
Method Two Using Command Line
If you prefer a more hands-on approach, you can use the Windows command line. This method gives you more control but requires a bit more care:
- Open Command Prompt as an administrator on your Windows PC.
- Type
diskpartand press Enter. - Type
list diskto see all connected drives. - Select your USB drive by typing
select disk X(replace X with the correct number). - Type
cleanto wipe the drive. - Type
create partition primaryand press Enter. - Type
format fs=ntfs quickto format the drive. - Type
activeto mark the partition as active. - Exit diskpart by typing
exit. - Copy the macOS installer files to the USB drive manually.
This method takes a bit more patience, but it works well if you are comfortable with the command line. Many people use this approach because it does not require downloading extra software.
Quick Tips For Both Methods
- Always back up any important data before starting. The USB drive will be completely erased.
- Use a high-quality USB drive from a trusted brand. Cheap drives sometimes fail during the writing process.
- Make sure your Windows PC is plugged into power. You do not want it to shut down mid-process.
- If the tool asks you to format the drive as FAT32, note that this has a 4GB file size limit. You may need to use a different format for larger macOS files.
Best Tools For Making Bootable Macos USB On Windows
Not all tools are created equal. Some are free, some are paid, and some work better with certain versions of macOS. Here is a look at the top options for creating a bootable macOS USB on Windows.
Tool Comparison
| Tool | Price | Ease of Use | Best For |
|---|---|---|---|
| TransMac | Free trial / Paid | Very Easy | Beginners and quick jobs |
| BalenaEtcher | Free | Easy | Simple flashing tasks |
| Win32 Disk Imager | Free | Moderate | Advanced users |
| Rufus | Free | Moderate | Creating custom boot drives |
| Apple Configurator 2 | Free | Easy | Only works on Mac (not Windows) |
Which Tool Should You Pick?
If you want the simplest experience, go with TransMac. It is designed specifically for working with macOS disk images on Windows. The interface is clean and straightforward. Just point it at your ISO file, select your USB drive, and click start.
If you prefer free software, BalenaEtcher is a fantastic choice. It works with many types of disk images and is very reliable. Win32 Disk Imager is another solid free option that gives you more control over the process.
For most people making a bootable macOS USB on Windows, TransMac or BalenaEtcher will get the job done perfectly. Pick the one that feels right for you.
Common Mistakes And Expert Tips
Even with the best tools, things can go wrong. Here are the most common mistakes people make when creating a bootable macOS USB, along with expert advice to help you avoid them.
Common Mistakes To Avoid
- Using a USB drive that is too small: Modern macOS installers are large. A drive under 16GB will not work. Always check the size requirements before you start.
- Skipping the format step: Some tools will format the drive for you, but others will not. If you skip formatting, the bootable drive may not be recognized by the Mac.
- Using a corrupted installer file: Always download the macOS installer from a trusted source. A damaged file will create a broken bootable USB drive that will not work.
- Not testing the drive: After creating the bootable macOS USB, plug it into a Mac and test it before you need it in an emergency. It is much better to fix problems now than later.
- Ignoring partition scheme differences: Intel Macs and Apple Silicon Macs handle startup disks differently. Make sure your bootable drive is compatible with the Mac you plan to use it with.
Expert Insights
According to experienced Mac technicians, the most important thing is to use a reliable USB formatter and a high-quality flash drive. Cheap generic drives from unknown brands often fail during the writing process or after just a few uses.
Another expert tip is to always keep a backup of your macOS installer file. If you ever need to create another bootable macOS USB, having the installer file saved locally saves you from downloading it again. This is especially helpful if your internet connection is slow or unreliable.
For those using Apple Silicon Macs, make sure the bootable USB is created with a macOS version that supports your specific Mac model. Older macOS versions may not work with newer Apple Silicon chips.
Final Thoughts
Creating a bootable macOS USB on Windows is a skill that saves time, money, and frustration. Whether you are a student, a professional, or a tech enthusiast, knowing how to do this puts you ahead of most people. The process is straightforward, the tools are accessible, and the results are incredibly useful.
Start with the method that feels most comfortable to you. Try TransMac if you are new to this. Experiment with command line if you want more control. Whatever you choose, the key is to just get started. You will be surprised how quickly you can create a bootable macOS USB on your Windows PC.
Remember to always test your bootable drive after creating it. A quick test on a Mac will confirm everything works as expected. Keep your USB drive in a safe place, label it clearly, and you will have a reliable macOS installer ready whenever you need it.
The world of cross-platform computing is more connected than ever. Being able to create a bootable macOS USB on Windows is just one example of how these two ecosystems can work together. Embrace the flexibility, try it out today, and you will wonder why you did not do it sooner.
Frequently Asked Questions
Can I make a bootable macOS USB on any Windows computer?
Yes, you can make a bootable macOS USB on any modern Windows computer running Windows 10 or Windows 11. You just need a USB drive with at least 16GB of space and a reliable tool to write the macOS image. The process works the same regardless of your PC’s brand or specifications.
Do I need a Mac to create a bootable macOS USB?
No, you do not need a Mac to create a bootable macOS USB. While Apple provides tools like Disk Utility on macOS, you can use Windows-based tools like TransMac or BalenaEtcher to create the same bootable drive. This makes the process accessible to anyone with a Windows PC.
Which macOS versions work with this method?
This method works with most recent macOS versions including macOS Ventura, macOS Sonoma, and earlier releases like macOS Monterey and macOS Big Sur. Always check that the specific macOS version you are installing is compatible with the Mac model you are targeting.
Is it safe to use a bootable macOS USB on a Windows PC?
Yes, it is safe. A bootable macOS USB will not affect your Windows installation or files. The USB drive is designed to boot a Mac into the macOS installer environment. It does not run on Windows PCs, so there is no risk to your existing Windows system.
How long does it take to create a bootable macOS USB on Windows?
The process usually takes between 10 and 30 minutes depending on your USB drive speed, the tool you use, and your internet connection during the download phase. The actual writing process to the USB drive typically takes about 10 to 15 minutes.
Can I reuse a bootable macOS USB after installing macOS?
Yes, you can reuse a bootable macOS USB multiple times. After you use it to install macOS, the USB drive still contains the installer files. You can plug it into another Mac and use it again. Just make sure the drive is not damaged or corrupted before each use.
=== CONCLUSION ===
Making a bootable macOS USB on Windows is a practical, valuable skill that anyone can learn. It opens up new possibilities for installing macOS, repairing Mac systems, and working across different platforms with ease. The process is straightforward, the tools are free or affordable, and the results are incredibly useful.
We covered everything from the basics of what a bootable USB drive is, to detailed step-by-step instructions, tool comparisons, common mistakes, and expert tips. You now have everything you need to create your own bootable macOS USB on a Windows PC right now.
Do not wait for a Mac emergency to learn this skill. Try it today, test your drive, and build your confidence. The ability to create a bootable macOS USB on Windows puts you in control of your technology. It is a small investment of time that pays off every time you need it.