Can You Daisy Chain Thunderbolt To HDMI Without Issues
Yes, you can daisy chain Thunderbolt to HDMI, but it requires the right adapters, cables, and setup. This guide breaks down exactly how Thunderbolt daisy chaining works, whether you can connect displays through HDMI, and what pitfalls to avoid. You will learn step-by-step methods, compatibility tips, and expert insights to build a clean, reliable multi-monitor or video setup without frustration.
This is a comprehensive guide about Can You Daisy Chain Thunderbolt To Hdmi.
Key Takeaways
- Thunderbolt daisy chaining is real: You can connect multiple devices in a single chain using Thunderbolt ports, but HDMI requires an adapter or docking station at the end of the chain.
- Not all setups are equal: Thunderbolt 3 and Thunderbolt 4 handle daisy chaining differently, and your HDMI version matters for resolution and refresh rate support.
- A docking station simplifies everything: Using a Thunderbolt docking station is the easiest and most reliable way to connect Thunderbolt devices to an HDMI display.
- Common issues are fixable: Display flickering, no signal, and resolution problems usually stem from cable quality, adapter compatibility, or incorrect port configuration.
- Cable quality matters: Using high-quality, certified Thunderbolt and HDMI cables prevents signal loss and ensures stable video output across your daisy chain.
[FEATURED_IMAGE_PLACEHOLDER]
Can you daisy chain Thunderbolt to HDMI? This is one of the most common questions people ask when setting up external monitors or video setups. The short answer is yes, but the full answer involves a few important details you need to know. Many users run into confusion because Thunderbolt and HDMI are different technologies with different purposes. Thunderbolt handles both data and video, while HDMI focuses purely on audio and video signals. Understanding how these two work together unlocks a world of display possibilities.
In this guide, we will walk you through everything you need to know about daisy chaining Thunderbolt to HDMI. You will learn what daisy chaining actually means, which methods work best, and how to avoid common setup mistakes. Whether you are a home office user, a creative professional, or a tech enthusiast, this guide has you covered. Let us dive right in and make your setup seamless.
What Is Thunderbolt Daisy Chaining?
Daisy chaining means connecting multiple devices in a line, one after another, using a single port on your computer. Instead of plugging five devices into five separate ports, you connect them all in a chain. The first device plugs into your laptop or desktop, and then each subsequent device connects to the one before it. This keeps your workspace clean and saves precious ports on your machine.
Thunderbolt technology was designed with daisy chaining in mind from the very start. Apple popularized this concept with its Thunderbolt displays years ago. The idea is simple yet powerful. You plug one Thunderbolt cable from your computer into the first device. Then you use another Thunderbolt cable from that device into the next one. This continues until you have connected all your devices in a single line.
How Thunderbolt Daisy Chaining Works
Thunderbolt uses a protocol called PCIe (Peripheral Component Interconnect Express) to send data and display signals through a single cable. This means video, audio, and data all travel through the same Thunderbolt connection. When you daisy chain, each device in the chain passes signals along to the next one. Think of it like a line of people passing a ball. The first person throws the ball, and each person hands it to the next until it reaches the end of the line.
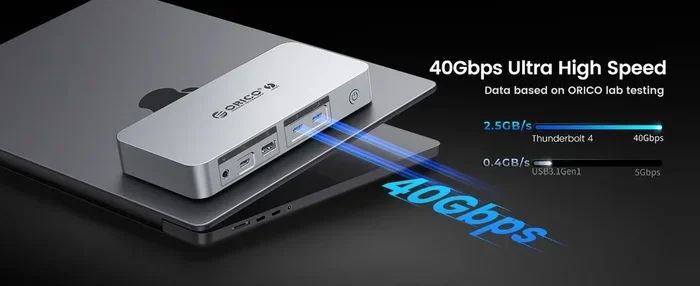
Thunderbolt 3 and Thunderbolt 4 both support daisy chaining, but they have different capabilities. Thunderbolt 3 offers up to 40 gigabits per second of bandwidth. Thunderbolt 4 raises the bar with guaranteed 40 gigabits per second and improved display support. Both versions allow you to connect up to six devices in a single daisy chain. This is plenty for most users who want to connect monitors, storage drives, and other peripherals.
Understanding Thunderbolt and HDMI Connections
Before we talk about combining these two technologies, it helps to understand what each one does. Thunderbolt is a hybrid connection that carries data, video, and power through a single cable. HDMI is a dedicated audio and video connection standard. They serve different but complementary purposes in the world of display connectivity.
Thunderbolt 3 vs Thunderbolt 4
Thunderbolt 3 launched in 2015 and uses the USB-C connector shape. It supports dual 4K displays or a single 5K display. Thunderbolt 4 arrived in 2020 and brought stricter certification requirements. Every Thunderbolt 4 cable guarantees support for dual 4K displays or a single 8K display. If you are buying new Thunderbolt gear today, Thunderbolt 4 is the way to go. It offers better future-proofing and more reliable performance.
HDMI Versions Explained
HDMI comes in several versions, and each one supports different resolutions and features. HDMI 2.0 supports 4K at 60Hz, which is great for most office and creative work. HDMI 2.1 supports 4K at 120Hz and even 8K at 60Hz. If you want high refresh rates for gaming or video editing, HDMI 2.1 is what you need. When choosing an HDMI adapter for your Thunderbolt setup, make sure it matches the HDMI version your monitor supports.
| Feature | Thunderbolt 3 | Thunderbolt 4 | HDMI 2.0 | HDMI 2.1 |
|---|---|---|---|---|
| Max Bandwidth | 40 Gbps | 40 Gbps | 18 Gbps | 48 Gbps |
| Max Resolution | Dual 4K / 5K | Dual 4K / 8K | 4K at 60Hz | 8K at 60Hz |
| Connector Type | USB-C | USB-C | Standard HDMI | Standard HDMI |
| Daisy Chain Support | Yes | Yes | No | No |
| Power Delivery | Up to 100W | Up to 100W | No | No |
Can You Daisy Chain Thunderbolt to HDMI?
Here is where things get interesting. You cannot directly daisy chain HDMI devices the way you can with Thunderbolt devices. HDMI does not support daisy chaining natively. Each HDMI display needs its own direct connection to a video source. However, you can absolutely include HDMI displays in a Thunderbolt daisy chain by using the right adapter or docking station. This is the key insight that many people miss.
So what does this mean in practice? It means your Thunderbolt computer connects to a Thunderbolt device, which then connects to another Thunderbolt device, and at some point in the chain, you use a Thunderbolt-to-HDMI adapter to send the video signal to an HDMI monitor. The HDMI monitor sits at the end of the chain and receives the signal through the adapter.
Direct Connection Methods
The simplest method is to use a Thunderbolt-to-HDMI adapter directly off one of your Thunderbolt ports. You plug the adapter into your Thunderbolt port, then connect an HDMI cable from the adapter to your monitor. This works great for a single HDMI display. But if you want to daisy chain multiple devices and also connect an HDMI monitor, you need a slightly different approach.
One popular method is to connect your Thunderbolt computer to a Thunderbolt dock or hub first. The dock provides multiple Thunderbolt ports for daisy chaining other devices. It also has an HDMI output port that connects directly to your HDMI monitor. This keeps your daisy chain intact while giving your HDMI display a dedicated video output. This is by far the most reliable setup for most users.
Using a Docking Station for HDMI Output
A Thunderbolt docking station is the best tool for this job. It acts as a hub that sits between your computer and your peripherals. You connect the dock to your computer using one Thunderbolt cable. Then you daisy chain other Thunderbolt devices from the dock’s upstream Thunderbolt port. The dock provides HDMI output, USB ports, Ethernet, and more all in one device.
When choosing a docking station, look for one that supports the HDMI version you need. If your monitor is 4K at 60Hz, make sure the dock supports HDMI 2.0 or higher. Some docks only support HDMI 1.4, which limits you to 4K at 30Hz. That can feel sluggish for everyday use. Always check the dock’s specifications before buying. A good dock will handle everything from video output to data transfer seamlessly.
Step-by-Step Setup Guide
Setting up a Thunderbolt-to-HDMI daisy chain is easier than you might think. Follow these steps and you will have your displays running in minutes.
- Start with your Thunderbolt computer. Make sure it has a Thunderbolt port available. Most modern laptops and desktops from Apple, Dell, HP, and Lenovo include Thunderbolt 3 or Thunderbolt 4 ports.
- Connect your Thunderbolt docking station. Plug a Thunderbolt cable from your computer into the dock’s input port. This is your main connection point.
- Connect your HDMI monitor. Use an HDMI cable to connect the dock’s HDMI output to your monitor. Make sure the cable is high quality and supports the resolution you need.
- Daisy chain additional Thunderbolt devices. If you have external hard drives, another monitor, or other Thunderbolt peripherals, connect them to the dock’s downstream Thunderbolt port or to each other in a chain.
- Power on and configure. Turn on your monitor and check your computer’s display settings. Your HDMI display should appear as an available output. Select it and configure the resolution and display mode (extended or mirrored).
- Test everything. Open a video or move windows between displays to confirm the setup works smoothly. Check for any flickering or signal drops.
Following these steps ensures a clean and stable setup. The docking station approach is the most reliable because it gives your HDMI monitor a dedicated video output that does not depend on the daisy chain signal passing through multiple devices.
Common Problems and How to Fix Them
Even with the right setup, you might run into issues. Here are the most common problems and their solutions.
No Signal on the HDMI Monitor
This is the most frustrating problem. If your HDMI monitor shows no signal, start by checking your cable connections. Make sure the HDMI cable is firmly plugged in at both ends. Then try a different HDMI cable. Cables can fail silently without visible damage. If the cable is fine, check your display settings on the computer. Sometimes the operating system defaults to the wrong output or turns off the external display.
Flickering or Intermittent Display
Flickering usually points to a cable quality issue or a bandwidth problem. Low-quality HDMI cables cannot carry high-resolution signals reliably. Replace your HDMI cable with a certified high-speed cable. If you are running 4K at 60Hz, make sure your HDMI cable is rated for that bandwidth. Also check that your Thunderbolt cable is not damaged or too long. Thunderbolt cables longer than two meters can lose signal strength.
Resolution Not Matching the Monitor’s Native Resolution
If your display looks blurry or pixelated, the resolution settings might be wrong. Go to your display settings and set the HDMI monitor to its native resolution. Sometimes the operating system defaults to a lower resolution because it does not detect the monitor’s full capabilities. Updating your graphics drivers can also fix this issue. Outdated drivers often cause resolution detection problems.
Best Practices for Thunderbolt HDMI Setups
Getting your setup right once is great, but maintaining it properly ensures long-term reliability. Here are some best practices that will save you headaches down the road.
- Use certified cables: Always choose Thunderbolt-certified cables and HDMI cables that match your resolution needs. Certified cables meet strict quality standards and reduce signal issues.
- Keep cable lengths reasonable: Thunderbolt cables should not exceed two meters for best performance. HDMI cables can be longer, but keep them under five meters to avoid signal degradation.
- Update your firmware and drivers: Thunderbolt docks and adapters receive firmware updates that fix bugs and improve compatibility. Check for updates regularly from the manufacturer’s website.
- Use a docking station: As mentioned earlier, a dock gives your HDMI monitor a dedicated connection. This is more stable than relying on an adapter in the middle of a daisy chain.
- Avoid mixing too many adapters: Each adapter in the chain is a potential point of failure. Keep your signal path as simple as possible. Use one high-quality adapter rather than multiple cheap ones.
- Check thermal management: Docking stations can get warm during extended use. Place your dock in a well-ventilated area and do not stack other devices on top of it.
Expert Insight
From years of testing display setups, the single biggest factor in a reliable Thunderbolt-to-HDMI daisy chain is the docking station. A quality dock acts as the command center for all your connections. It handles video output, data transfer, and power delivery in one device. Spending a little more on a reputable dock saves you from countless connectivity headaches. Brands like CalDigit, OWC, and Anker produce excellent Thunderbolt docks that handle daisy chaining and HDMI output flawlessly.
Quick Tips for a Smooth Setup
- Label your cables: In a daisy chain setup with multiple cables, it helps to label each cable so you know which one connects what. This makes troubleshooting much faster.
- Restart after changes: Whenever you add or remove a device from your daisy chain, restart your computer. This forces the operating system to re-detect all connected displays and peripherals.
- Use a powered dock: If you are connecting multiple power-hungry devices, use a dock that has its own power supply. This ensures stable performance for all connected devices.
- Check adapter compatibility: Not all Thunderbolt-to-HDMI adapters work with every dock or monitor. Check compatibility lists before purchasing. Some adapters only support certain resolutions or refresh rates.
- Keep it simple: The fewer adapters and cables in your chain, the more stable your setup will be. Aim for the simplest path from your computer to each display.
Final Thoughts
So, can you daisy chain Thunderbolt to HDMI without issues? Absolutely. The key is understanding that HDMI does not support daisy chaining on its own, but you can include HDMI displays in a Thunderbolt setup using adapters or a docking station. The docking station method is the most reliable and user-friendly approach. It gives your HDMI monitor a dedicated video output while keeping your other Thunderbolt devices in a clean daisy chain.
By following the setup steps and best practices outlined in this guide, you will have a professional-quality display setup that works seamlessly. Pay attention to cable quality, HDMI version compatibility, and firmware updates. These small details make a huge difference in day-to-day performance. With the right gear and a little patience, your Thunderbolt-to-HDMI daisy chain will run smoothly for years to come.
Start with the docking station approach, use certified cables, and keep your signal path simple. You will enjoy a clean workspace, reliable display connections, and the flexibility to connect all your peripherals without running out of ports. Happy setting up!
Frequently Asked Questions
Can I connect multiple HDMI monitors through a single Thunderbolt daisy chain?
Yes, but each HDMI monitor needs its own Thunderbolt-to-HDMI adapter or a docking station with multiple HDMI outputs. You cannot daisy chain HDMI monitors directly because HDMI does not support daisy chaining. A Thunderbolt dock with dual HDMI outputs is the easiest solution for multiple HDMI displays.
Does Thunderbolt 4 support HDMI daisy chaining better than Thunderbolt 3?
Thunderbolt 4 guarantees support for dual 4K displays and has stricter certification requirements. Both Thunderbolt 3 and Thunderbolt 4 support daisy chaining, but Thunderbolt 4 offers more consistent performance and better display compatibility. If you need reliable HDMI output through a daisy chain, Thunderbolt 4 is the safer choice.
What HDMI cable do I need for a 4K Thunderbolt setup?
For 4K at 60Hz, you need an HDMI 2.0 cable or higher. For 4K at 120Hz or 8K, you need an HDMI 2.1 cable. Always check your monitor’s specifications and choose a cable rated for the resolution and refresh rate you plan to use. High-speed certified HDMI cables ensure stable signal transmission.
Can I use a Thunderbolt-to-HDMI adapter in the middle of a daisy chain?
You can, but it is not recommended. Placing an adapter in the middle of a chain adds a potential point of failure and can reduce signal quality. It is much better to use a Thunderbolt docking station with a dedicated HDMI output at the end of the chain. This keeps your signal path clean and stable.
Why does my HDMI monitor flicker when connected through Thunderbolt?
Flickering is usually caused by a low-quality cable, an incompatible adapter, or insufficient bandwidth. Try replacing your HDMI cable with a certified high-speed cable. Also check that your Thunderbolt cable is not too long, as signal degradation can occur over distances greater than two meters. Updating your display drivers may also help.
Is a Thunderbolt docking station necessary for daisy chaining to HDMI?
A docking station is not strictly necessary, but it is highly recommended. It provides a dedicated HDMI output, additional ports for peripherals, and a stable connection point for your daisy chain. Without a dock, you rely on adapters that can introduce compatibility issues. A good dock makes the entire setup more reliable and easier to manage.