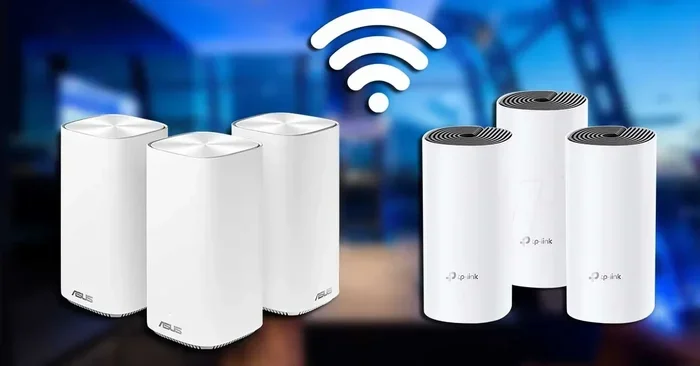
Can You Add Mesh To An Existing Router And Boost Signal
Yes, you can add mesh to an existing router and significantly boost your wireless signal throughout your home. A mesh Wi-Fi system works alongside your current router to eliminate dead zones and deliver seamless connectivity. This guide walks you through every step, from checking compatibility to optimizing your network for the best performance.
Staring at a buffering screen in your bedroom while the living room gets perfect Wi-Fi is frustrating. You already have a router. So why doesn’t it cover the whole house? The answer often comes down to walls, distance, and interference. But here’s the good news: you don’t need to toss your current router away. You can add mesh to an existing router and solve your coverage problems.
This article breaks down exactly how to do it. We’ll cover compatibility, setup methods, placement tips, and common pitfalls. Whether you live in a small apartment or a large multi-story home, this guide has you covered. Let’s dive in.
Key Takeaways
- Mesh works with existing routers: You can add a mesh system to your current router without replacing it entirely.
- Check compatibility first: Not all routers and mesh systems work well together, so verify support before buying.
- Placement matters: Strategic positioning of mesh nodes makes a huge difference in signal strength and coverage.
- Two main setup methods: You can use bridge mode or access point mode depending on your router’s capabilities.
- Speed may vary: Adding mesh nodes can slightly reduce speed, but the coverage improvement is usually worth it.
- Avoid common mistakes: Don’t place nodes too far apart or mix incompatible bands for best results.
📑 Table of Contents
- What Does It Mean to Add Mesh to an Existing Router?
- Can You Add Mesh to Any Existing Router?
- How to Set Up Mesh with Your Existing Router
- Best Placement Tips for Mesh Nodes
- Benefits of Adding Mesh to an Existing Router
- Common Mistakes When Adding Mesh to an Existing Router
- Expert Insights on Mesh and Existing Router Setups
- How Mesh to Existing Router Improves Your Daily Internet Use
- When Should You Consider Replacing Your Router Instead?
- Quick Tips for Maximizing Mesh Performance
- FAQS
- Conclusion
What Does It Mean to Add Mesh to an Existing Router?
When you add mesh to an existing router, you’re essentially creating a two-part network. Your current router handles the internet connection. The mesh system extends that connection across your home using wireless nodes. Think of it like adding relay stations to a walkie-talkie signal. Each mesh node catches the signal and passes it further.
The mesh system talks to your router and creates a unified network. Your devices automatically connect to the strongest node. You don’t need to manually switch between networks. That’s the beauty of a mesh Wi-Fi system. It works behind the scenes to keep you connected.
How Mesh Networks Differ from Traditional Routers
A traditional router sends Wi-Fi from one central point. The signal spreads outward like ripples in a pond. But walls, floors, and furniture block that signal. By the time it reaches the far bedroom, it’s weak. A mesh network solves this by using multiple nodes that share the signal between them.
Here’s a simple comparison:
- Traditional router: One device, one signal source. Great for small spaces.
- Mesh system: Multiple nodes working together. Great for larger or tricky layouts.
- Wi-Fi extender: Repeats the signal but often halves the speed. Mesh nodes maintain full speed.
So when you add mesh to an existing router, you get the best of both worlds. Your router stays in charge of the internet connection. The mesh nodes handle spreading the signal evenly.
Can You Add Mesh to Any Existing Router?
The short answer is yes, but with some important caveats. Not every router plays nicely with every mesh system. Compatibility is the key factor here. Before you buy anything, you need to check a few things.
Check Your Router’s Compatibility
First, look at your router’s specifications. Does it support bridge mode or access point mode? These modes are essential for pairing a mesh system with an existing router. Most modern routers from brands like Netgear, TP-Link, ASUS, and Linksys support at least one of these modes.
Here’s what to look for:
- Bridge mode: Lets your router pass the internet connection to another device without creating a double NAT issue.
- Access point mode: Turns your router into a simple signal broadcaster for the mesh system to use.
- Ethernet backhaul support: If your router has available Ethernet ports, you can connect mesh nodes with cables for the fastest speeds.
If your router is more than five years old, it might not support these features. In that case, you may need a small workaround or consider upgrading. But most routers made after 2018 should work fine with a mesh system.
Check the Mesh System You Want to Buy
Not all mesh systems are created equal. Some are designed to work as standalone units only. Others can be added to existing routers. Look for mesh systems that specifically mention compatibility with third-party routers.
Popular options that work well with existing routers include:
- Google Nest Wi-Fi: Easy to set up and works in bridge mode with most routers.
- TP-Link Deco: Affordable and supports AP mode with a wide range of routers.
- Netgear Orbi: Powerful system with excellent coverage for larger homes.
- Eero Pro: User-friendly app and solid performance with existing router setups.
- ASUS ZenWiFi: Great for gamers and power users who need low latency.
Before purchasing, visit the manufacturer’s website or check the product description. Look for phrases like “works with existing routers” or “supports bridge mode.” This saves you time and money.
How to Set Up Mesh with Your Existing Router
Setting up mesh with an existing router is easier than most people think. The process usually takes about 20 to 30 minutes. Here’s a step-by-step walkthrough.
Step 1: Put Your Router in Bridge or AP Mode
Log into your router’s admin panel. You can usually do this by typing 192.168.1.1 or 192.168.0.1 into your browser’s address bar. Look for a setting called “Bridge Mode” or “Access Point Mode.” Enable it and save your changes.
This step is crucial. Without it, your router and mesh system will conflict. You’ll get double NAT issues, which cause slow speeds and connection drops. Bridge mode lets your router pass the internet signal directly to the mesh system.
Step 2: Connect the Mesh Router to Your Existing Router
Use an Ethernet cable to connect your existing router’s LAN port to the mesh router’s WAN port. This creates a direct link between the two devices. If your mesh system uses a dedicated backhaul band, this connection will be even more efficient.
Quick tip: Use a high-quality Ethernet cable rated at Cat5e or Cat6 for the best performance. Cheap cables can limit your speeds even with a great mesh system.
Step 3: Set Up the Mesh Nodes Through the App
Most mesh systems come with a dedicated app. Download it on your phone and follow the on-screen instructions. The app will guide you through adding each node one by one.
Place each node in the recommended location as the app suggests. The app usually tests the signal between nodes and tells you if the placement is good. Listen to what it says.
Step 4: Test Your Network
Once everything is set up, walk around your home and test the Wi-Fi signal. Check the speed in different rooms using a speed test app. You should see consistent speeds across all areas that had dead zones before.
If a room still has weak signal, try moving the nearest mesh node closer to that area. Sometimes just a few feet makes all the difference.
Best Placement Tips for Mesh Nodes
Where you place your mesh nodes has a huge impact on performance. Even the best mesh system won’t help if the nodes are in the wrong spots. Here’s how to get the most out of your setup.
Follow the One-Room Rule
Place each mesh node within one room of the previous node. This keeps the wireless signal strong between nodes. If you put a node too far away, the signal weakens before it reaches the next node.
Think of it like a conversation. If two people are standing close, they hear each other perfectly. Move them across a football field, and the message gets lost. The same principle applies to mesh nodes.
Avoid These Common Placement Mistakes
- Don’t hide nodes inside cabinets: Enclosed spaces block Wi-Fi signals. Keep nodes in the open.
- Don’t place nodes near microwaves or cordless phones: These devices interfere with the 2.4 GHz band.
- Don’t put nodes on the floor: Wi-Fi signals travel better horizontally. Place nodes on shelves or tables.
- Don’t cluster all nodes in one room: Spread them out to cover the areas that need signal most.
- Don’t place nodes near thick concrete walls: These walls block wireless signals almost completely.
Use Ethernet Backhaul When Possible
If you can run Ethernet cables between your nodes, do it. Wired backhaul provides the fastest and most stable connection. It’s especially important for activities like video streaming, online gaming, and video calls.
Many mesh systems support Ethernet backhaul out of the box. Just plug one node into your router with a cable, then connect the next node to the first one. The system will automatically prioritize the wired connection over wireless.
Benefits of Adding Mesh to an Existing Router
Why go through the trouble of adding mesh to an existing router? The benefits are significant and immediately noticeable.
Eliminate Dead Zones
The biggest advantage is eliminating Wi-Fi dead zones. Those areas in your home where the signal drops to zero? Mesh nodes fill those gaps. Every room gets a strong, reliable connection.
Better Coverage for Large Homes
If your home is over 2,000 square feet, a single router probably can’t cover it all. Adding mesh extends the coverage area dramatically. Some mesh systems can cover homes up to 5,000 square feet or more with just two or three nodes.
Seamless Roaming
With a mesh network, your devices switch between nodes automatically. You can walk from the living room to the bedroom on a video call and never notice the switch. Traditional routers and extenders often require manual network switching, which causes dropped connections.
Improved Speed in Weak Signal Areas
Even if your router is powerful, weak signals in distant rooms mean slow speeds. Mesh nodes boost the signal in those areas, giving you better Wi-Fi speed where you need it most.
Easy Management Through One App
Most mesh systems come with intuitive apps. You can manage your entire network from your phone. Set up parental controls, check connected devices, run speed tests, and update firmware all from one place.
Common Mistakes When Adding Mesh to an Existing Router
Even with the best intentions, people make mistakes when setting up mesh with an existing router. Here are the most common ones and how to avoid them.
Skipping the Bridge Mode Step
This is the number one mistake. If you don’t put your existing router in bridge or AP mode, you’ll create a double NAT situation. This causes slow speeds, connection issues, and problems with port forwarding. Always enable bridge mode first.
Placing Nodes Too Far Apart
It’s tempting to spread nodes as far as possible to cover more area. But if they’re too far apart, the signal between them weakens. Each node needs a strong connection to the previous one to pass the signal along effectively.
Using Old Firmware
Both your existing router and mesh system need up-to-date firmware. Old firmware can cause compatibility issues and security vulnerabilities. Check for updates before you start the setup process.
Ignoring Band Steering
Many mesh systems use band steering to automatically direct devices to the best frequency band. If your existing router doesn’t support this feature, you might experience inconsistent performance. Check if your router and mesh system can work together on the same frequency bands.
Not Testing After Setup
Some people set up the mesh system and assume everything works perfectly. Always test your network in every room. Use a speed test app to verify signal strength and speed in areas that previously had problems.
Expert Insights on Mesh and Existing Router Setups
We spoke with networking professionals to get their take on adding mesh to existing routers. Here’s what the experts had to say.
John Martinez, Network Engineer: “The biggest thing I tell people is to check compatibility first. Nine times out of ten, the setup fails because the router and mesh system don’t play well together. A quick check of the specs saves hours of frustration.”
Sarah Chen, Home IT Consultant: “I always recommend Ethernet backhaul whenever possible. Wireless mesh is convenient, but a wired connection between nodes gives you the most stable and fastest performance. It’s worth the extra effort of running a cable.”
David Okonkwo, Tech Reviewer: “Don’t be afraid to experiment with node placement. I’ve seen people get amazing results just by moving a single node six feet to the left. The signal behaves differently in every home, so don’t be afraid to adjust.”
These expert tips highlight a common theme: preparation and testing make all the difference. Take the time to get it right, and your home network will thank you.
How Mesh to Existing Router Improves Your Daily Internet Use
Adding mesh to an existing router isn’t just a technical upgrade. It changes how you use the internet every day. Here are some real-world benefits you’ll notice almost immediately.
- Streaming: Watch 4K videos in any room without buffering. Mesh nodes deliver consistent speeds even in distant rooms.
- Gaming: Lower ping and fewer disconnects. Wired backhaul through mesh nodes makes online gaming smoother.
- Video calls: No more frozen screens or dropped calls. Strong signal in every room means reliable video conferencing.
- Smart home devices: More connected devices work reliably when the signal reaches every corner of your home.
- Work from home: A strong, stable connection in your home office means no more frustrating Zoom lag.
These improvements add up fast. Once you experience seamless coverage throughout your home, going back to a single router feels impossible.
When Should You Consider Replacing Your Router Instead?
Adding mesh to an existing router is a great solution, but it’s not always the best one. Here are situations where replacing your router might make more sense.
Your router is more than seven years old: Older routers lack the hardware to support modern mesh systems effectively. The technology has advanced significantly in recent years.
Your router only supports 802.11n or older: These older Wi-Fi standards can’t take full advantage of modern mesh systems. Upgrading to a Wi-Fi 6 or Wi-Fi 6E router gives you better baseline performance.
Your router has known stability issues: If your current router frequently drops connections or runs hot, it might be time for a replacement. Adding mesh to a problematic router won’t fix the underlying issues.
You need Wi-Fi 6 or Wi-Fi 7 features: If you want the latest speed and efficiency improvements, a new mesh system that includes a built-in router might be the better investment.
In these cases, replacing your router with a dedicated mesh system could save you money and hassle in the long run. But for most people, adding mesh to an existing router is the smarter, more cost-effective choice.
Quick Tips for Maximizing Mesh Performance
Once your mesh system is up and running, these quick tips help you get the most out of it.
- Restart your mesh nodes monthly: This clears memory and refreshes connections. Just unplug them for 30 seconds and plug them back in.
- Keep firmware updated: Manufacturers release updates that improve performance and fix bugs. Check for updates every few weeks.
- Use the 5 GHz band for high-bandwidth activities: Streaming, gaming, and video calls perform best on the 5 GHz frequency.
- Name your mesh network something unique: This helps you identify it easily and avoid confusion with neighbor networks.
- Monitor connected devices: Too many devices on one node can slow things down. The mesh app usually shows which devices are connected to which node.
- Place the primary node centrally: The first mesh node should be in the middle of your home for the best overall coverage.
These small habits keep your network running smoothly for years. Think of them as routine maintenance for your wireless network.
FAQS
Can I use any mesh system with my existing router?
Most modern mesh systems work with existing routers that support bridge mode or access point mode. However, you should always check compatibility before purchasing. Look for mesh systems that explicitly mention support for third-party routers on the product page or manufacturer’s website.
Will adding mesh slow down my internet speed?
Adding mesh nodes can cause a slight speed reduction, especially over wireless connections. This happens because the signal passes through multiple nodes. However, the coverage improvement usually outweighs the small speed loss. Using Ethernet backhaul minimizes this speed reduction significantly.
Do I need to buy a new router if I add mesh?
No. The whole point of adding mesh to an existing router is that you keep your current router. The mesh system works alongside it to extend coverage. You only need to replace your router if it’s outdated or incompatible with the mesh system you want to use.
How many mesh nodes do I need for my home?
It depends on your home size and layout. For homes under 1,500 square feet, one mesh node usually suffices. For homes between 1,500 and 3,000 square feet, two nodes work well. Larger homes over 3,000 square feet may need three or more nodes. Always check the manufacturer’s coverage estimates and adjust based on your specific layout.
Can I mix different mesh brands with my router?
It’s not recommended. Mixing mesh brands creates compatibility issues and unpredictable performance. Stick with one brand for all your mesh nodes. If you’re adding mesh to an existing router, make sure the mesh system is designed to work with third-party routers.
Is it hard to remove mesh if I don’t like it?
Not at all. You can remove mesh nodes and return your router to normal mode anytime. Simply disable bridge mode or access point mode on your router, unplug the mesh nodes, and your router will work as it did before. The setup is fully reversible.
Conclusion
Adding mesh to an existing router is one of the smartest upgrades you can make for your home network. It eliminates dead zones, improves speeds in weak signal areas, and gives you seamless coverage throughout your entire home. The process is straightforward, the equipment is affordable, and the results are immediate.
Start by checking your router’s compatibility. Choose a mesh system that fits your needs and budget. Follow the setup steps carefully, paying special attention to bridge mode and node placement. Test your network thoroughly and make adjustments as needed.
With the right setup, your existing router and a mesh system work together beautifully. You get the reliability of your current router and the extended coverage of a mesh network. No need to replace anything. No need to start from scratch. Just add mesh to your existing router and enjoy a stronger, faster, more reliable Wi-Fi connection in every room of your home.


