Can I Use A Projector On My Wall Everything You Need To Know
Yes, you can absolutely use a projector on your wall. It is one of the easiest and most affordable ways to build a home theater setup. You do not need a fancy screen to enjoy big, vibrant images. This guide covers everything from wall color and texture to projector placement and image quality. By the end, you will know exactly how to get the best picture on your wall.
Have you ever thought about turning your plain wall into a giant movie screen? Using a projector on your wall is one of the simplest and most fun upgrades you can make to any room. Whether you want to watch movies, play video games, or give presentations, a wall projection setup delivers a big-screen experience without the hassle of buying a separate screen.
The good news is that you do not need a lot of fancy equipment or a professional setup. Most people can get started with just a projector and a clean white wall. But there are a few things you should know to get the best results. In this article, we will walk you through everything you need to think about when using a projector on your wall.
Key Takeaways
- A plain white wall works great for projection: You do not need a special screen to get a good picture.
- Wall color matters a lot: White or light gray walls give the best image quality and color accuracy.
- Throw distance affects image size: The further your projector sits, the bigger the image will be on the wall.
- Ambient light can reduce brightness: Using curtains or blinds helps improve your viewing experience.
- Wall texture impacts sharpness: Smooth walls produce clearer images than rough or textured surfaces.
- Short throw projectors are ideal for small rooms: They let you project a large image even in tight spaces.
- Keystone correction fixes image distortion: This feature helps you align the picture when the projector is not perfectly centered.
📑 Table of Contents
- Can I Use A Projector On My Wall? The Short Answer
- Choosing the Right Wall for Your Projector
- How to Set Up Your Projector on the Wall
- Projector Brightness and Ambient Light
- Common Mistakes to Avoid When Projecting on a Wall
- Quick Tips for the Best Wall Projection Experience
- Projector Resolution and Image Quality on Walls
- Can You Use Any Wall for a Projector?
- Do You Need a Projector Screen at All?
- Final Thoughts on Using a Projector on Your Wall
Can I Use A Projector On My Wall? The Short Answer
The short answer is yes. You can use a projector on almost any wall in your home. A wall projection setup is the most budget-friendly way to enjoy a large display. Many people skip buying a projector screen entirely and just aim their home theater projector right at the wall.
But just because you can does not mean every wall will give you great results. The color, texture, and even the lighting in your room all play a big role. Let us break down what makes a wall good for projection and what you should avoid.
Why People Choose Wall Projection Over Screens
There are several reasons why wall projection is so popular. First, it saves money. A decent projector screen can cost anywhere from 50 to 200 dollars or more. A wall costs nothing extra. Second, it saves space. You do not have to mount or stand up a bulky screen in your living room or bedroom.
Third, a wall gives you flexibility. You can project on any surface that is large enough. This means your bedroom wall, your garage, or even a basement wall can become an instant movie screen. The convenience factor is hard to beat.
Choosing the Right Wall for Your Projector
Not all walls are created equal when it comes to projector wall setup. The surface you choose will directly affect your image quality. Here is what to look for.
Wall Color for Projector
The best wall color for projector use is white or very light gray. A white wall reflects light back to your eyes, which makes the image bright and easy to see. Dark-colored walls like black or deep navy absorb light and make the image look dull and washed out.
If your wall is a bold color, you still have options. Some people use a projector screen paint to create a dedicated projection area. These special paints enhance light reflection and improve color accuracy. But for a quick and easy setup, plain white is your best friend.
Wall Texture and Surface
Smooth walls give the sharpest image. When the surface is flat and even, light passes through without bouncing in random directions. This keeps the picture crisp and clear.
Rough or textured walls, on the other hand, scatter light. This can make your image look fuzzy or blurry. If your wall has a lot of texture, consider painting a smooth section or using a flat white paint to create a better surface. A smooth wall projection surface makes a huge difference in image quality on wall.
Wall Size and Space
You need enough wall space to fit the image size you want. A small wall will limit how big your picture can be. Measure the wall before you buy a projector. Think about how far away the projector will sit and what size image you want to create.
As a general rule, a wall that is at least 8 feet wide works well for most setups. If you want an even bigger picture, you will need more wall space or a projector with a shorter throw distance.
How to Set Up Your Projector on the Wall
Setting up a projector on your wall is easier than most people think. You do not need any special tools or technical skills. Here is a simple step-by-step process.
Step 1: Choose Your Projector Placement
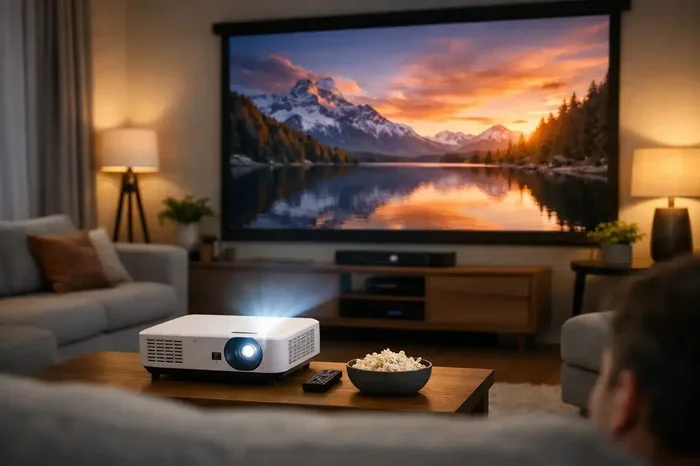
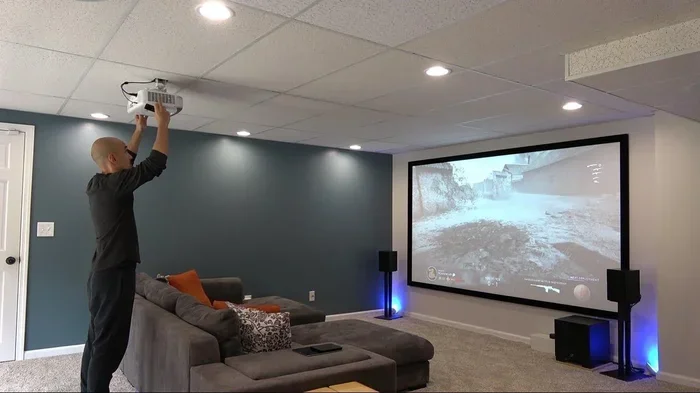
Decide where your projector will sit. The most common setup is to place the projector on a table or shelf in front of the wall. This is called a front projection setup. The projector throws light toward the wall and the image appears on the surface.
Make sure the projector is level and stable. Even a slight tilt can distort the image. Use a sturdy surface that will not vibrate or shake during use.
Step 2: Calculate the Throw Distance
Throw distance is the space between your projector and the wall. This distance determines how large your image will be. Check your projector manual or specs to find the recommended throw distance for your desired image size.
If you have a small room, look into a short throw projector. These models can produce a large image even when placed close to the wall. They are perfect for apartments, bedrooms, or any space where you cannot put the projector far from the wall.
Step 3: Adjust the Image
Most modern projectors come with keystone correction. This feature lets you adjust the image shape if the projector is not perfectly aligned with the wall. You can make the picture rectangular even if the projector is slightly off-center or tilted.
However, keystone correction can sometimes reduce image sharpness. For the best quality, try to position the projector as straight and centered as possible. Use a projector mount if you want a fixed, stable setup that stays in place.
Step 4: Connect Your Devices
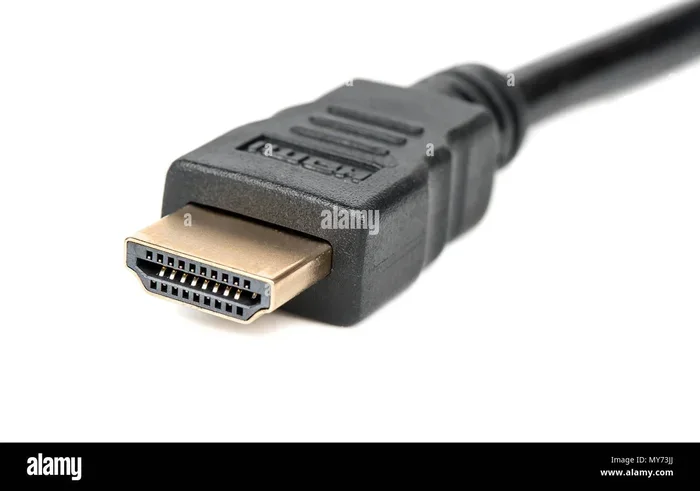
Once the projector is positioned, connect your source device. This could be a laptop, streaming stick, gaming console, or Blu-ray player. Most projectors have HDMI ports that work with almost any device.
Make sure all cables are tucked away and not in the way of the projected image. A clean setup not only looks better but also prevents you from tripping over cords during movie night.
Projector Brightness and Ambient Light
One of the biggest factors that affects your wall projection experience is ambient light. Brightness is measured in lumens, and the more lumens your projector has, the better it performs in well-lit rooms.
How Many Lumens Do You Need?
For a dark room, a projector with 1,500 to 2,000 lumens is usually enough. If you plan to use your projector in a room with windows or overhead lights, aim for 3,000 lumens or more. Higher brightness helps your image stand out even when there is competing light in the room.
Keep in mind that wall projection does not have the added benefit of a screen surface that boosts brightness. This means the wall itself absorbs some light. Choosing a brighter projector helps compensate for this.
Managing Room Lighting
You can improve your viewing experience by controlling the light in your room. Heavy curtains or blackout blinds are a great investment. They block outside light and create a darker environment that makes your projected image pop.
You can also turn off overhead lights or use dimmable lamps. Even small changes to the lighting can make a big difference in how clear and vibrant your wall projection looks. The goal is to reduce competing light sources so your image stays sharp and easy to see.
Common Mistakes to Avoid When Projecting on a Wall
Even though projecting on a wall is simple, there are a few common mistakes that can ruin your experience. Here is what to watch out for.
Using a Dark or Colored Wall
This is the number one mistake people make. A dark wall kills the brightness and color of your image. Always choose a white or light-colored wall for the best results. If your only option is a darker wall, consider using a projector screen paint or a portable screen instead.
Ignoring Wall Imperfections
Cracks, bumps, and uneven surfaces on your wall can distort the image. Your projector will try to display a flat picture on an uneven surface, and the result can look wavy or distorted. Fill in any holes or cracks with spackle and sand smooth before your first session.
Placing the Projector Too Close or Too Far
Getting the throw distance wrong leads to a too-small or too-large image. Measure your wall space first and then match it with a projector that fits your room size. Do not guess. Check the projector specs and plan your setup before you start mounting or placing the device.
Forgetting About Ventilation
Projectors generate heat, especially during long viewing sessions. Do not place your projector in a closed cabinet or against a wall with no airflow. Good ventilation keeps your projector cool and extends its lifespan. Give it plenty of space around the vents.
Quick Tips for the Best Wall Projection Experience
Want to get the most out of your wall projection setup? Here are some quick tips that make a big difference.
- Use matte white paint: It reflects light evenly and boosts image clarity.
- Clean your wall before projecting: Dust and dirt can show up on the big screen.
- Test different positions: Move the projector around until the image looks its best.
- Use a high-resolution source: The sharper your input, the sharper your projected image.
- Turn off the projector when not in use: This saves bulb life and energy.
- Consider a portable projector screen: Even a simple pull-down screen can improve your setup.
- Experiment with angle adjustments: Small tweaks can dramatically improve image shape and sharpness.
Projector Resolution and Image Quality on Walls
The resolution of your projector plays a big role in how good your wall image looks. Most modern projectors offer at least 1080p resolution, which is full HD. This is more than enough for a great movie or gaming experience on a wall.
If you want even sharper images, look for 4K projectors. These models deliver ultra-high definition and show every detail with incredible clarity. However, 4K projectors tend to cost more. For most wall projection setups, 1080p is the sweet spot between quality and price.
Keep in mind that your wall surface also affects perceived sharpness. A smooth white wall will always look better than a rough or textured one. Combine a good projector with a clean wall, and you will be impressed with the results.
Can You Use Any Wall for a Projector?
Technically, yes. You can use almost any wall for a projector. But the results will vary depending on the wall color, texture, and the lighting in your room. A smooth white wall in a dim room will give you the best experience. A rough dark wall in a bright room will give you a poor experience.
If your ideal wall is not available, do not worry. You can always make improvements. Paint the wall white, smooth out any texture, or hang a simple white sheet as a temporary screen. These small changes can transform a mediocre setup into something truly impressive.
Do You Need a Projector Screen at All?
For most people, the answer is no. A wall works just fine for everyday use. A projector screen does offer some benefits, like a slightly brighter and more uniform image. But for casual movie watching, gaming, or presentations, a well-prepared wall is all you need.
You might want to invest in a screen if you are a serious home theater enthusiast or if your wall is not suitable for projection. But for the average person, a wall projection setup is more than enough. It is simple, affordable, and gets the job done.
Final Thoughts on Using a Projector on Your Wall
Using a projector on your wall is one of the easiest and most rewarding home entertainment upgrades you can make. It does not require a big budget, a lot of space, or any technical expertise. With the right wall color, a suitable projector, and a bit of planning, you can enjoy a big-screen experience right in your own home.
The key is to pay attention to the details. Choose a white or light-colored wall. Keep the surface smooth and clean. Manage the light in your room. And position your projector at the right distance. Follow these simple steps and your wall projection setup will look fantastic.
So go ahead and try it. Set up your projector on your wall tonight and see the difference for yourself. You might just discover that your wall was the best screen you never knew you had.
Frequently Asked Questions
Can I use a projector on any wall color?
White or light gray walls work best for projection. Dark colors absorb light and make the image look dim. If your wall is a bold color, consider using projector screen paint in a designated area for the best results.
Do I need a special projector to use it on a wall?
No, you do not need a special projector. Any standard home theater projector can work on a wall. However, choosing the right brightness and throw distance for your room size will make a big difference in image quality.
Will a textured wall ruin my projector image?
A textured wall can make the image look fuzzy or uneven. Smooth walls produce the sharpest picture. If your wall has texture, you can paint a smooth section or use a flat white finish to improve the projection surface.
What is the best throw distance for wall projection?
Throw distance depends on your projector model and the image size you want. Check your projector specifications for the recommended distance. Short throw projectors work well in small rooms where you cannot place the device far from the wall.
Can I use a projector on a wall during the day?
Yes, but ambient light will reduce image quality. Use a projector with at least 3,000 lumens and block outside light with curtains or blinds for the best daytime viewing experience.
Is keystone correction bad for image quality?
Keystone correction can slightly reduce sharpness because it digitally adjusts the image. For the best quality, try to position your projector straight and centered on the wall. Use keystone correction only when you need a quick fix for alignment.
=== CONCLUSION ===
Can I use a projector on my wall? Absolutely. A wall projection setup is simple, affordable, and delivers a fantastic big-screen experience. You do not need a fancy screen or a professional installation. Just pick the right wall, position your projector correctly, and manage your room lighting. With these basics in place, you are ready to enjoy movies, games, and presentations on a giant display right at home.
Take the time to prepare your wall surface, choose a projector that fits your space, and follow the tips in this guide. Your wall can become the best screen in your house. Start your projector on wall setup today and enjoy the show.