Can You Use A Projector With A Laptop For Presentations
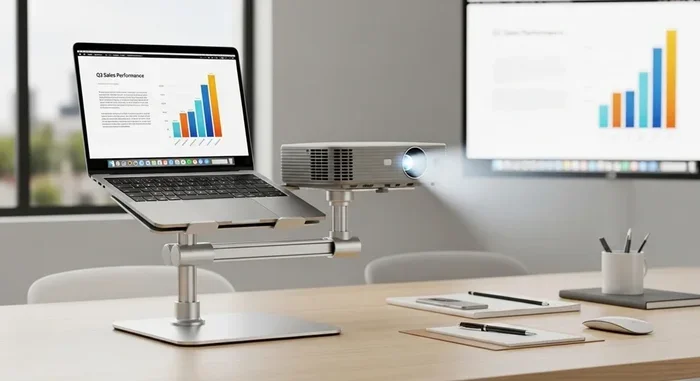
Yes, you can absolutely use a projector with a laptop for presentations. Whether you are connecting via HDMI, VGA, or wireless streaming, setting up your projector with a laptop is easier than most people think. This guide walks you through every step, from choosing the right cables to troubleshooting common issues, so your next presentation looks professional and runs smoothly.
Have you ever walked into a meeting room, opened your laptop, and realized you have no idea how to get your screen onto the projector? You are not alone. Millions of professionals face this exact moment every single day. The good news is that connecting a projector with a laptop is simpler than it looks, and once you know the basics, you will never struggle again.
In this guide, we break down everything you need to know about using a projector with your laptop for presentations. From choosing the right cable to adjusting display settings, we cover it all. By the end, you will feel confident walking into any room and sharing your screen with a room full of people.
Key Takeaways
- Multiple Connection Options: You can connect a projector to a laptop using HDMI, VGA, USB-C, or wireless methods depending on your devices.
- Display Settings Matter: Adjusting your laptop display settings ensures the projector shows the right content in the correct resolution and layout.
- Wireless Streaming Is Possible: Many modern setups let you cast or mirror your laptop screen to a projector without any cables at all.
- Audio Setup Is Often Overlooked: Properly routing audio to your projector or external speakers makes a big difference in presentation quality.
- Compatibility Varies: Not every projector works with every laptop, so checking ports and resolution support beforehand saves time and frustration.
📑 Table of Contents
- Why Use a Projector With a Laptop for Presentations?
- How to Connect a Laptop to a Projector
- Setting Up Your Display: Laptop and Projector Settings
- Audio Setup: Getting Sound Through the Projector
- Common Compatibility Issues and How to Fix Them
- Best Practices for a Smooth Presentation
- Quick Tips for Common Scenarios
- Conclusion
Why Use a Projector With a Laptop for Presentations?
Presentations have come a long way from printed slides and overhead projectors. Today, a laptop and projector setup gives you incredible flexibility. You can pull up live data, switch between apps instantly, and even stream content directly from the web.
Here is why this combination works so well:
- Portability: Most laptops are lightweight and easy to carry. You do not need a dedicated computer to run a presentation.
- Flexibility: You can edit slides, check emails, or browse the web right up until the moment you present.
- Cost Savings: Many businesses already own laptops. Adding a projector to the mix is often cheaper than buying a dedicated presentation computer.
- Familiarity: You already know how to use your laptop. There is no learning curve with a new device.
Whether you are pitching a client, training a team, or giving a classroom lecture, a projector and laptop combo delivers a professional experience that audiences appreciate.
How to Connect a Laptop to a Projector
The connection method you choose depends on the ports available on both your laptop and your projector. Let us walk through each option step by step.
Option 1: HDMI Connection (The Easiest Method)
HDMI is the gold standard for connecting a laptop to a projector. It carries both video and audio through a single cable, which makes setup incredibly simple.
Here is what to do:
- Check that both your laptop and projector have HDMI ports.
- Plug one end of the HDMI cable into your laptop.
- Plug the other end into the projector.
- Turn on the projector and select the correct input source.
- Adjust your laptop display settings to mirror or extend the screen.
Most modern laptops and projectors support HDMI, so this is the method you will likely use most often. If your laptop has a USB-C port instead, you can use a USB-C to HDMI adapter to make it work.
Option 2: VGA Connection (For Older Equipment)
VGA cables have been around for decades. They carry video signals only, so you will need a separate audio cable if your projector does not have built-in speakers.
To use VGA:
- Connect the VGA cable from your laptop to the projector.
- Use a 3.5mm audio cable to connect your laptop headphone jack to the projector or external speakers.
- Go into your laptop display settings and select the external display option.
VGA connections are older and lower quality than HDMI, but they still work fine for basic presentations. If you are dealing with legacy equipment, this is your best bet.
Option 3: Wireless Connection (No Cables Needed)
Wireless projection is a game changer. Many modern projectors support Wi-Fi or Bluetooth connectivity, which lets you cast your laptop screen without running cables across the room.
Some popular wireless options include:
- Built-in Wi-Fi projectors: These projectors connect directly to your laptop over your office or home network.
- Streaming devices: Devices like Chromecast or Roku can plug into your projector and receive a wireless signal from your laptop.
- Screen mirroring software: Apps like AirParrot or Epson iProjection let you mirror your screen wirelessly.
For example, if you want to stream content from your laptop to a projector wirelessly, you might explore options like projecting Netflix from your laptop to a projector using built-in casting features or third-party apps.
Wireless setups are perfect for conference rooms and classrooms where cable management is a hassle. Just make sure your Wi-Fi connection is stable for the best experience.
Setting Up Your Display: Laptop and Projector Settings
Connecting the cables is only half the battle. You also need to configure your laptop display settings so the projector shows the right content. This step trips up a lot of people, so pay close attention.
Windows Display Settings
On a Windows laptop, press the Windows key plus P to open the projection menu. You will see several options:
- PC Screen Only: The projector stays blank. Your laptop screen is the only display.
- Duplicate: The projector shows the exact same image as your laptop screen. This is the most common setting for presentations.
- Extend: Your laptop screen becomes a second monitor. You can drag windows between screens. Great for reading notes while presenting slides.
- Second Screen Only: The laptop screen goes dark and the projector becomes the only display.
For most presentations, Duplicate mode works best. It keeps things simple and ensures your audience sees exactly what you see on your screen.
Mac Display Settings
On a Mac, go to System Settings and look for Displays. Click on the Arrangement tab to see both screens. You can drag the display rectangles to match the physical layout of the room. Make sure the Mirror Displays checkbox is selected if you want the same image on both screens.
Adjusting Resolution and Aspect Ratio
Your projector has a native resolution that looks best. Common resolutions include 1024×768 (XGA) and 1920×1080 (Full HD). To get a crisp image:
- Match your laptop resolution to the projector native resolution.
- Set the aspect ratio to 16:9 for widescreen content or 4:3 for older projectors.
- Adjust brightness and contrast on the projector itself for the room conditions.
Getting these settings right makes a huge difference in how professional your presentation looks.
Audio Setup: Getting Sound Through the Projector
One thing many people forget about is audio. If your projector has built-in speakers, great. But many projectors have weak or no speakers at all. Here is how to handle audio properly.
If you need to connect external speakers, you can plug speakers into your laptop directly using a 3.5mm audio jack or Bluetooth. This way, the audio comes through your speakers instead of relying solely on the projector.
For a wired setup, simply run a 3.5mm cable from your laptop headphone jack to the projector audio input or an external speaker system. For wireless setups, Bluetooth speakers pair easily with most modern laptops.
Quick tip: Always test your audio before the presentation starts. Walk to the back of the room and make sure the sound is loud and clear. Nothing kills a presentation faster than people straining to hear your voice or your media audio.
Common Compatibility Issues and How to Fix Them
Not every projector works perfectly with every laptop. Here are the most common compatibility issues you might run into and how to solve them.
No Signal on the Projector
This is the most common problem. If the projector shows no signal, try these steps:
- Check that both ends of the cable are securely plugged in.
- Make sure the projector is set to the correct input source.
- Press the display toggle key on your laptop (usually Fn plus F4, F5, or F7 depending on the brand).
- Restart both devices and try again.
Resolution Problems
If the image looks blurry or cut off, your resolution settings are likely off. Go into your display settings and adjust the resolution to match the projector native resolution. Sometimes clicking Detect in the display settings helps the laptop recognize the projector properly.
Projector Not Recognizing a Wireless Connection
For wireless setups, make sure both devices are on the same network. If your projector supports screen mirroring apps, download the corresponding app on your laptop and follow the setup instructions. If you are using a streaming device like a Chromecast or Roku, ensure it is properly connected to the same Wi-Fi network as your laptop.
Some projectors may have specific compatibility requirements. For instance, checking whether a particular projector works with a window setup or specific laptop models can save you from unexpected issues. You can find more details on projector compatibility by exploring guides like Can I Use Any Projector For Window to understand device-specific limitations better.
Laptop Does Not Have the Right Port
Older laptops sometimes only have VGA or even PS/2 ports. Newer laptops may only have USB-C or Thunderbolt. In these cases, adapters are your best friend. USB-C to HDMI adapters, VGA to HDMI converters, and docking stations can bridge the gap between older projectors and modern laptops.
Best Practices for a Smooth Presentation
Now that you know how to set everything up, here are some best practices that will make your presentations run like clockwork.
Test Everything Before the Big Day
Never set up your projector and laptop for the first time right before a presentation. Test the connection, audio, and display settings at least a day in advance. This gives you time to troubleshoot any issues without the pressure of an audience waiting.
Bring Backup Cables and Adapters
Cables fail. Adapters get lost. Always carry a spare HDMI cable, a VGA cable, and a few adapters in your presentation bag. You never know what kind of equipment the venue will have.
Close Unnecessary Applications
Running too many applications can slow down your laptop and cause lag during the presentation. Close everything you do not need. This also prevents notifications from popping up on the big screen.
Use a Presentation Remote
A wireless presentation remote lets you advance slides without standing next to your laptop. Some remotes also include a laser pointer feature, which is great for highlighting key points on the screen.
Manage Your Battery
Presentations can drain your laptop battery quickly, especially when driving an external display. Plug your laptop into a power outlet before starting. If an outlet is not available, lower your screen brightness and close background apps to conserve power.
Consider the Room Layout
Think about where the projector will be placed. If the projector is at the front of the room, make sure there is enough throw distance to fill the screen properly. If you are using a short-throw projector, it can sit closer to the wall or screen, which is great for smaller rooms.
Quick Tips for Common Scenarios
- Presenting in a conference room: Use HDMI for the cleanest setup. Test the wireless option as a backup in case the HDMI cable is too short.
- Teaching in a classroom: Extend your display so you can see presenter notes on your laptop while students see the slides on the projector.
- Outdoor presentations: Choose a projector with high brightness (at least 3000 lumens) and use a portable projector screen for the best visibility.
- Small team meetings: A wireless setup works great here. No cables means no tripping hazards and faster setup.
If you are looking for ways to enhance your setup further, you might also want to explore pairing your phone to a projector as an alternative or backup method for sharing content wirelessly during meetings.
Conclusion
Using a projector with a laptop for presentations is one of the most practical and effective ways to share information with a group. Whether you prefer a wired HDMI connection for reliability or a wireless setup for convenience, the process is straightforward once you know the steps. Adjust your display settings, test your audio, and always have a backup plan. With the right setup and a little preparation, your presentations will look polished and professional every single time.
Remember, the technology is only as good as the person using it. Take the time to practice your setup before important meetings. Once you get comfortable, you will wonder how you ever presented without a projector and laptop combo. Happy presenting!
Frequently Asked Questions
Can I connect any projector to any laptop?
Most projectors and laptops can work together as long as they share a common connection type, such as HDMI or VGA. If the ports do not match, you can use adapters to bridge the gap. Always check the specifications of both devices before purchasing cables or adapters.
Do I need special software to use a projector with a laptop?
In most cases, no special software is needed. Windows and Mac operating systems have built-in display settings that detect external projectors automatically. Wireless setups may require a companion app provided by the projector manufacturer or a third-party casting tool.
Can I use a projector with a laptop for gaming or video playback?
Yes, you can use a projector with a laptop for gaming and video playback. Make sure your projector supports the resolution and refresh rate you need. For smooth video playback, an HDMI connection is recommended. If you want to stream content wirelessly, you can explore casting options like projecting Netflix from your laptop to a projector using built-in casting features.
Why is my projector showing a blank screen when connected to my laptop?
A blank screen usually means the display settings are not configured correctly. Press the Windows key plus P to select the right projection mode. Also check that the projector is on and set to the correct input source. Try unplugging and replugging the cable, or restart both devices to refresh the connection.
Can I use a projector with a laptop wirelessly without Wi-Fi?
Some projectors support Bluetooth or proprietary wireless protocols that do not require a Wi-Fi network. Check your projector manual for wireless connectivity options. If your projector does not support direct wireless connections, you can use a wireless HDMI transmitter or a USB dongle that plugs into the projector.
What is the best cable for connecting a laptop to a projector?
HDMI is the best all-around cable for connecting a laptop to a projector. It carries high-quality video and audio through a single cable. If your devices do not have HDMI ports, USB-C to HDMI adapters or VGA cables are reliable alternatives for older equipment.